文、意如
任務ㄧ:認識基本模板寫法-使用大括弧 {{ }}
	1-1:插入值(變數)title與屬性值
	1-2:放在 {{ }} 大括弧中,可以做計算

任務二:屬性綁定-使用中括弧 [  ]
	2-1.以插入圖片<image>為例,將屬性 [src] 綁定到元件上的myimg值
	2-2.以插入css為例,將屬性 [class] 綁定到元件上的my_class值

任務三:事件綁定-使用小括弧( )
	3-1.以按鈕事件為例,點擊後呼叫方法

任務四:表單雙向綁定-使用 [(ngModel)]
任務ㄧ:認識基本模板寫法
基本寫法主要使用 {{……}} , 將值用大括弧包起來,可以將 …… 改成你要放入的變數或屬性值。
1-1:插入值(變數)title與屬性值
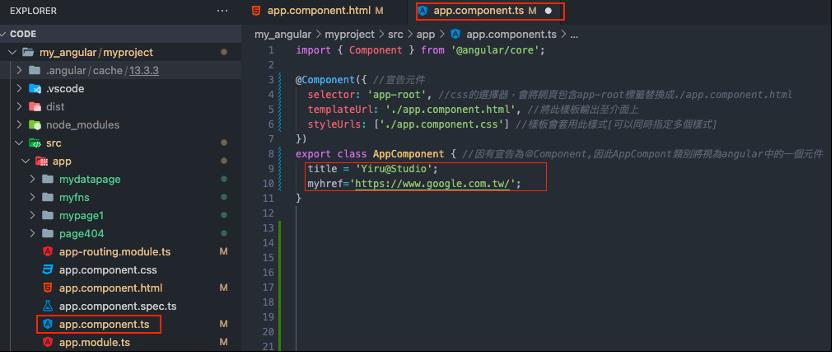
設定變數,路徑:src/app/app.component.ts
程式碼:
使用變數,路徑:src/app/app.component.html
程式碼:
<h3>
  {{title}}<br>
  <a href="{{myhref}}">Google Search</a>
</h3>
<router-outlet></router-outlet>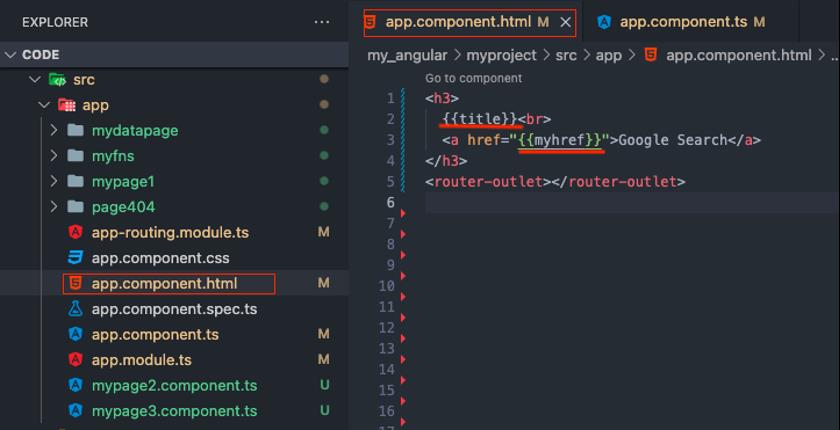
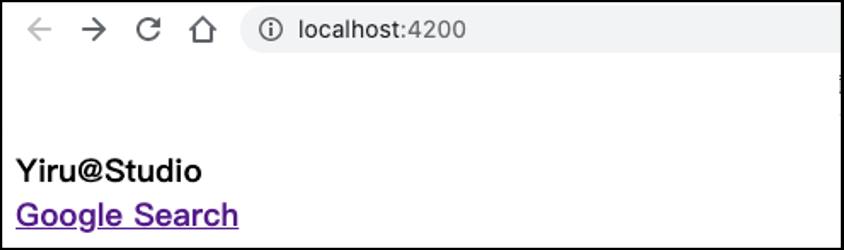
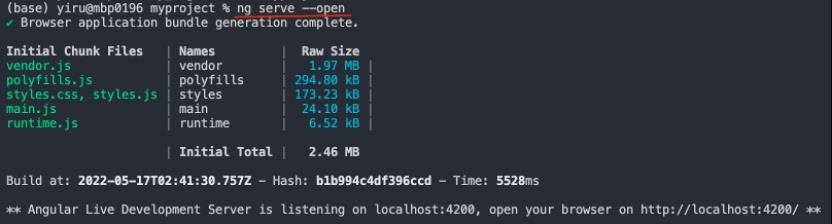
執行指令:ng serve --open

執行結果:
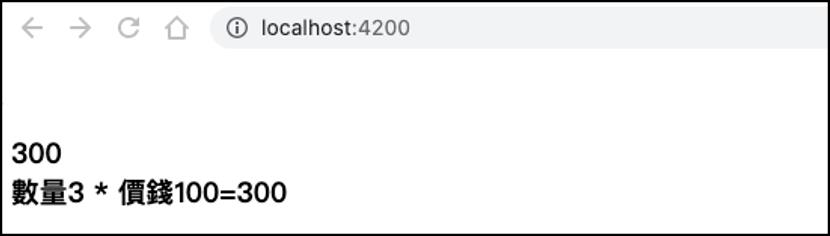
1-2:放在 {{ }} 大括弧中,可以做計算
路徑:src/app/app.component.html
程式碼:
<h3>
  <div>{{3*100}}</div>
  <div>數量3 * 價錢100={{3*100}}</div>
</h3>
<router-outlet></router-outlet>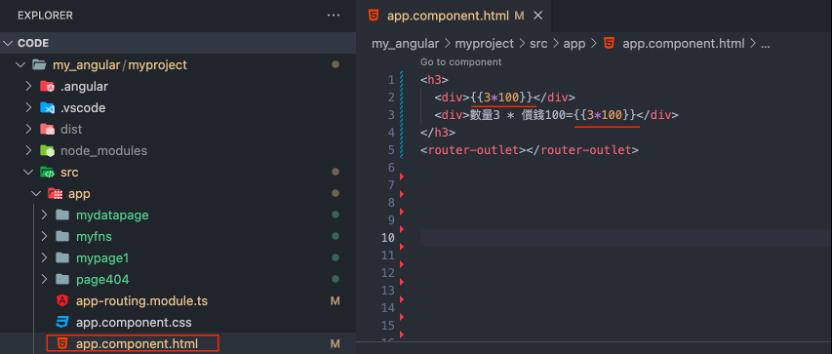
執行指令:ng serve --open
執行結果:
任務二:屬性綁定
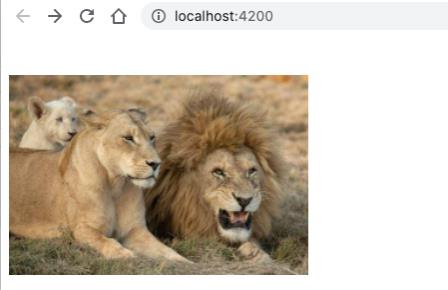
2-1.以插入圖片<image>為例,將屬性 [src] 綁定到元件上的myimg值
準備一張圖片放置src/assets中的images
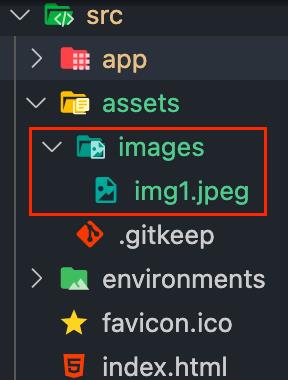
2.到元件中設定myimg的值,路徑:src/app/app.component.ts
myimg='assets/images/img1.jpeg'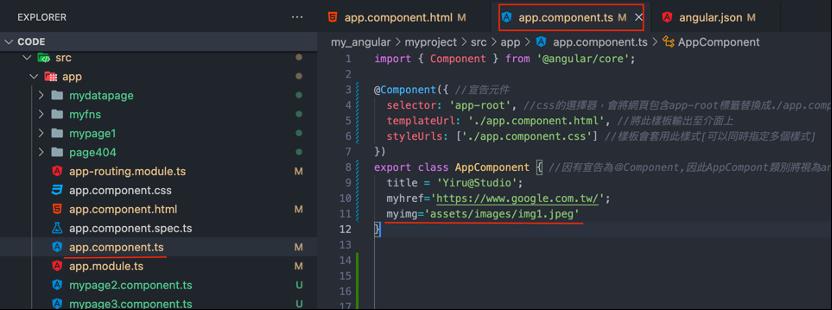
3.插入圖片<image>,將屬性[src]綁定到元件上的myimg值。
路徑:src/app/app.component.html
<img [src]="myimg" width="300" height="200">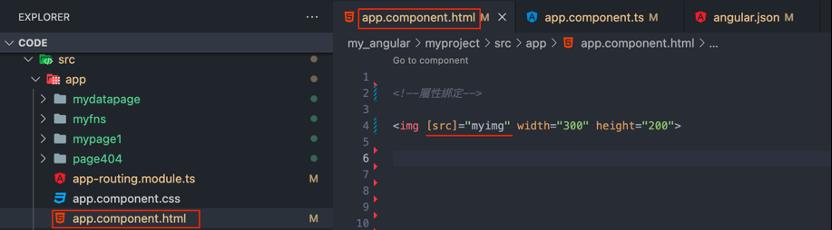
執行指令:ng serve --open

執行結果:
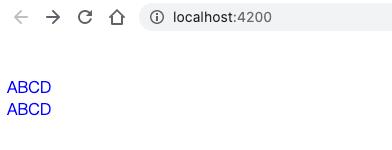
2-2.以插入css為例,將屬性 [class] 綁定到元件上的my_class值
1.先設定css,路徑:src/app/app.component.css
.myfont{
  color:blue; /*文字顏色:藍色*/
}

2. 到元件中設定my_class的值,路徑:src/app/app.component.ts
my_class='myfont';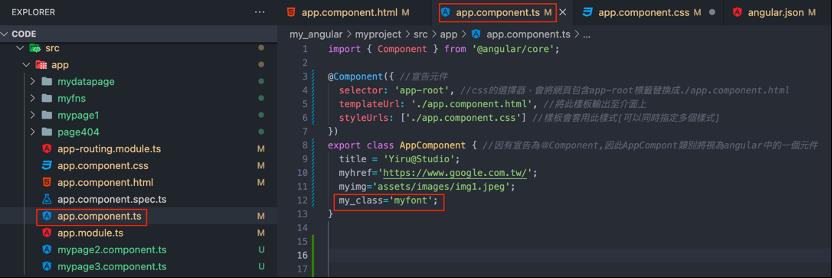
3. 可使用 [class] 或 [ngClass] 將屬性綁定到元件上的my_class值
路徑:src/app/app.component.html
<div [ngClass]="my_class">ABCD</div>
<div [class]="my_class">ABCD</div>
執行指令:ng serve --open

執行結果:
任務三:事件綁定-使用小括弧( )
3-1.以按鈕事件為例,點擊後呼叫方法
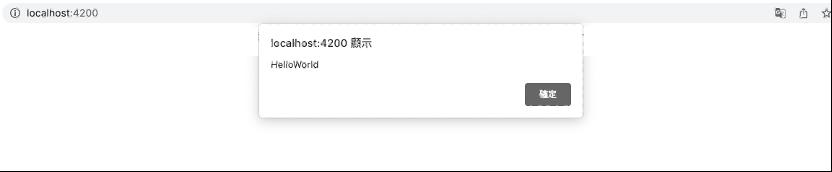
1.設定方法(function),路徑:src/app/app.component.ts
 myfunction(){
    alert("HelloWorld")
 }
2.事件綁定:點擊按鈕呼叫方法
使用(class)將事件綁定到元件上的myfunction()方法中
路徑:src/app/app.component.html
<button (click)="myfunction()">確認</button>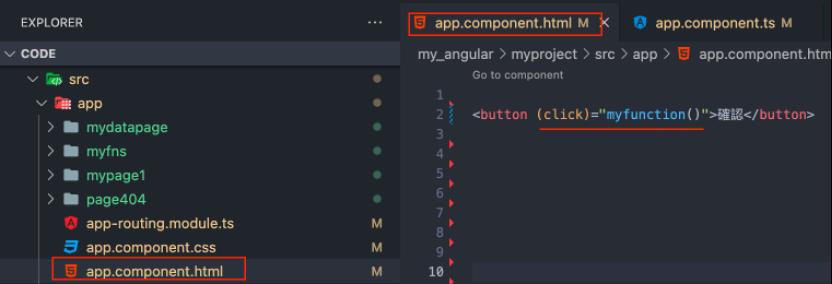
執行指令:ng serve --open

執行結果:
任務四:表單雙向綁定-使用 [(ngModel)]
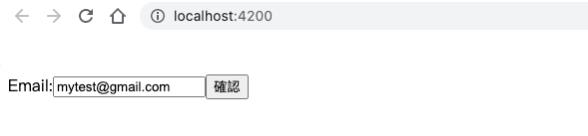
4-1將表單中的值綁定到元件上的值,修改表單值時,同時也能更新元件中的值。
預期結果:
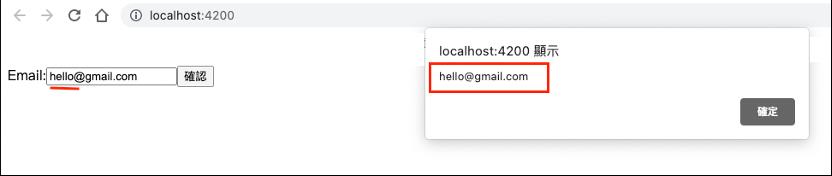
1.email文字框,預設綁定為元件中的值。

2.用戶修改後,按下確認按鈕,自動更新元件中的值,並把更新後的值跳出顯示。

實作如下:
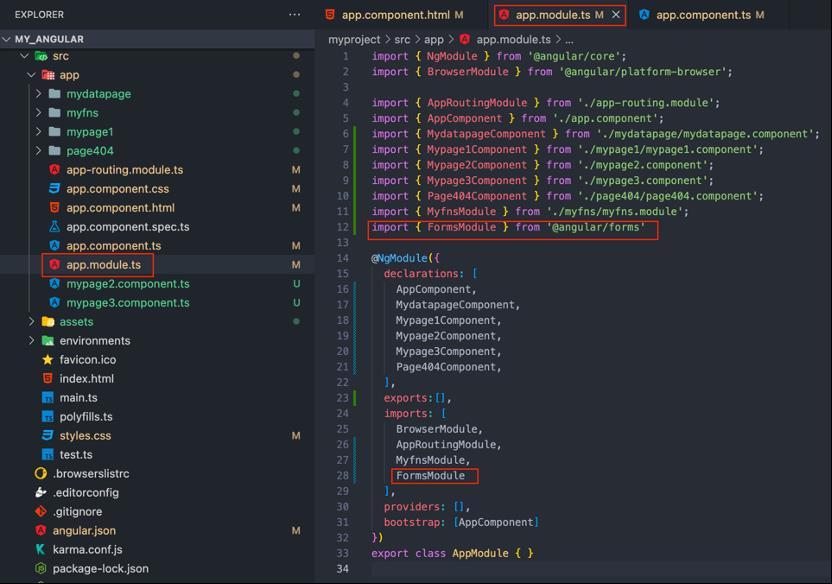
1.匯入表單模組
路徑:src/app/app.module.ts
import { FormsModule } from '@angular/forms'
imports: [
    FormsModule
  ],
2.建立html,路徑為: src/app/app.component.html
<!--雙向綁定-->
Email:<input type="text" [(ngModel)]="email">
<button (click)="myfunction()">確認</button>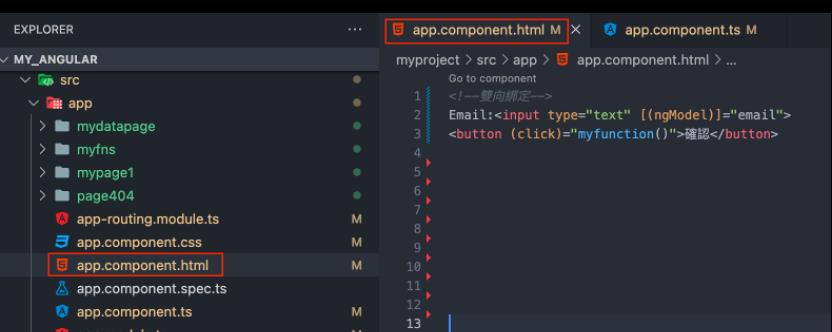
3.設定綁定值及方法(function),路徑:src/app/app.component.ts
email='mytest@gmail.com'; //綁定值

myfunction(){
    alert(this.email) //跳出表單email中的值
}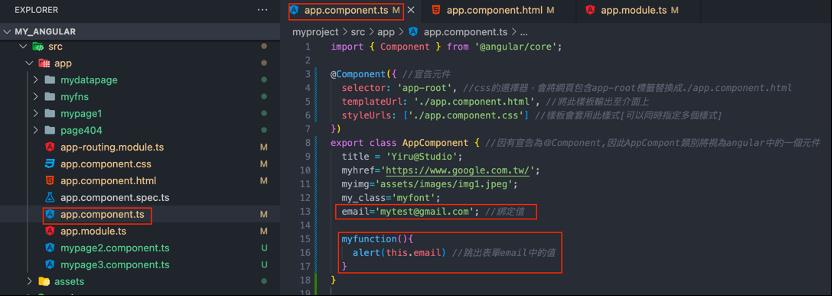
執行指令:ng serve --open

執行結果:
更新Email值後,按下確定,跳出綁定的值。
Yiru@Studio - 關於我 - 意如