Light Map是靜態的3D場景用來顯示影子用的,它是將影子的UV Coordinate藏在頂點的第二組UV上,並且對應到額外一張只有影子的材質,這個動作需要藉由3D軟體如3ds Max或MAYA,來協助會比較方便。以下這篇文章是XNA3.1,但是3ds Max的操作幾乎沒變,XNA 4.0的Light Map文章,GameDev.Net希望我照他們的建議修改好後再傳給他們先發佈,所以等他們發佈我再貼連結進來。
release at GameDev.Net http://www.gamedev.net/page/resources/_/creative/visual-arts/how-to-render-light-maps-in-xna-r2721
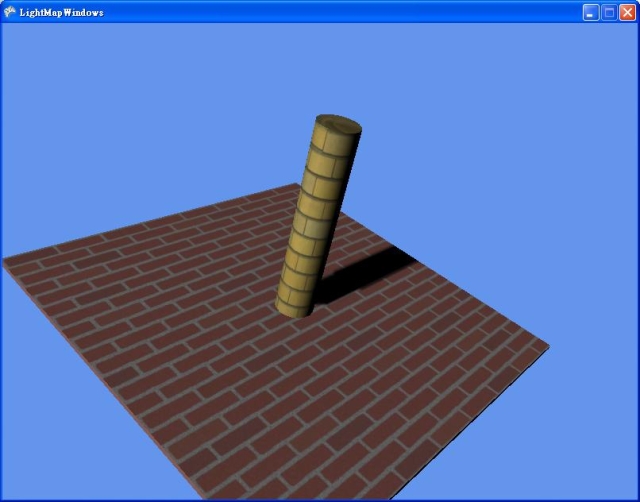
How to render light map in XNA
Using 3ds Max 2008 and Panda plugin
modified at 20091107
modified at 20130909 copy from GameDev.Net
Light mapping is a method for handling the lighting of a surface, including shadows, for static geometry. There are two mainstream techniques, (shadow mapping and shadow volumes) that can render
dynamic models and static models in real-time, but they cost some performance. Ray-tracing is the highly-realistic method for calculating the lighting properties of objects, but the cost in time is
very high and it is hard to render a complex scene in real-time. For static models, light mapping is a better method, because it requires just a light map texture and a second set of texture
coordinates in the model file (such as a .X file, exported by Panda 3ds Max plug-in. Light mapping can be used with multiple light sources at no additional cost. For example, shadow mapping will add
some extra rendering passes to the scene with multiple light sources).
How can we generate a light map? We can use the "render to texture" function of 3ds Max to generate a light map and save the texture coordinates in UV Channel 2. The light map is storing the
intensities of light on the object’s surface. It can be an RGB color texture. When we render a model with light map, each pixel from the usual color map is modulated by the color stored in the
light map (access via the second texture coordinate stored in the FVFData block of a .X file).

You can find the complete source code (for XNA Game Studio 3.0) for this article and 3ds Max files here
W,S,A,D to move the camera, click and drag mouse middle button to rotate the camera
Part 1: Create 3D models and their light maps
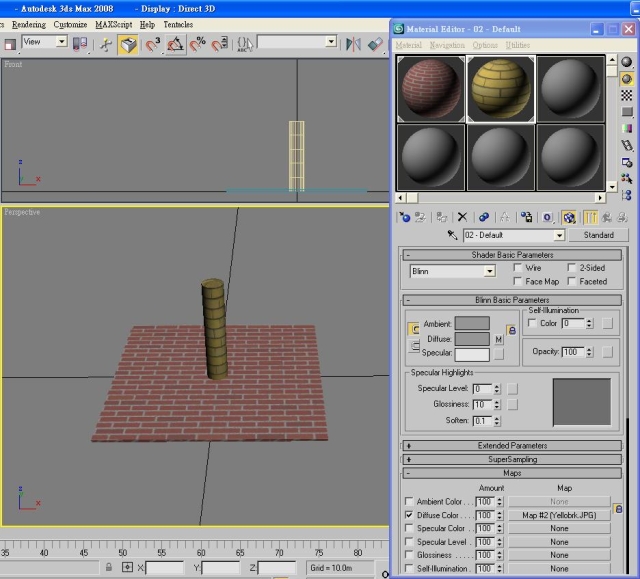
Step1: (file: Content\step1, original material.max)
Add Box and Cylinder - Assign textures to their Diffuse Maps
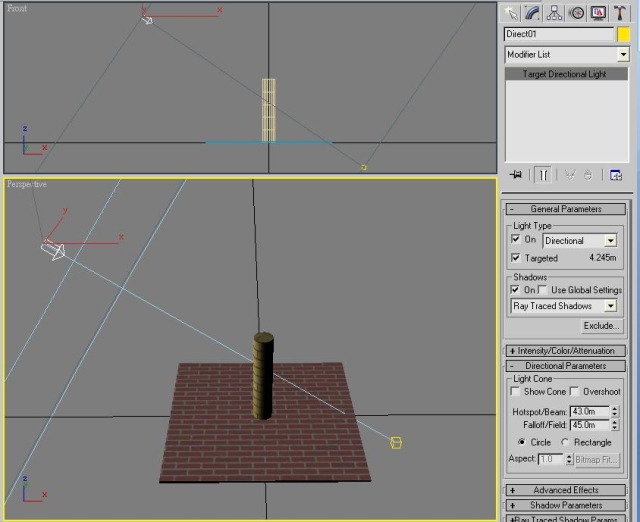
Add Target Directional Light
Shadows:
- Lenable Shadows [V] on
- select "Ray Traced Shadows" or "Shadow Map"
Directional Parameters - use proper Hotspot/Beam
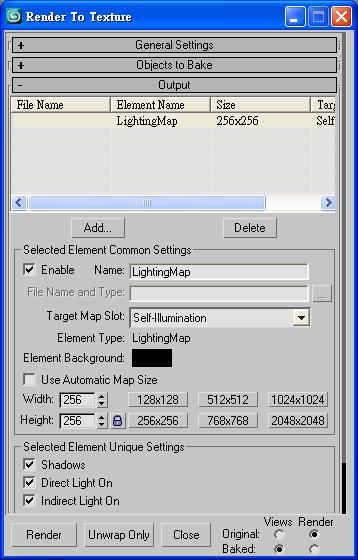
Step 2: (file: Content\step2,render t texture.max)
Selected Box and Cylinder
Rendering -> Render to Texture
Output Page:
-
push “Add” button and select ”LightingMap” in Add Texture Elements
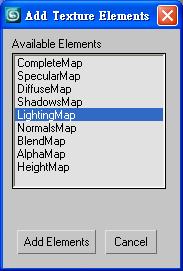
-
set Target Map Slot as “Self-Illumination”
Baked Material Page:
-
click the radio of “Output Into Source“

Objects to Bake Page -> Mapping Coordinates Option:
- Object==>set “Use Automatic Unwrap“
- set Channel as2
Click “Render” button
Delete the ”Target Directional Light”
The light map will be generated and assigned automatically in the “Self-Illumination” map
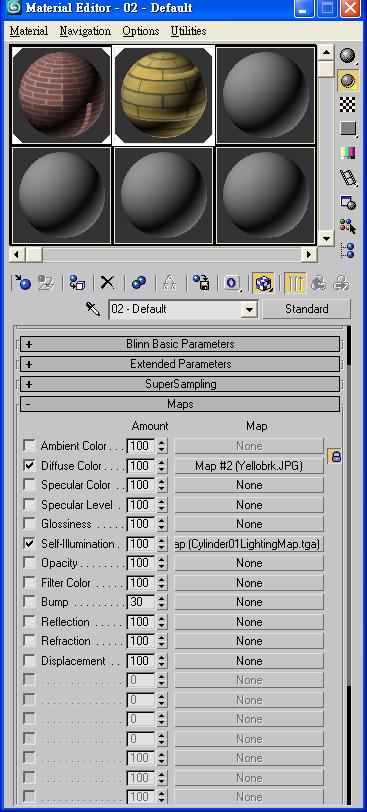
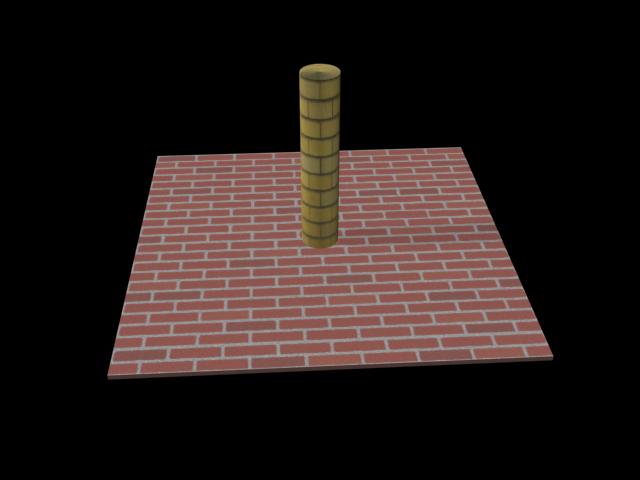
Push F9 or click “Quick Render”, the shadow will appear on Box01 and Cylinder01
Step3: (file: Content\step3,use shader.max)
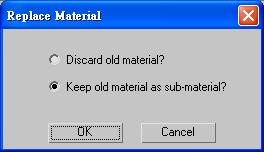
Select Box1 and Change Material to be Direct Shader and "Keep old material as sub-material"
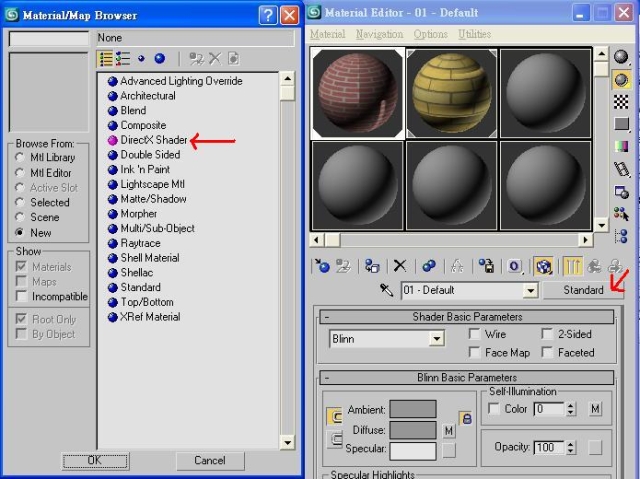
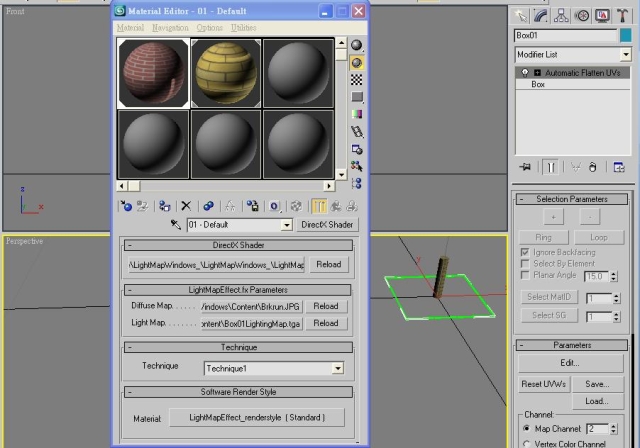
Select the Shader of "Content\LightMapEffect.fx"
Assign the Diffuse Map and its Light Map and Select the Technique as "Technique1"
Push F3 to show the Box01
Push F9 or click “Quick Render”, the shadow will appear on Box01 and Cylinder01(the scene without light object)

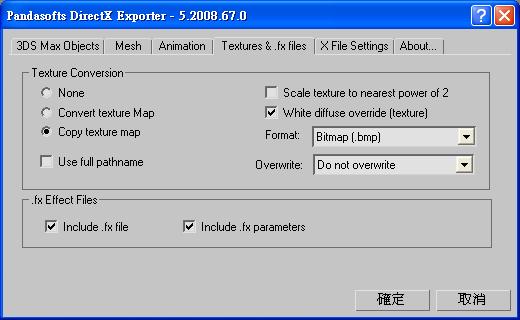
Step4: Export 3D Models with Panda plug-in
At last, you can export the model using the Panda plug-in; the second texture coordinate will be written into the FVFData block in
the .X file. Remember to enable the "Include .fx file" and "Include .fx parameters" options.
Step5: Show the light map result
Use the max file of Step2
If you want to see the light map in 3ds max with sharp shadow, you must re-assign the new materials (with DirectX Shader – LightMap) to Box01 and Cyliner01.
Open Material Editor and click the new material slot
DirectX Manager page:
- Select LightMap and enable “Enable Plugin Material”
DirectX Shader-LightMap:
- BaseTexture: RedB.jpg [V]
- Mapping channel=1
- light map: Box01LightMap.tga [V]
- Mapping channel=2
Remember keep to select Box01


Part 2: XNA Project (LightMapWindows)
Step 1
- Load model and measure its size
- Add camera (reference Book: Learning XNA 3.0 chapter11 Flying Camera)
namespace LightMapWindows

{

 ///

 /// This is the main type for your game

 ///

 public class LightMap : Microsoft.Xna.Framework.Game

 {

  GraphicsDeviceManager graphics;

  SpriteBatch spriteBatch;


  //add

  ContentManager content;

  BasicModel basicModel;

  Camera camera;


  public LightMap()

  {

   graphics = new GraphicsDeviceManager(this);

   Content.RootDirectory = "Content";


   //

   content = new ContentManager(Services);

   content.RootDirectory = "Content";


   IsMouseVisible = true;

  }


  protected override void LoadContent()

  {

   // Create a new SpriteBatch, which can be used to draw textures.

   spriteBatch = new SpriteBatch(GraphicsDevice);


   // TODO: use this.Content to load your game content here

   camera = new Camera(this);

   Components.Add(camera);


   basicModel = new BasicModel();

   basicModel.LoadModel(content, @"pillar");

   basicModel.MeasureModel();


   camera.SetSpeed(basicModel.GetModelRadius() / 100.0f);


   float modelRadius = basicModel.GetModelRadius();

   Vector3 modelCenter = basicModel.GetModelCenter();

   Vector3 eyePosition = modelCenter;


   eyePosition.Z += modelRadius * 2;

   eyePosition.Y += modelRadius;


   float aspectRatio = (float)Window.ClientBounds.Width / (float)Window.ClientBounds.Height;


   float nearClip = modelRadius / 100;

   float farClip = modelRadius * 100;


   camera.SetCamera(eyePosition, modelCenter, Vector3.Up);

   camera.SetFOV(MathHelper.PiOver4, aspectRatio, nearClip, farClip);

  }
Step 2
- Render model with its effect instance
  protected override void Draw(GameTime gameTime)

  {

   GraphicsDevice.Clear(Color.CornflowerBlue);


   // TODO: Add your drawing code here


   basicModel.DrawLightMap(camera);

   //basicModel.Draw(camera);//basic effect


   base.Draw(gameTime);

  }


namespace AkBasicModel

{

    class BasicModel

    {


......


  public void DrawLightMap(Camera camera)

  {

   //Set transfroms

   Matrix[] transforms = new Matrix[m_model.Bones.Count];

   m_model.CopyAbsoluteBoneTransformsTo(transforms);


   //Loop through meshes and their effects

   foreach (ModelMesh mesh in m_model.Meshes)

   {

    foreach (Effect effect in mesh.Effects)

    {

     //Set Effect parameters

     effect.CurrentTechnique = effect.Techniques["Technique1"];

     effect.Begin();

     effect.Parameters["World"].SetValue(GetWorld() * transforms[mesh.ParentBone.Index]);

     effect.Parameters["View"].SetValue(camera.view);

     effect.Parameters["Projection"].SetValue(camera.projection);

     effect.End();

    }

    //Draw

    mesh.Draw();

   }

  }
Further Reference
"Calculating Light Map Coordinates" and "Calculate Lumels of a Light Map" in the page 411 of Game Graphics Programming(by Allen Sherrod, ISBN : 1584505168)