本篇將介紹ASP.Net Core中NLog使用方式。
C#中有許多好用的Log工具(如NLog、Log4net、Serilog),
關於各工具的比較可以參考這篇,
本篇使用NLog做介紹。
在ASP.Net Core MVC專案中使用NLog,
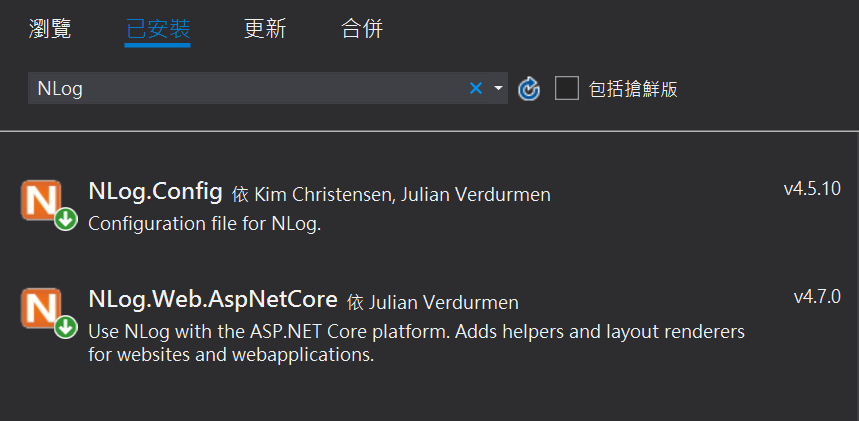
需先安裝以下套件:
- NLog.Web.AspNetCore v4.7.0
- NLog.Config v4.5.10
(筆者使用ASP.Net Core 2.1版)
我們使用Nuget進行安裝。

好了之後專案內會多一個NLog.Config,
預設的輸出格式如下。
<?xml version="1.0" encoding="utf-8" ?>
<nlog xmlns="http://www.nlog-project.org/schemas/NLog.xsd"
      xmlns:xsi="http://www.w3.org/2001/XMLSchema-instance"
      xsi:schemaLocation="http://www.nlog-project.org/schemas/NLog.xsd NLog.xsd"
      autoReload="true"
      throwExceptions="false"
      internalLogLevel="Off" internalLogFile="c:\temp\nlog-internal.log">

  <!-- optional, add some variables
  https://github.com/nlog/NLog/wiki/Configuration-file#variables
  -->
  <variable name="myvar" value="myvalue"/>

  <!--
  See https://github.com/nlog/nlog/wiki/Configuration-file
  for information on customizing logging rules and outputs.
   -->
  <targets>

    <!--
    add your targets here
    See https://github.com/nlog/NLog/wiki/Targets for possible targets.
    See https://github.com/nlog/NLog/wiki/Layout-Renderers for the possible layout renderers.
    -->

    <!--
    Write events to a file with the date in the filename.
    <target xsi:type="File" name="f" fileName="${basedir}/logs/${shortdate}.log"
            layout="${longdate} ${uppercase:${level}} ${message}" />
    -->

    <target xsi:type="File" name="f" fileName="${basedir}/logs/${shortdate}.log"
           layout="${longdate} ${uppercase:${level}} ${message}" />
  </targets>

  <rules>
    <logger name="*" minlevel="Debug" writeTo="f" />
  </rules>
</nlog>
好了之後要修改Program.cs
public class Program
{
    public static void Main(string[] args)
    {
        NLogBuilder.ConfigureNLog("nlog.config").GetCurrentClassLogger();
        CreateWebHostBuilder(args).Build().Run();
    }

    public static IWebHostBuilder CreateWebHostBuilder(string[] args) =>
        WebHost.CreateDefaultBuilder(args)
        .UseStartup<Startup>()
        .ConfigureLogging(logging =>
        {
            logging.ClearProviders();
            logging.SetMinimumLevel(Microsoft.Extensions.Logging.LogLevel.Trace);
        })
        .UseNLog();  // NLog: setup NLog for Dependency injection
}
在Main 中可指定log組態設定檔名,
logging.ClearProviders() 會移除預設的DebugProvider及ConsoleProvider,
ASP.Net Core中Logger的設計可以允許多個LoggingProvider,
你可以依照個人需求選擇是否移除。
並使用UseNLog() 指定NLogProvider。
好了之後我們在HomeController/Index測試。
public class HomeController : Controller
{
    private readonly ILogger logger;

    public HomeController(ILogger<HomeController> _logger)
    {
        this.logger = _logger;
    }


    public IActionResult Index()
    {
        logger.LogTrace("Loggin Level = 0 (Trace)");
        logger.LogDebug("Loggin Level = 1 (Debug)");
        logger.LogInformation("Loggin Level = 2 (Information)");
        logger.LogWarning("Loggin Level = 3 (Warning )");
        logger.LogError("Loggin Level = 4 (Error)");
        logger.LogCritical("Loggin Level = 5 (Critical)");

        return View();
    }
}
執行完後接著開啟{專案目錄下}\bin\Debug\netcoreapp2.1\logs,
會看到多了一個log檔。

恩接著就結束了嗎?
還沒講到重點人物 - NLog.Config。
它是設定Log輸出的核心,
內容主要有<targets> 及<rules> 兩大塊,
分別可設定輸出規則及log寫入規則,
兩者必須要搭配使用,說明如下。
rules & targets
rules裡面可以自訂Log寫入規則,
例如指定logger名稱、最小LogLevel等,
最重要的是要指定輸出的target(輸出目標),
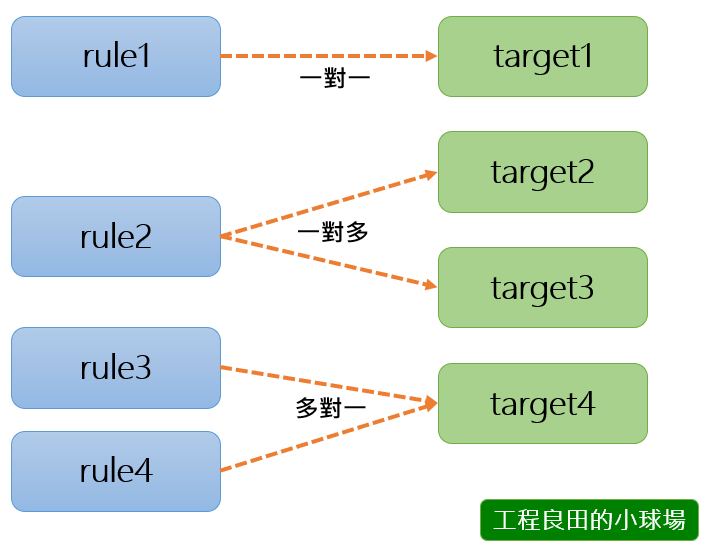
一條rule至少要指定一個對應的target,
但也可以輸出給多個target,
而一個target也可以對應多個rule,
概念上有點像DB資料表的多對多關係,
簡單示意圖如下圖。

設定起來大概會像這樣。
<rules>
  <!--一對一-->
  <logger name="r1" minlevel="Debug" writeTo="t1" />

  <!--一對多-->
  <logger name="r2" minlevel="Debug" writeTo="t2,t3" />

  <!--多對一-->
  <logger name="r3" minlevel="Debug" writeTo="t4" />
  <logger name="r4" minlevel="Debug" writeTo="t4" />

</rules>
如果有興趣的讀者可參考筆者之前的文章 - 點部落NLog連結。
但使用上會有一點點小問題,
因為預設ASP.Net Core與NLog的ILogger物件命名空間並不一樣,
(Microsoft.Extensions.Logging.ILogger、NLog.ILogger)
如果指定多條rule時Microsoft.Extensions.Logging.ILogger無法分辨rule,
小弟目前還沒找到更好的整合方法,
只能走回傳統NLog的使用方法。
target中可以指定輸出的檔案名稱及樣板,
裡面有一些保留的關鍵字可供使用,
例如依照{年/月/日}指定檔案路徑:
<target xsi:type="File" name="f" fileName="${basedir}/logs/${date:format=yyyy}/${date:format=MM}/${date:format=dd}/${shortdate}.log"
         layout="${longdate} ${uppercase:${level}} ${message}" />
如有需更詳細的資訊可以參考NLog官方文件。
參考
https://github.com/NLog/NLog.Web/wiki/Getting-started-with-ASP.NET-Core-2
