摘要:[ASP.NET MVC] 使用Bootsnipp樣式
[ASP.NET MVC] 使用Bootsnipp樣式
前言
在「[ASP.NET MVC] 使用Bootstrap套件」這篇文章中,介紹了如何在Web專案裡使用Bootstrap套件,讓使用者介面更加的美觀大氣,增加客戶對於專案產出的好感度。但是部分跟我一樣欠缺美感的開發人員會發現,就算Bootstrap提供了美美的樣式與元件,可是經過自己的組合處理之後,總是會產出不美觀的使用者介面。這時開發人員可以到Bootsnipp官網瀏覽開發前輩所貢獻的精美樣式,並且直接複製喜歡的樣式到專案中使用,透過這樣的方式就能節省開發人員調整介面外觀的時間、也讓產出的使用者介面更加美觀。本篇文章介紹如何在Web專案裡使用Bootsnipp樣式,為自己留個紀錄也希望能幫助到有需要的開發人員。
加入Bootstrap參考
Bootsnipp中的樣式是以Bootstrap做為底層框架,來提供各式的介面組合樣式,所以在使用這些樣式之前,開發人員必須要先為Web專案加入Bootstrap的參考,才能接著套用Bootsnipp中的樣式。開發人員可以照著「[ASP.NET MVC] 使用Bootstrap套件」的內容,來為專案加入Bootstrap參考,並且產出下列的基礎頁面內容:
<html lang="en">
<head>
    <meta name="viewport" content="width=device-width" />
    <title>Index</title>

    <!-- Styles -->
    <link href="/Content/bootstrap.css" rel="stylesheet">
</head>
<body>
    <!-- Contents -->


    <!-- Scripts -->
    <script src="/Scripts/jquery-1.9.0.js"></script>
    <script src="/Scripts/bootstrap.js"></script>
</body>
</html>
使用Bootsnipp樣式
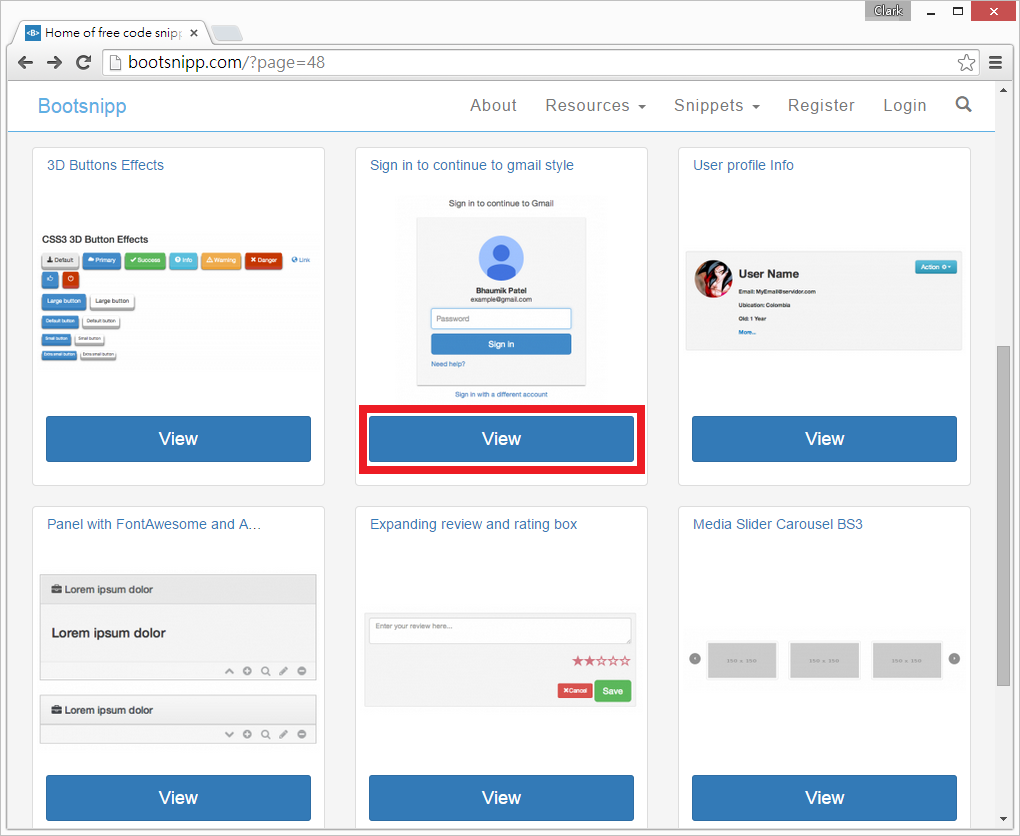
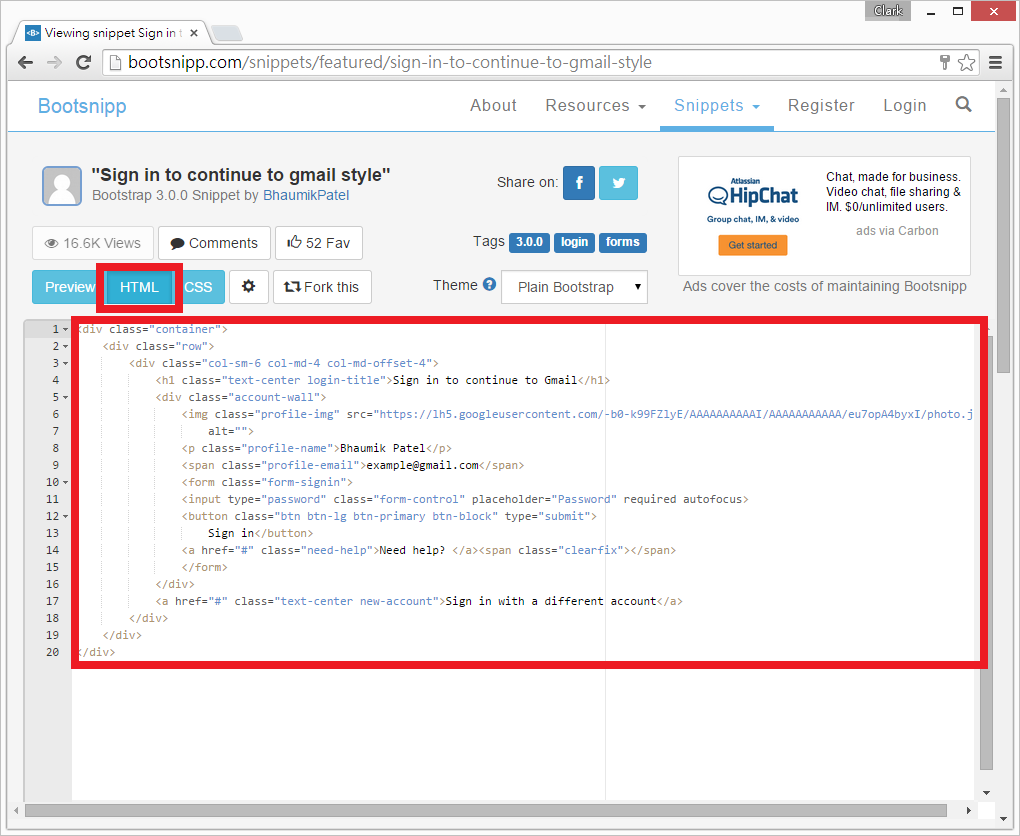
加入Bootstrap參考後,開發人員就可以到Bootsnipp官網,瀏覽符合專案需求的樣式,並且點擊樣式項目的View按鈕,來進入樣式內容展示頁面。
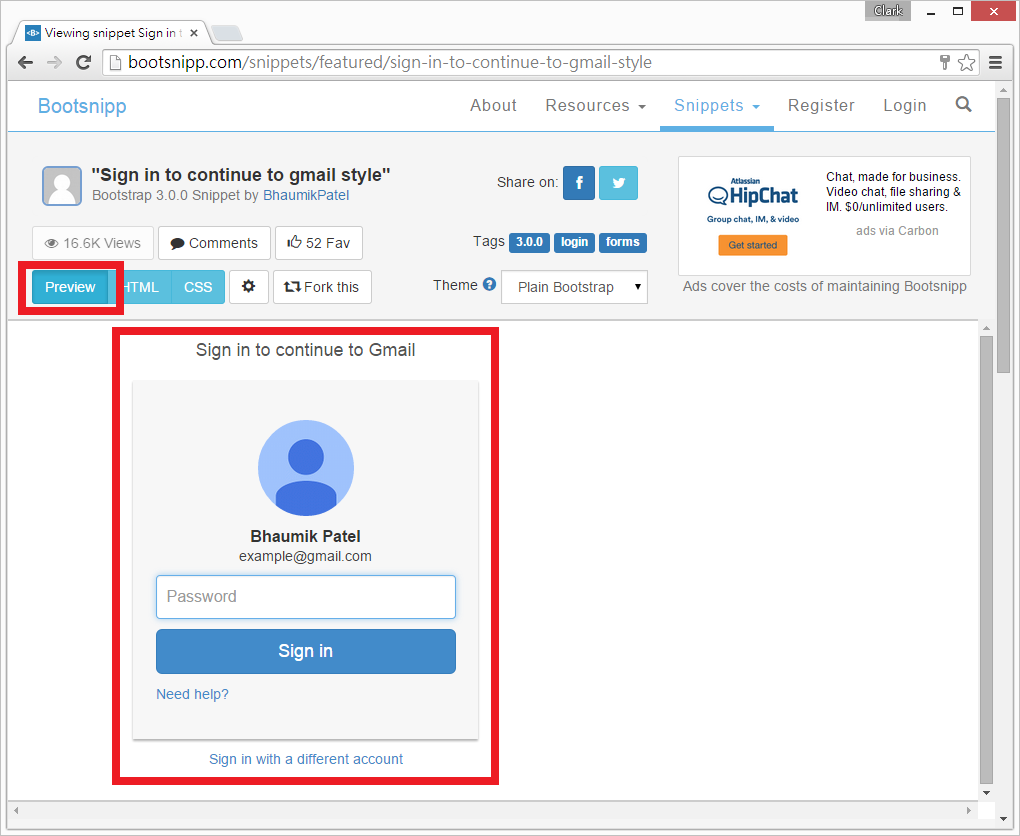
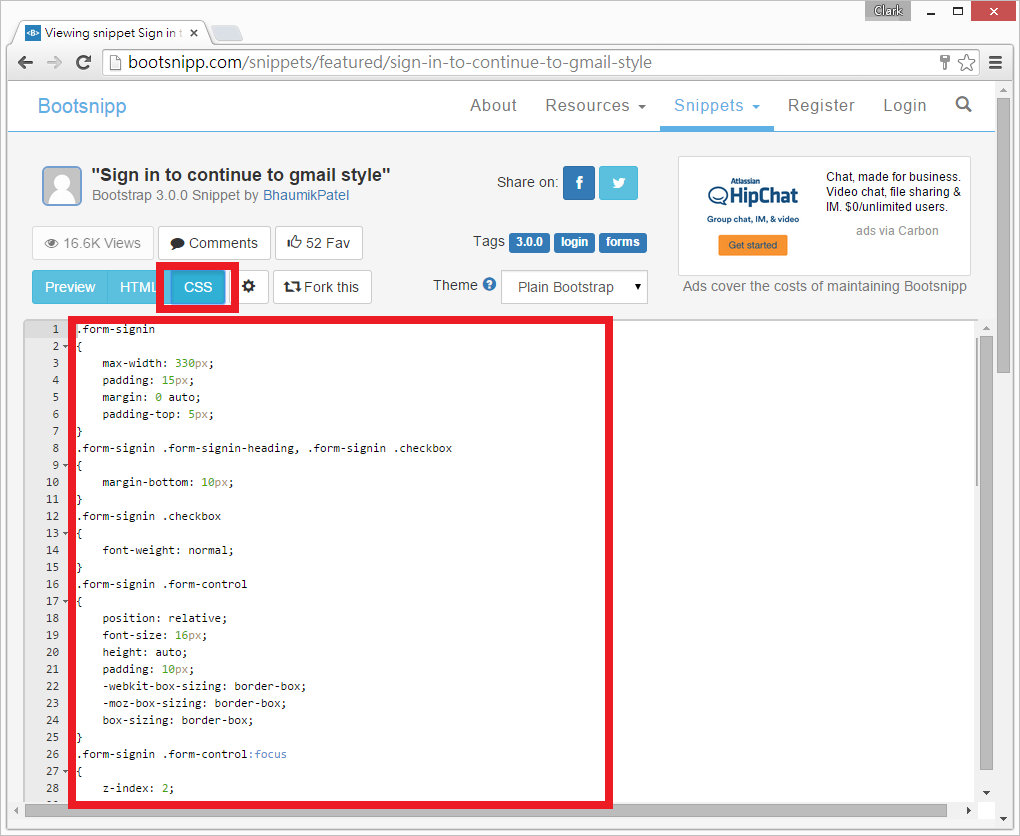
確認樣式內容符合專案需求後,開發人員點擊頁面上方的CSS按鈕來取得該樣式的CSS內容,並且複製CSS內容,到先前建立的基礎頁面內容的Styles區塊內備用。
接著,開發人員同樣點擊頁面上方的HTML按鈕來取得該樣式的HTML內容,並且複製HTML內容,到先前建立的基礎頁面內容的Contents區塊內備用。
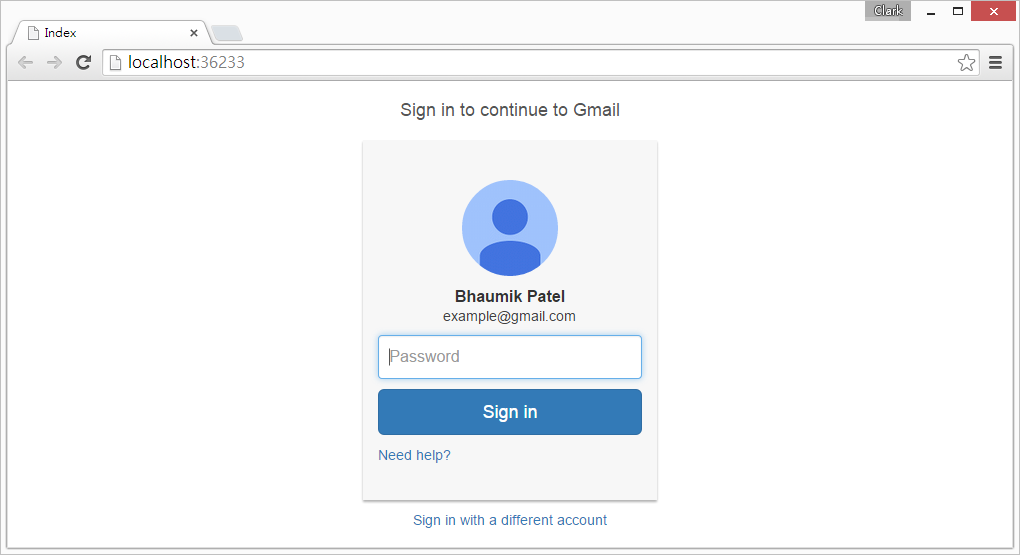
最後,儲存並執行基礎頁面的內容,就可以在瀏覽器上看到Bootsnipp上的樣式,已經正常的在Web專案中執行。後續只需要依照專案需求,來調整頁面中的HTML內容,就可以完成專案使用者介面的開發工作。
<html lang="en">
<head>
    <meta name="viewport" content="width=device-width" />
    <title>Index</title>

    <!-- Styles -->
    <link href="/Content/bootstrap.css" rel="stylesheet">
    <style type="text/css">
        .form-signin {
            max-width: 330px;
            padding: 15px;
            margin: 0 auto;
            padding-top: 5px;
        }

        .form-signin .form-signin-heading, .form-signin .checkbox {
            margin-bottom: 10px;
        }

        .form-signin .checkbox {
            font-weight: normal;
        }

        .form-signin .form-control {
            position: relative;
            font-size: 16px;
            height: auto;
            padding: 10px;
            -webkit-box-sizing: border-box;
            -moz-box-sizing: border-box;
            box-sizing: border-box;
        }

            .form-signin .form-control:focus {
                z-index: 2;
            }

        .form-signin input[type="password"] {
            margin-bottom: 10px;
        }

        .account-wall {
            margin-top: 20px;
            padding: 40px 0px 20px 0px;
            background-color: #f7f7f7;
            -moz-box-shadow: 0px 2px 2px rgba(0, 0, 0, 0.3);
            -webkit-box-shadow: 0px 2px 2px rgba(0, 0, 0, 0.3);
            box-shadow: 0px 2px 2px rgba(0, 0, 0, 0.3);
        }

        .login-title {
            color: #555;
            font-size: 18px;
            font-weight: 400;
            display: block;
        }

        .profile-img {
            width: 96px;
            height: 96px;
            margin: 0 auto 10px;
            display: block;
            -moz-border-radius: 50%;
            -webkit-border-radius: 50%;
            border-radius: 50%;
        }

        .profile-name {
            font-size: 16px;
            font-weight: bold;
            text-align: center;
            margin: 10px 0 0;
            height: 1em;
        }

        .profile-email {
            display: block;
            padding: 0 8px;
            font-size: 15px;
            color: #404040;
            line-height: 2;
            font-size: 14px;
            text-align: center;
            overflow: hidden;
            text-overflow: ellipsis;
            white-space: nowrap;
            -moz-box-sizing: border-box;
            -webkit-box-sizing: border-box;
            box-sizing: border-box;
        }

        .need-help {
            display: block;
            margin-top: 10px;
        }

        .new-account {
            display: block;
            margin-top: 10px;
        }
    </style>

</head>
<body>
    <!-- Contents -->
    <div class="container">
        <div class="row">
            <div class="col-sm-6 col-md-4 col-md-offset-4">
                <h1 class="text-center login-title">Sign in to continue to Gmail</h1>
                <div class="account-wall">
                    <img class="profile-img" src="https://lh5.googleusercontent.com/-b0-k99FZlyE/AAAAAAAAAAI/AAAAAAAAAAA/eu7opA4byxI/photo.jpg?sz=120"
                         alt="">
                    <p class="profile-name">Bhaumik Patel</p>
                    <span class="profile-email">example@gmail.com</span>
                    <form class="form-signin">
                        <input type="password" class="form-control" placeholder="Password" required autofocus>
                        <button class="btn btn-lg btn-primary btn-block" type="submit">
                            Sign in
                        </button>
                        <a href="#" class="need-help">Need help? </a><span class="clearfix"></span>
                    </form>
                </div>
                <a href="#" class="text-center new-account">Sign in with a different account</a>
            </div>
        </div>
    </div>

    <!-- Scripts -->
    <script src="/Scripts/jquery-1.9.0.js"></script>
    <script src="/Scripts/bootstrap.js"></script>
</body>
</html>
參考資料
能以更簡潔的文字與程式碼,傳達出程式設計背後的精神。
真正做到「以形寫神」的境界。
