前篇文章提及,VSTS其實可以自動透過Nuget Restore來取得專案所使用的套件,這樣不僅可以避免直接在專案中硬性加入參考,也可以解決套件散亂難以管理的問題,當然,專案中許多套件是屬於自行研發,也不打算放上Public Nuget Server給外部人使用的,這時候就需要自行架構Nuget Server。
文/黃忠成
Private Nuget Server
前篇文章提及,VSTS其實可以自動透過Nuget Restore來取得專案所使用的套件,這樣不僅可以避免直接在專案中硬性加入參考,也可以解決套件散亂難以管理的問題,當然,專案中許多套件是屬於自行研發,也不打算放上Public Nuget Server給外部人使用的,這時候就需要自行架構Nuget Server。
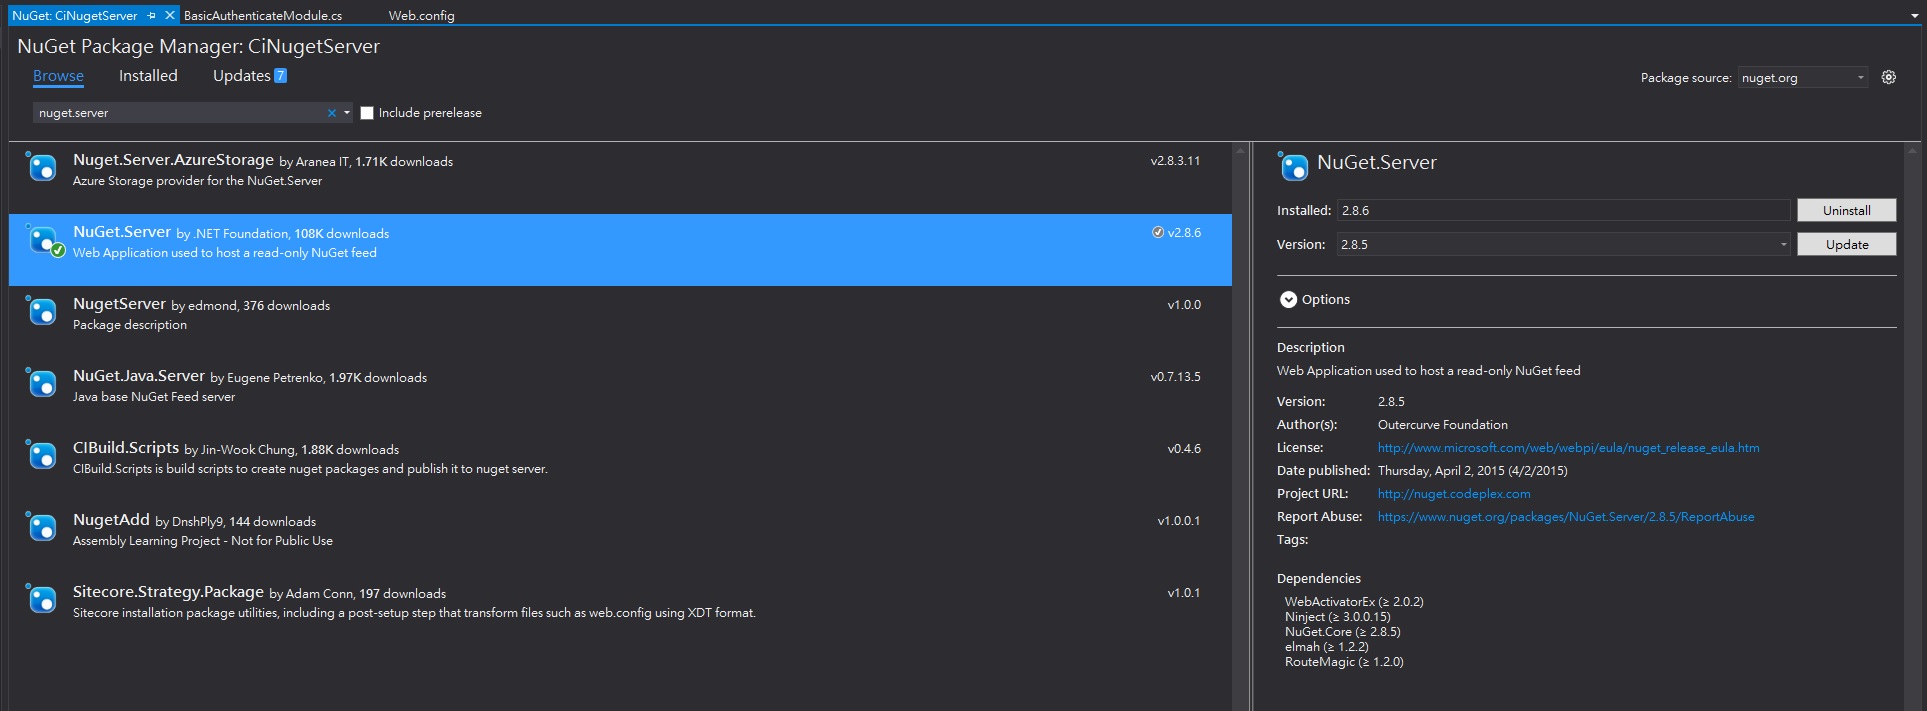
透過ASP.NET,自行建構Nuget Server其實很簡單,只要建立一個新的ASP.NET 專案,接著透過Nuget取得Nuget.Server套件安裝加上一些簡易設定就可完成。
圖001
 裝完後透過web.config來調整設定。
圖002
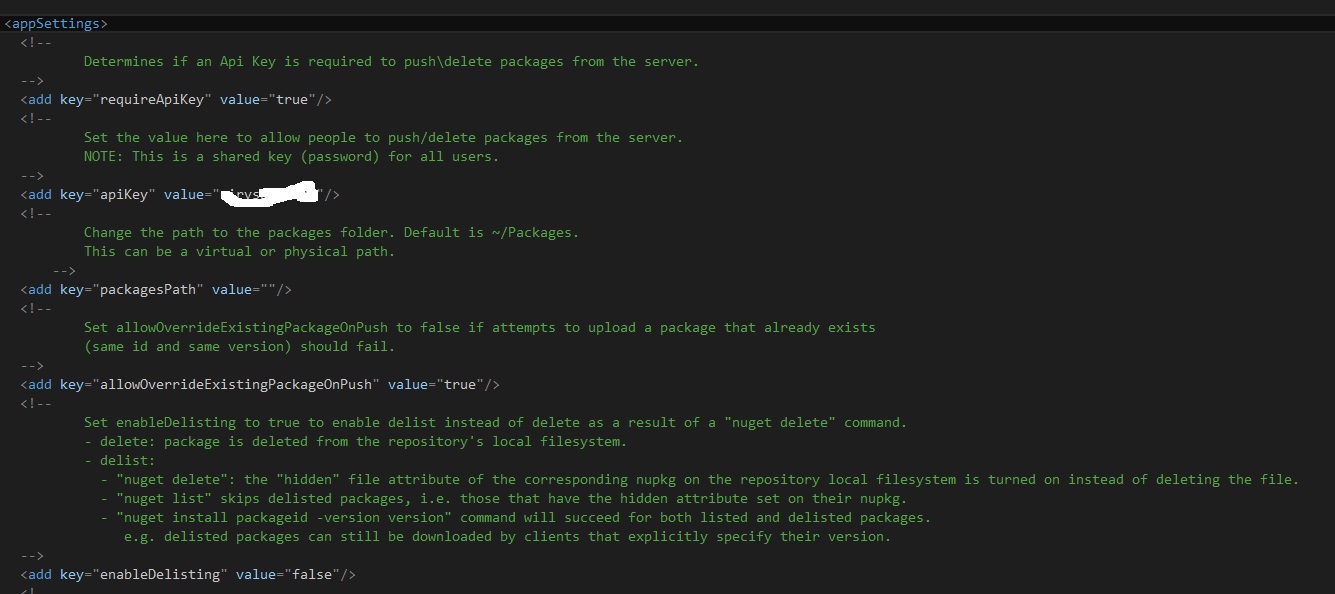
只有一個部份需注意,那就是appKey的部分,這用於upload nuget package時所需要的application key,請自行輸入即可,完成後執行便可看到下圖畫面。
圖003
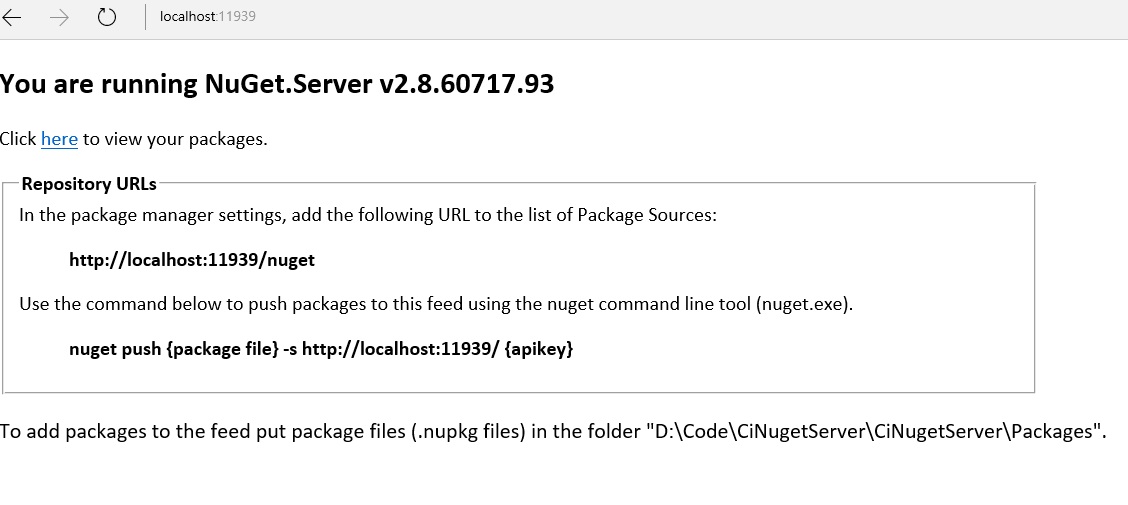
要特別注意的是,如果是要讓VSTS使用,那麼這個Nuget Server必須處於公開的網路環境,也就是任何人都可以透過網際網路存取到這個Nuget Server,這我想不是你所想要的,因此我們需要為這個Nuget Server加上安全機制,本例中用最簡單的Basic Authenticate,如果是真實環境下,建議至少加上SSL。
首先在專案中加入以下的程式碼。
BasicAuthenticateModule.cs
using System;

using System.Collections.Generic;

using System.Linq;

using System.Net.Http.Headers;

using System.Security.Principal;

using System.Text;

using System.Threading;

using System.Web;


namespace CiNugetServer

{

    public class BasicAuthHttpModule : IHttpModule

    {

        private const string Realm = "My Realm";


        public void Init(HttpApplication context)

        {

            // Register event handlers

            context.AuthenticateRequest += OnApplicationAuthenticateRequest;

            context.EndRequest += OnApplicationEndRequest;

        }


        private static void SetPrincipal(IPrincipal principal)

        {

            Thread.CurrentPrincipal = principal;

            if (HttpContext.Current != null)

            {

                HttpContext.Current.User = principal;

            }

        }


        // TODO: Here is where you would validate the username and password.

        private static bool CheckPassword(string username, string password)

        {

            return username == "user" && password == "password";

        }


        private static void AuthenticateUser(string credentials)

        {

            try

            {

                var encoding = Encoding.GetEncoding("iso-8859-1");

                credentials = encoding.GetString(Convert.FromBase64String(credentials));


                int separator = credentials.IndexOf(':');

                string name = credentials.Substring(0, separator);

                string password = credentials.Substring(separator + 1);


                if (CheckPassword(name, password))

                {

                    var identity = new GenericIdentity(name);

                    SetPrincipal(new GenericPrincipal(identity, null));

                }

                else

                {

                    // Invalid username or password.

                    HttpContext.Current.Response.StatusCode = 401;

                }

            }

            catch (FormatException)

            {

                // Credentials were not formatted correctly.

                HttpContext.Current.Response.StatusCode = 401;

            }

        }


        private static void OnApplicationAuthenticateRequest(object sender, EventArgs e)

        {

            var request = HttpContext.Current.Request;

            var authHeader = request.Headers["Authorization"];

            if (authHeader != null)

            {

                var authHeaderVal = AuthenticationHeaderValue.Parse(authHeader);


                // RFC 2617 sec 1.2, "scheme" name is case-insensitive

                if (authHeaderVal.Scheme.Equals("basic",

                        StringComparison.OrdinalIgnoreCase) &&

                    authHeaderVal.Parameter != null)

                {

                    AuthenticateUser(authHeaderVal.Parameter);

                }

            }

        }


        // If the request was unauthorized, add the WWW-Authenticate header

        // to the response.

        private static void OnApplicationEndRequest(object sender, EventArgs e)

        {

            var response = HttpContext.Current.Response;

            if (response.StatusCode == 401)

            {

                response.Headers.Add("WWW-Authenticate",

                    string.Format("Basic realm=\"{0}\"", Realm));

            }

        }


        public void Dispose()

        {

        }

    }


}
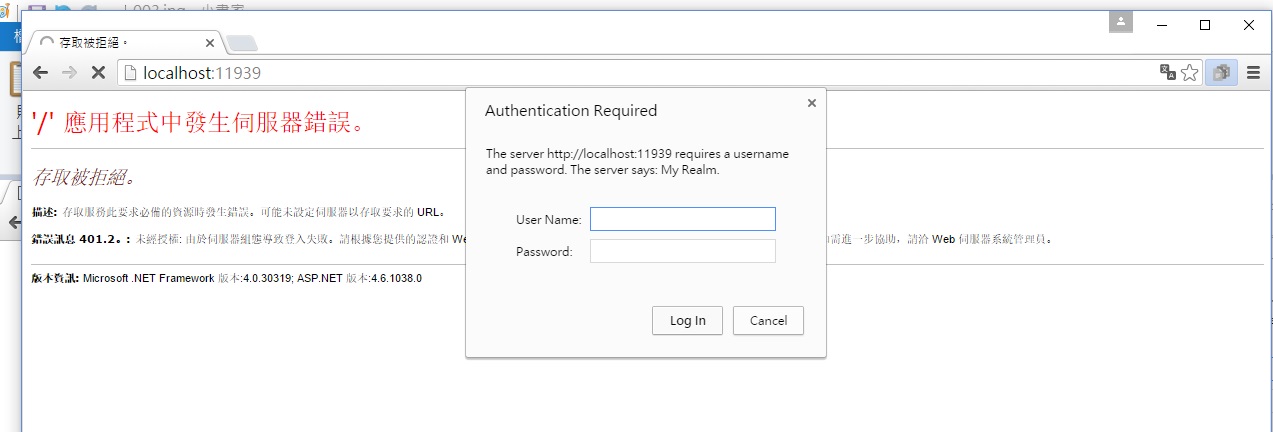
接著修改web.config,加入HTTP Module設定。
web.config
<system.web>

   …….

    <authorization>

        <deny users="?"/>

    </authorization>

  </system.web>


<system.webServer>

    ……..

      <add name="MyBasicAuthenticationModule" type="CiNugetServer.BasicAuthHttpModule, CiNugetServer"/>

    </modules>
注意type的定義,這裡是<TypeName>, <Assembly Name>。
完成後執行就可以看到以下的畫面。
圖004
接著就可以這個專案直接部署到Azure Web Sites去了。
由於已經加入了驗證,但Visual Studio卻沒有地方可以輸入驗證資訊,所以得用命令列方式來加入。
nuget sources add -Name "Cinuget" -Source "http://xxxxxx.azurewebsites.net/nuget" -UserName "nugettest" -Password "nugettest123"
如果已經透過Visual Stidio加入過,那麼就得使用update命令。
nuget sources update -Name "Cinuget" -Source "http://xxxxxx.azurewebsites.net/nuget" -UserName "nugettest" -Password "nugettest123"
發佈Package
其實很簡單,透過Nuget Package Explorer工具,就可以輕易地發佈自己撰寫的Package了。
https://github.com/NuGetPackageExplorer/NuGetPackageExplorer
對於.NET/Web相關的Package,Nuget Package Explorer其實就已經很夠用了,網路上也有很多說明文件,這裡就不再贅述,有興趣的可以參考黑大的文章。
http://blog.darkthread.net/post-2011-03-29-create-nuget-package.aspx
但如果要發佈的Package是一個Native,也就是C++的Package,那問題就複雜許多了,在目前的Nuget中已經支援C++類型的Package,首先必須安裝CoApp Tools。
http://coapp.org/pages/releases.html
接著準備要發佈的套件內容,本例中以Direct X SDK June為例,一般來說需要的就是include及lib目錄,這裡我建立一個新目錄,接著把SDK中的include、lib都複製過來。
圖005

然後要建立一個.autopkg檔案,這是CoApp工具所需要的檔案,他必須存放在套件的根目錄下,以本例來說就是DirectXJune目錄下。
Dxnugetsdk.autopkg
nuget{

   nuspec{

        id = DXSDKJUNE;

        version : 11.0;

        title: DirectX SDK(June);

        authors: {Microsoft Corporation};

        owners: {code6421, GIS};

        tags: { native, SDK, DirectX };

    }

   files {


        include: { "include\*" };

        [x86] {  // x86, dll

            lib: { lib\x86\*.lib };

        };

        [x64] {  // x64, dll

            lib: { lib\x64\*.lib };

        }

    }

}
最後透過CoApp的工具來產生.nupkg檔案及上傳至Nuget Server,注意,這是Powershell。內容不難懂,重點在於include區塊,多數的C++ SDK都包含兩種平台:x86、x64,不同平台需要Link不同的lib。
產生nupk的命令列
Write-NuGetPackage .\dxjunesdk.autopkg
上傳
nuget.exe push .\DXSDKJUNE.11.0.nupkg -s http://yourserver.azurewebsites.net/ yourkey
過程中會詢問user/password。
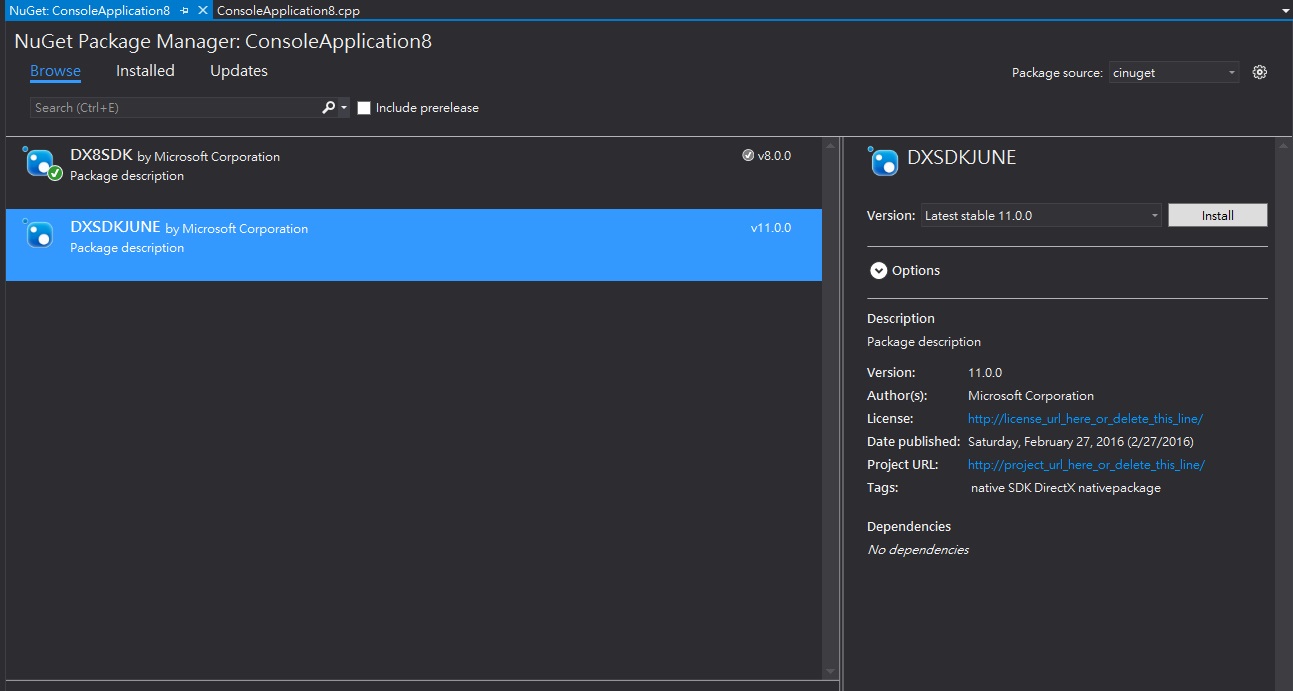
一切無誤的話,就可以在Visual Studio使用這個套件了。
圖006
透過VSTS來建置
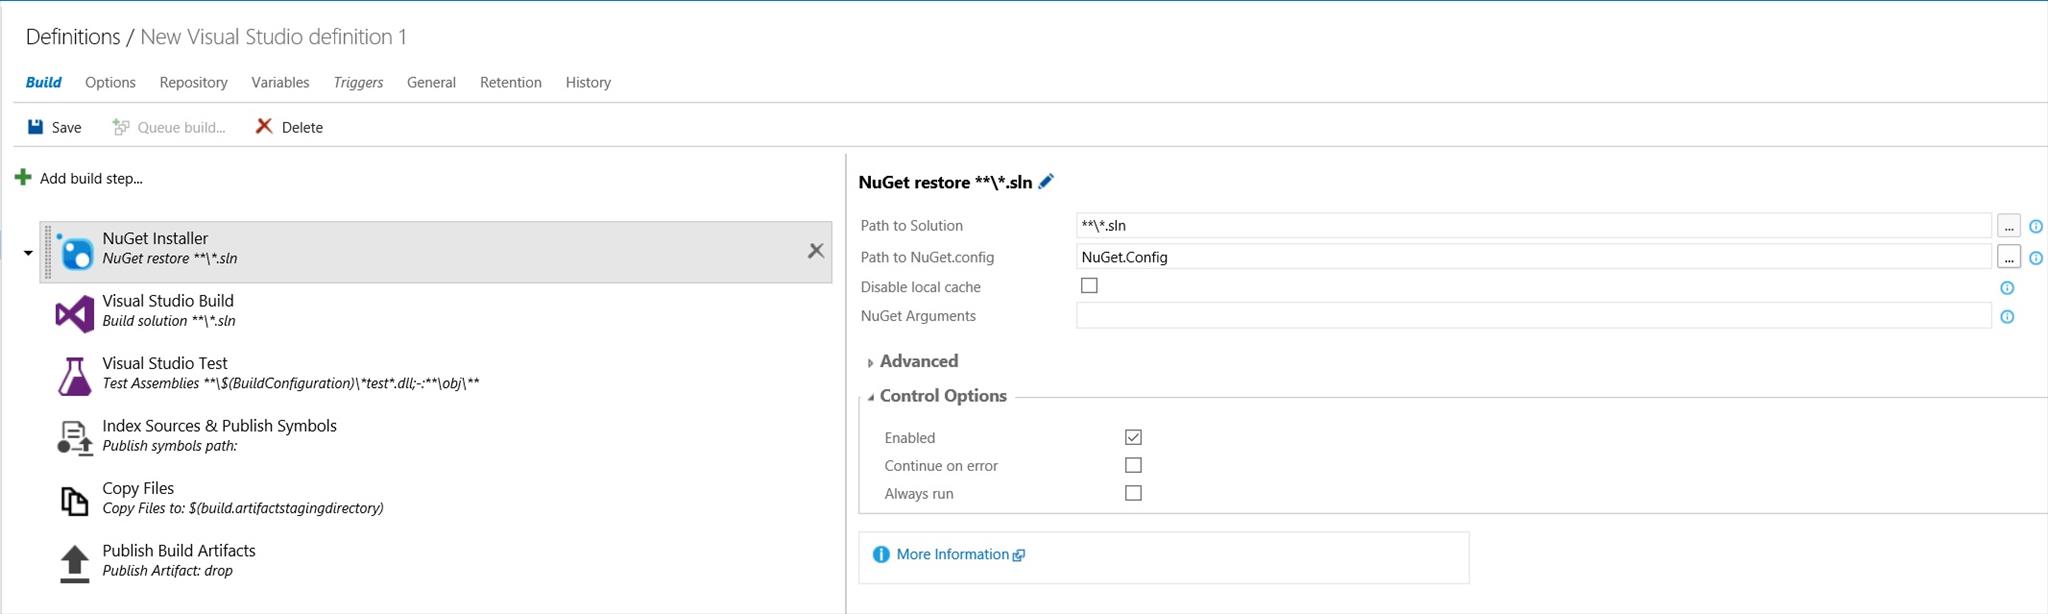
基本上與之前提過的方式差不多,一樣是先加入版控,接著透過VSTS建立Build,唯一要特別注意的是,這裡使用的是Private Nuget Server,而且是具備驗證機制的,所以必須透過上傳Nuget.config的方式來讓VSTS取得這些資訊,nuget.config存放於User\AppData\Roaming\Nuget目錄下。
圖007

這個檔案需要放置在版控中,通常我會放置於方案跟目錄,在建立Build的時候就可以直接指定。
圖008
習慣上我會把Clean跟Nuget package restore打勾。
圖009
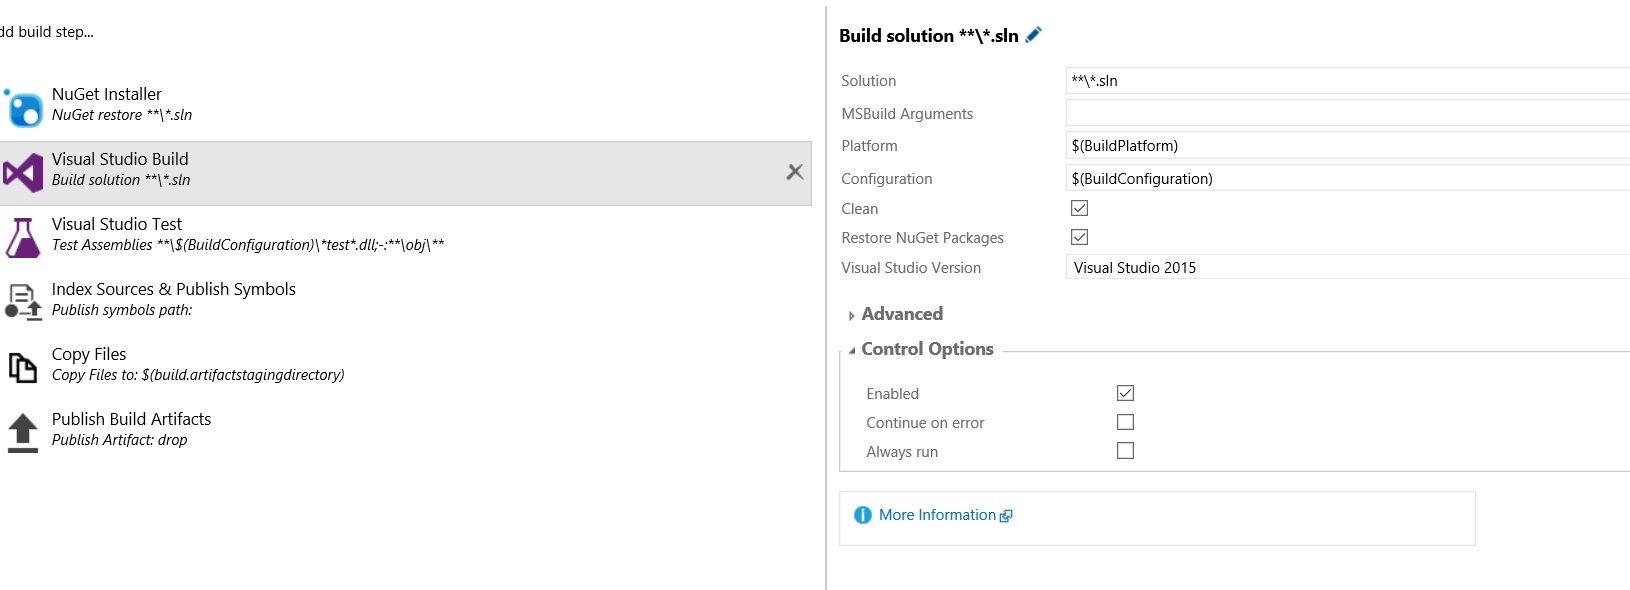
對於C++這種分平台的專案來說,必須要特別注意要Build的平台 $(BuildPlatform)參數的值,這裡指定為x64(其實當開發的是混合型的專案時,這裡會很有趣,後面有機會再談談這個)。
圖010
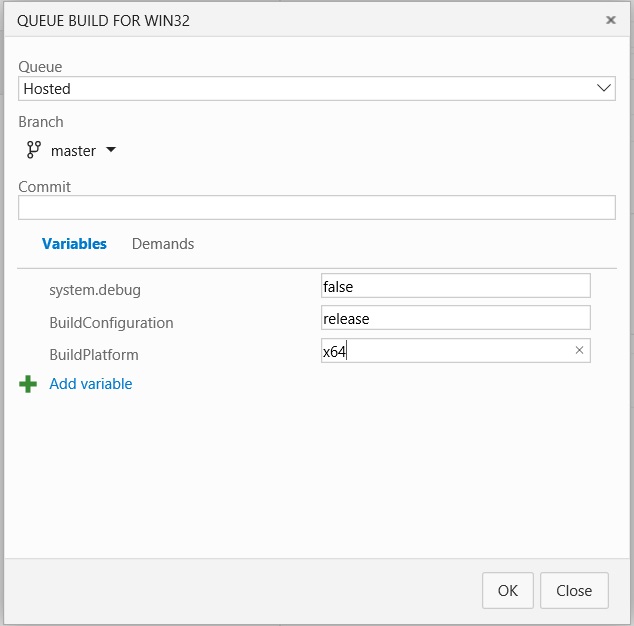
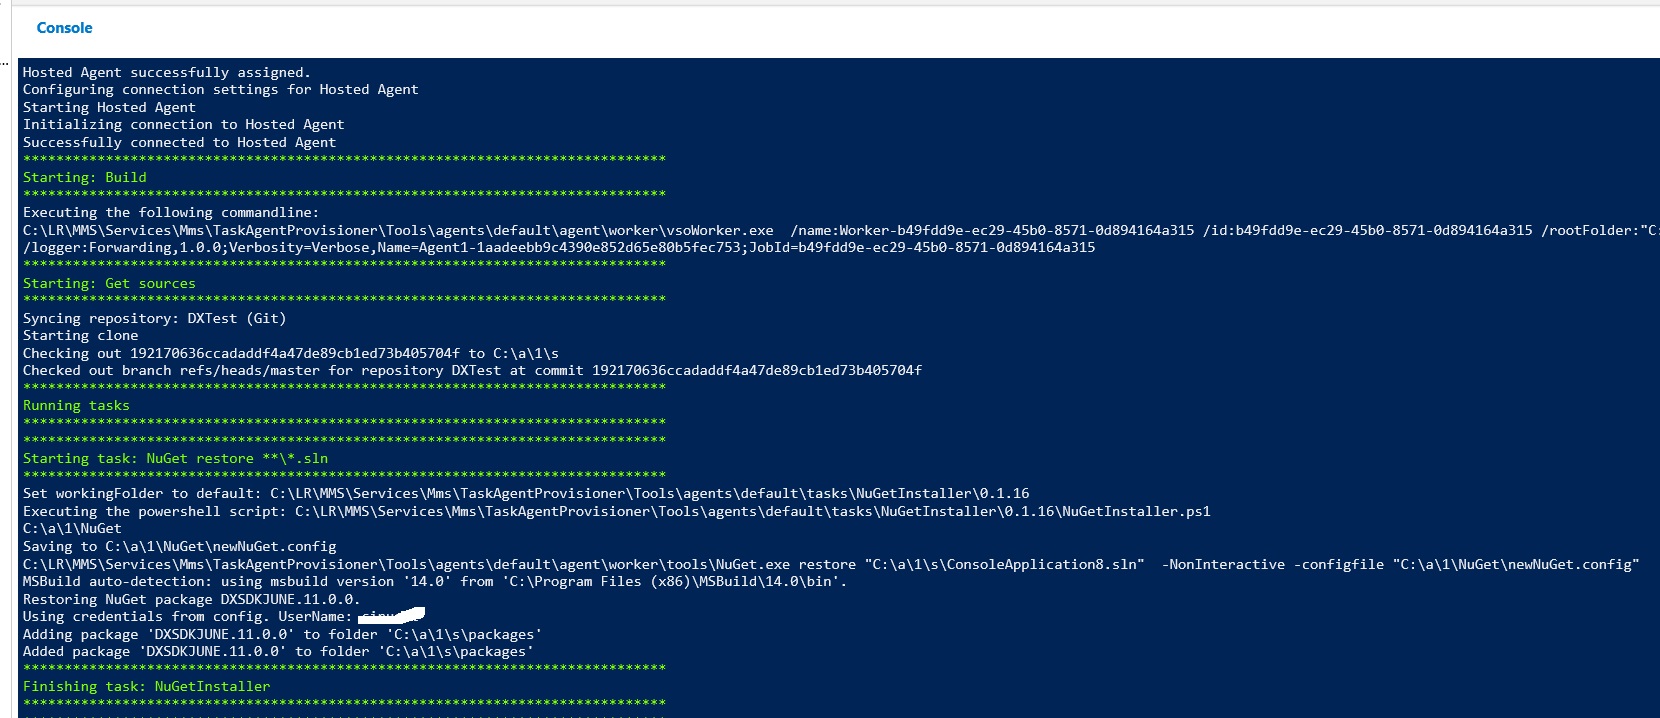
結果如圖11,通常不會有太大問題。
圖11
必須注意的事
在我的環境中曾經發生過VSTS無法使用Nuget.config中存放的驗證資訊來Restore Package,這通常會導致Build Fail,如果你有發生這種情況,那麼試著使用以下指令來存放明碼試試。
另外一種情況比較詭異,出現莫名的MSBuild Task錯誤,這種情況後來是把Packages目錄由版控exclude後,讓VSTS在每次Build前還原整個Nuget Packages後解決。
PS: 事實上Packages本來就不該在版控中,但有時候Nuget Server或是Package上傳者的錯誤,導致某個Package在短時間出現無法由Nuget取得而導致錯誤,所以對於線上的專案,我還是會把Packages包進去。
nuget sources update -Name "Cinuget" -Source "http://xxxxxx.azurewebsites.net/nuget" -UserName "nugettest" -Password "nugettest123" -StorePasswordInClearText