憑藉著Node.JS豐富的資源,傳統Desktop Application能做的事,Electron幾乎都做得到,前提是你能找到適用的套件,但總有些時候,能找到的套件雖然能達到你要的目的,但卻附帶一些不想要的後果,例如複雜的使用架構,或是效能不符需求,相依性過大等等,這時Electron Edge這類可以橋接.NET Library的機制就很有用。
使用.Net Library
Electron Edge這個套件可以讓你在Electron中直接載入.Net Framework所產生的Assembly,也就是說可以在Node.JS中直接呼叫.NET所寫的函式庫,使用方法很簡單,首先在專案目錄安裝Electron Edge套件。
npm install electron-edge
接著用C#撰寫需要的Library,本文以上篇顯示CPU Loading的程式為例,把取得CPU Loading的部分用C#完成,這個精確度比Node.JS提供的還高。
.Net Class Library Project(NetNative.dll) – Class1.cs
using System;
using System.Collections.Generic;
using System.Diagnostics;
using System.Linq;
using System.Text;
using System.Threading.Tasks;
using System.Windows.Forms;

namespace NetNative
{
    public class Startup
    {
        PerformanceCounter _cpuCounter;

        public async Task<object> Invoke(string parameter)
        {
            if (_cpuCounter == null)
            {
                _cpuCounter = new PerformanceCounter();
                _cpuCounter.CategoryName = "Processor";
                _cpuCounter.CounterName = "% Processor Time";
                _cpuCounter.InstanceName = "_Total";
            }
            return _cpuCounter.NextValue();
        }
    }
}
Electron Edge要求載入的.NET Assembly必須遵循一些規則,要提供一個Startup類別,且裡面要有一個Invoke函式,其傳回值必須是Task<object>,必須接受一個string參數,編譯這個.NET Assembly,把產生出來的NetNative.dll放到專案的目錄下,接著就能透過Electron Edge來呼叫這個Invoke函式了,這裡我們修改原先的cpu.js,改成透過Electron Edge來載入NetNative.dll後呼叫裡面的Invoke函式取得CPU Loading。
Cpu.js
var edge = require('electron-edge');
// Initialize collapse button
var dotNetFunction = edge.func(__dirname + '/NetNative.dll');
//Create function to get CPU information
exports.cpuAverage = function() {
    return dotNetFunction(null, true);
}
Index.html則沒有太大變化,主要是針對cpuAverage調整了一下呼叫方式。
Index.html
<!DOCTYPE html>
<html>

<head>
  <!--Import Google Icon Font-->
  <link href="http://fonts.googleapis.com/icon?family=Material+Icons" rel="stylesheet">
  <!--Import materialize.css-->
  <link type="text/css" rel="stylesheet" href="css/materialize.min.css" media="screen,projection" />

  <!--Let browser know website is optimized for mobile-->
  <meta name="viewport" content="width=device-width, initial-scale=1.0" />

  <style>
              .progress {
                height: 150px;
                width: 150px;
                background-color: transparent
            }

            .progress > svg {
                height: 100%;
                display: block;
                            }

        </style>
</head>

<body>
  <!--Import jQuery before materialize.js-->
  <script>window.$ = window.jQuery = require('jquery');</script>
  <script type="text/javascript" src="js/hammer.min.js"></script>
  <script type="text/javascript" src="js/materialize.min.js"></script>
  <ul id="slide-out" class="side-nav">
    <li>
      <div class="userView">
        <div class="background">
          <img src="images/office.jpg">
        </div>
        <a href="#!user"><img class="circle" src="images/yuna.jpg"></a>
        <a href="#!name"><span class="white-text name">John Doe</span></a>
        <a href="#!email"><span class="white-text email">jdandturk@gmail.com</span></a>
      </div>
    </li>
    <li><a href="#!"><i class="material-icons">cloud</i>First Link With Icon</a></li>
    <li><a href="#!">Second Link</a></li>
    <li>
      <div class="divider"></div>
    </li>
    <li><a class="subheader">Subheader</a></li>
    <li><a class="waves-effect" href="#!">Third Link With Waves</a></li>
  </ul>
  <a href="#" data-activates="slide-out" class="button-collapse"><i class="material-icons">menu</i></a>
  <div class="progress" id="progress"></div>
    <script>
     // Initialize collapse button
     $(".button-collapse").sideNav();

     var ProgressBar = require('progressbar.js')
     var cpu = require("./cpu.js");
     $(".button-collapse").sideNav();

     var circle = new ProgressBar.Circle('#progress', {
        color: '#FCB03C',
        strokeWidth: 3,
        trailColor: '#f4f4f4'
     });
     //Grab first CPU Measure
     var startMeasure = cpu.cpuAverage();
     //Set delay for second Measure
     setInterval(function() {
        //Grab second Measure
          var value = cpu.cpuAverage();
           circle.set(value / 100);
           circle.setText(value.toFixed(1) + "%");
          },  1500);
    </script>

</body>

</html>
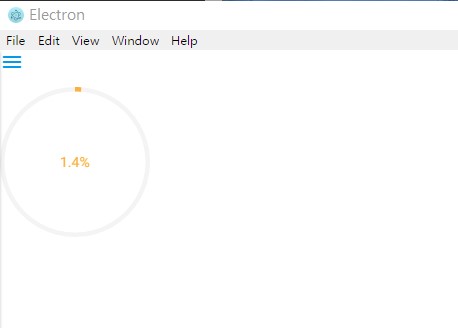
結果如下圖。
很簡單是吧,其實Electron Edge是透過CLR Hosting方式來達到這個效果,有興趣的話我們會在另一篇文章 .NET Core: The Hosting 中會詳細討論這技術,喔,Electron Edge也可以呼叫.NET Core的Library哦。