前言
TeamCity 是由 JetBrains 開發,一套 Java-Based 持續整合與管理的伺服器,能協助開發人員依據專案特性,從開發、編譯、整合、測試到發佈軟體等流程,建構一套專屬的 DevOps。TeamCity整合多家套件,如版本控管、測試框架、通知、視覺化圖表、問題追蹤、雲端支援...等,協助開發人員順行進行各種整合工作,功能相當強大。
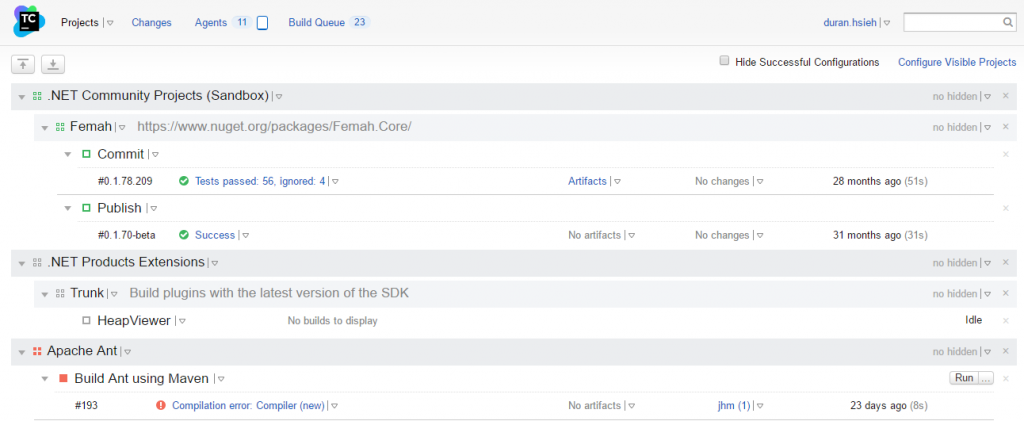
下圖為 TeamCity 主畫面。
TeamCity 版本與費用如下:
| Name | Dollars | Note |
|---|---|---|
| Professional | Free | 20 build configurations + 3 build agents |
| 1 Build Agent | US $299 | adds 10 additional build configurations |
| Enterprise | US $1999 | unlimited build configurations + 3 build agent |
| US $2499 | unlimited build configurations + 5 build agent | |
| US $3699 | unlimited build configurations + 7 build agent |
build configurations: 設定的整合流程
build agents:執行整合流程的程序
20個 build configurations 看似很多,但是當專案越來越龐大,一個專案可能因應環境就占用4-6個build configurations,若需要額外的前後端佈署或整合測試,占用7-10個是常有的事情。而同時間開發人員越多,Agents也會不夠用 - 最後會造成一堆測試排隊等著執行。
在進行安裝前,請先確認您是否有安裝資料庫(本範例使用Microsoft SQL 2016 Deveploper),本篇文章將簡單介紹如何安裝TeamCity,若有錯誤或任何建議,請各位先進不吝提出,謝謝!
測試環境
- TeamCity Professional 10.0.2 (build 42234)
- Windows 10 專業版
- Microsoft SQL 2016 Developer
安裝步驟
圖多注意
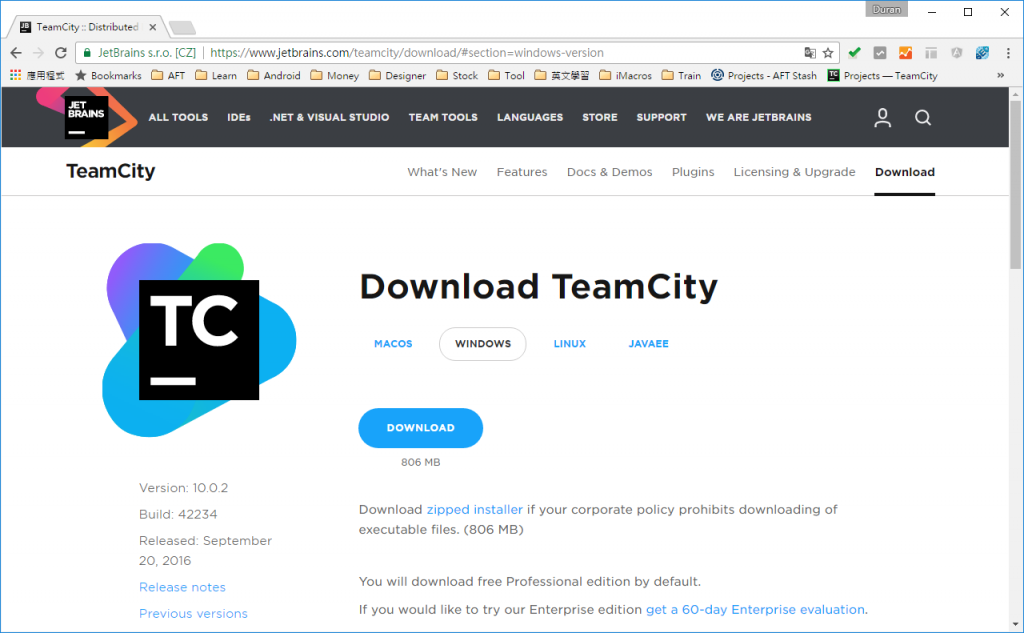
Step 1 開啟TeamCity下載網頁,Download進行下載
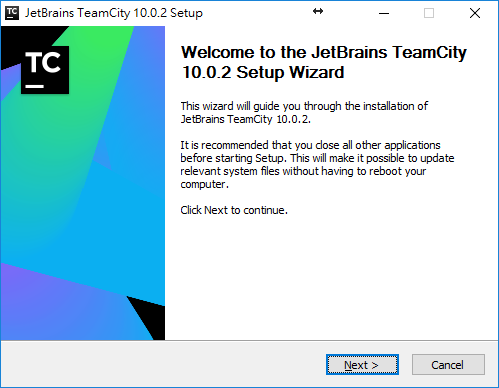
Step 2 點選 Next
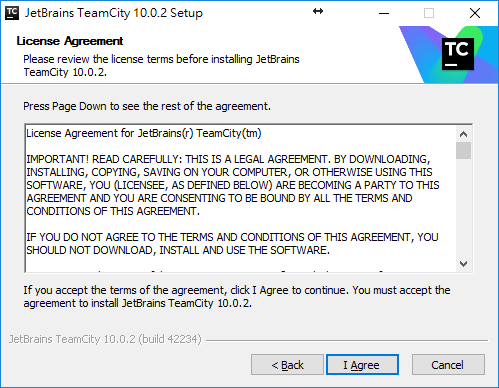
Step 3 點選 I Agree
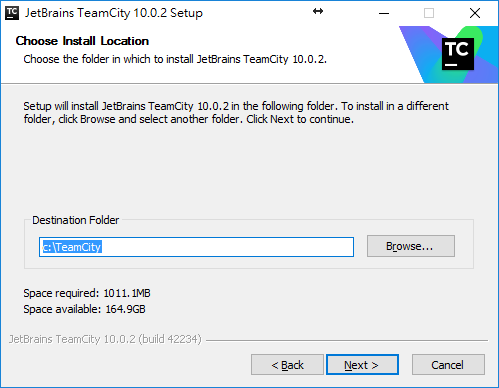
Step 4 選擇安裝路徑 -> 點選 Next
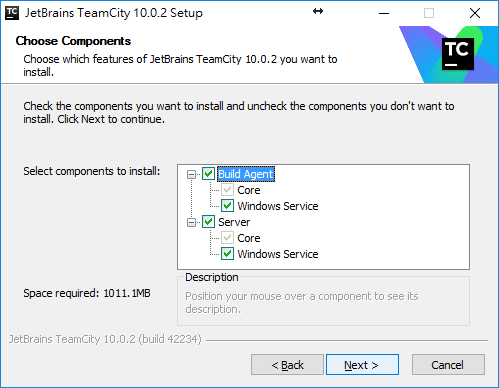
Step 5 選擇安裝元件 -> 點選 Next
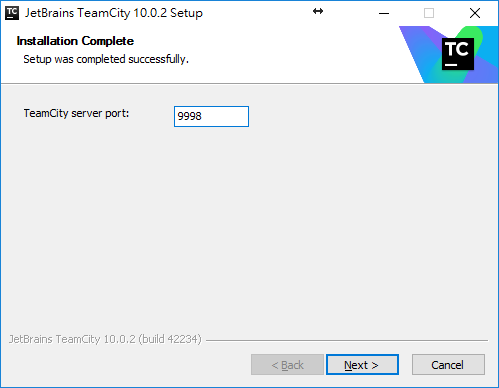
Step 6 輸入 TeamCity Server 想使用的 port 號 -> 點選 Next
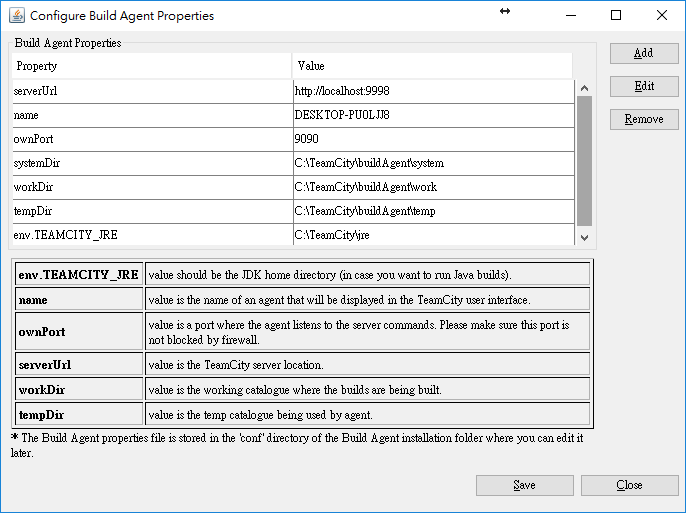
Step 7 設定第一個 Build Agent 資料 -> 點選 Save
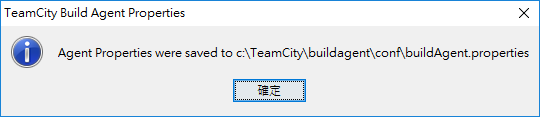
Step 8 成功儲存後,會出現提示訊息
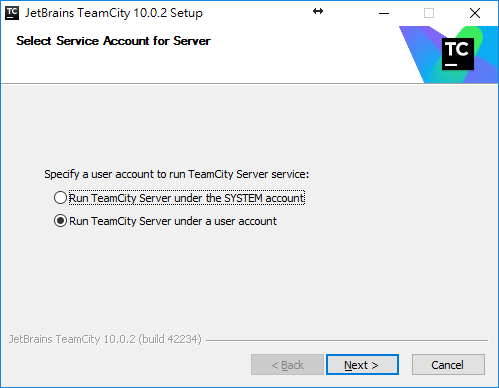
Step 9 選擇帳號(我們這次安裝選擇第一項)
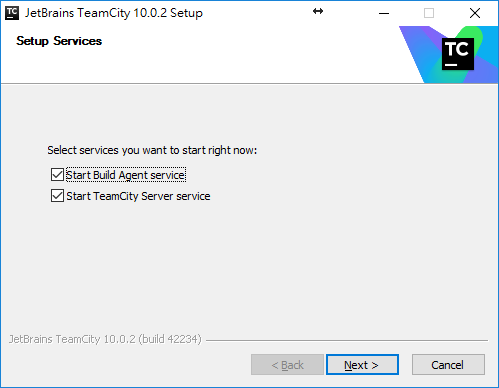
Step 10 選擇立刻要啟動的服務
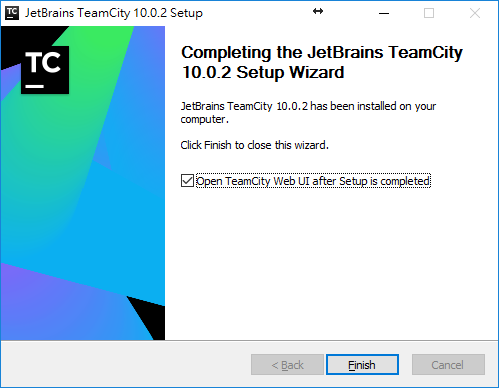
Step 11 安裝完成,點選 Finish
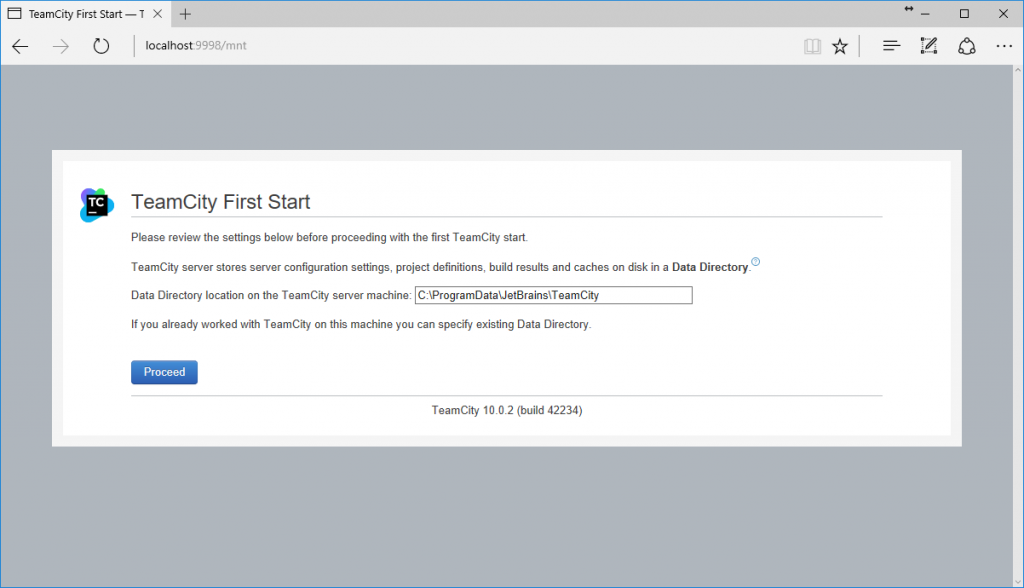
Step 12 開啟瀏覽器,輸入網址 http://localhost:9998 (您安裝時的預設值)
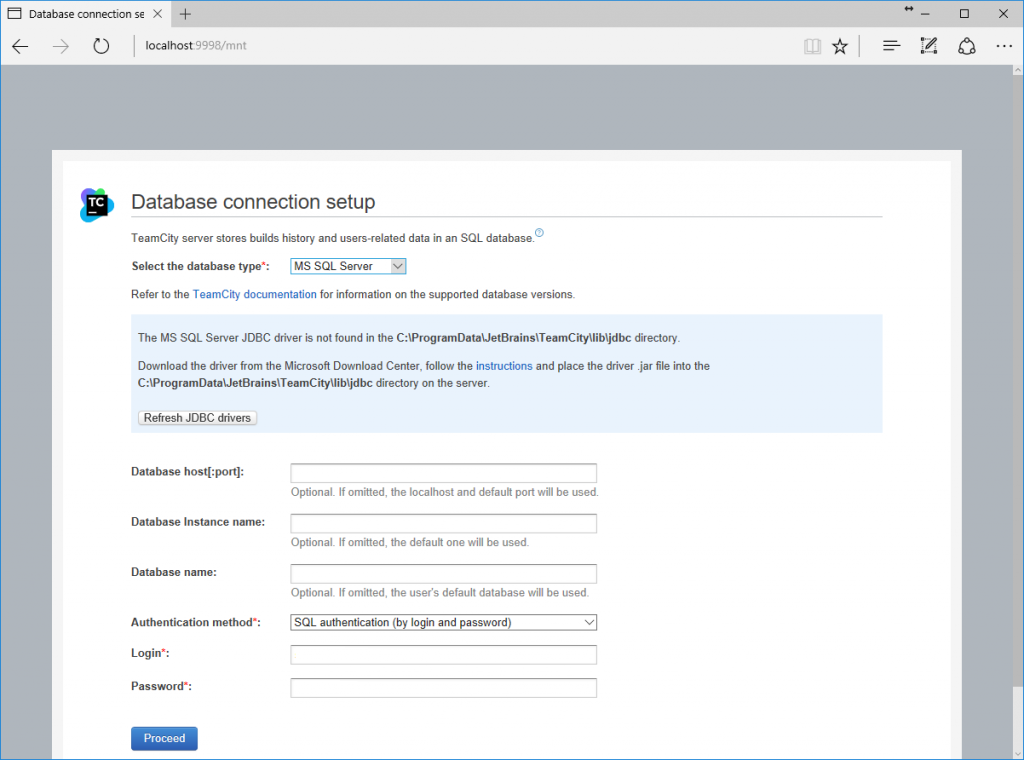
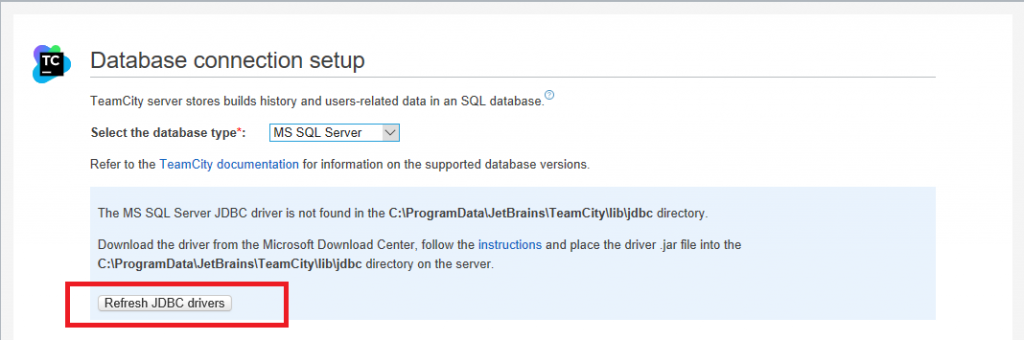
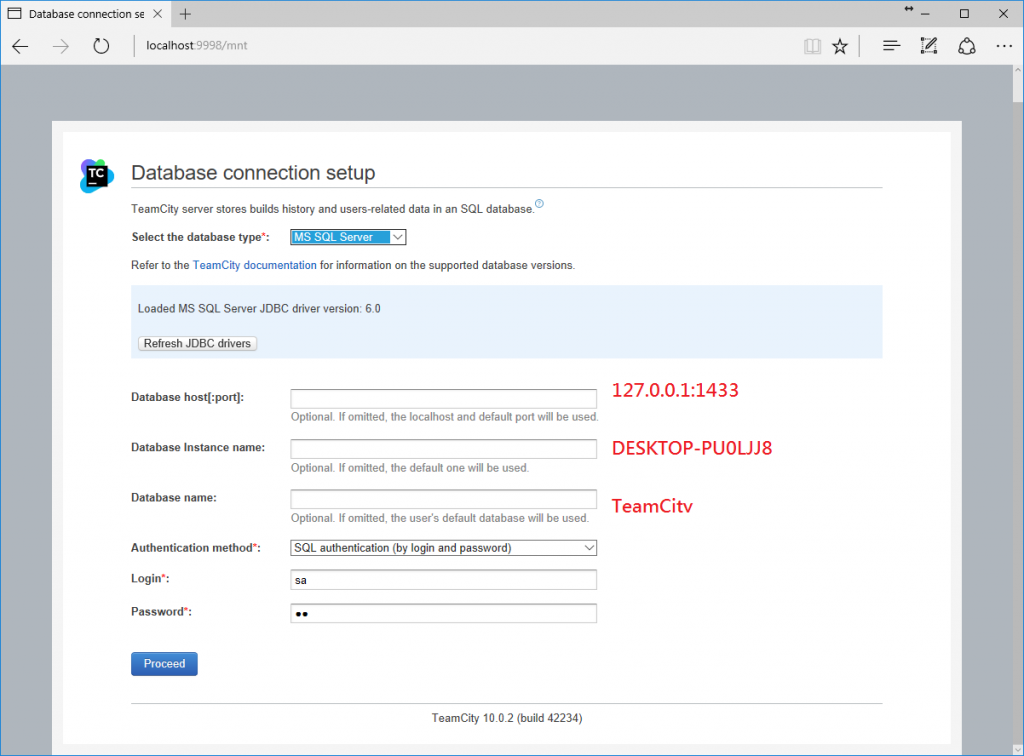
Step 13 第一次進入的時候需要設定資料庫:我們選擇MS SQL Server
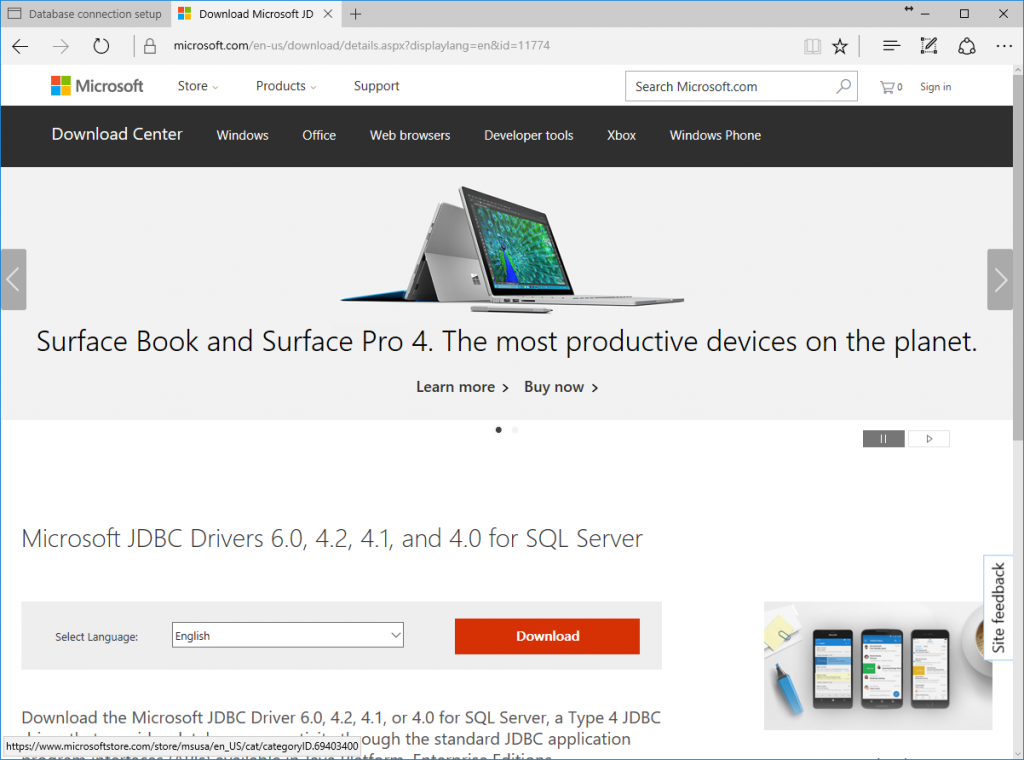
Step 14 接下來,我們必須先安裝 Microsoft JDBC Driver for SQL Server。下載連結
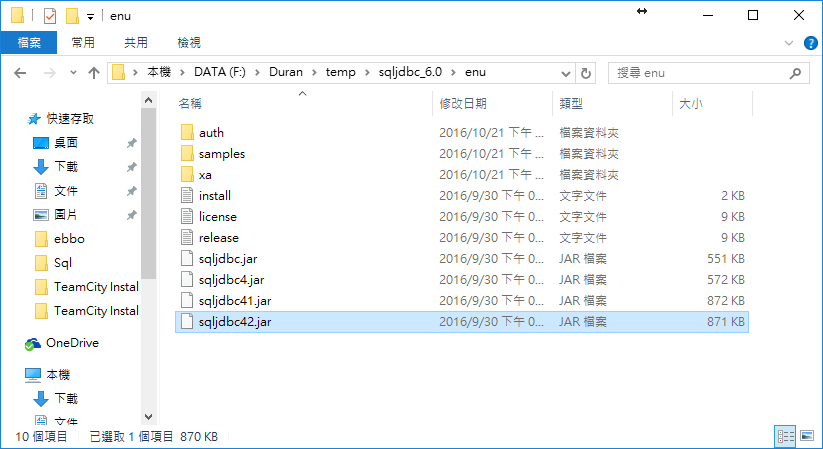
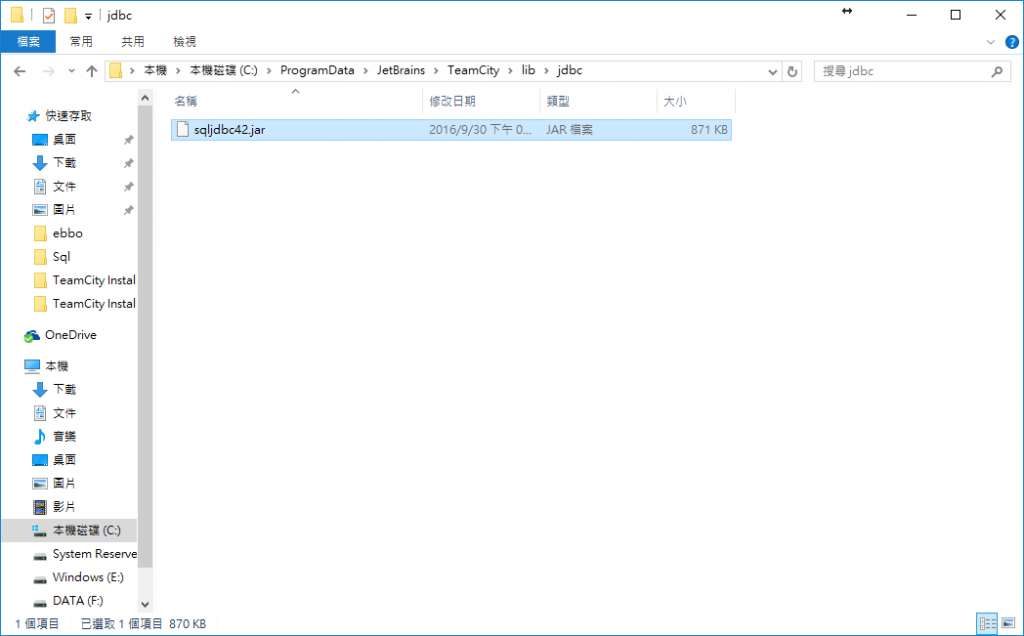
Step 15 將下載資料內 sqljdbc42.jar 依照安裝畫面指示,放入ProgramData\JetBrains\TeamCity\lub\jdbc
Step 16 回到安裝畫面,點選 Refresh JDBC drivers
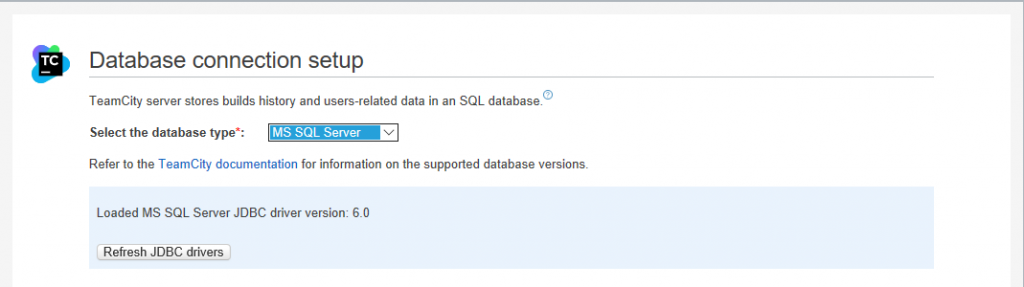
Step 17 偵測到 JDBC 版本
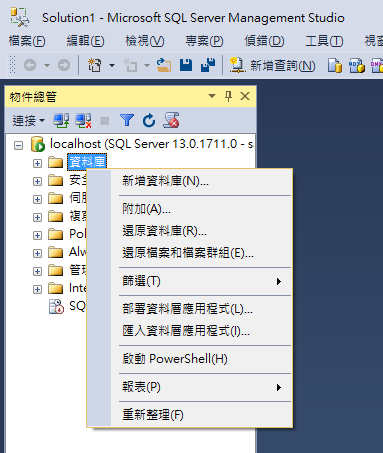
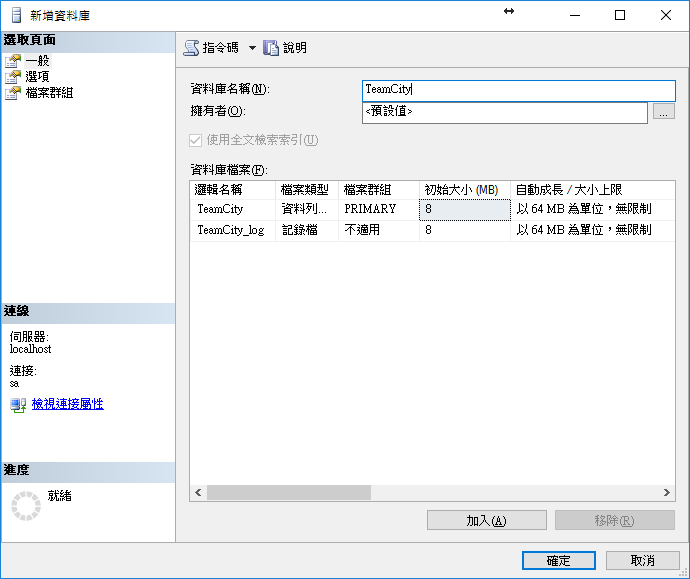
Step 18 接下來,我們必須先回到資料庫進行設定,開啟MS SQL Server Management Studio,對資料庫點選右鍵 -> 點選新增資料庫。
Step 19 輸入資料庫名稱:TeamCity -> 點選確定
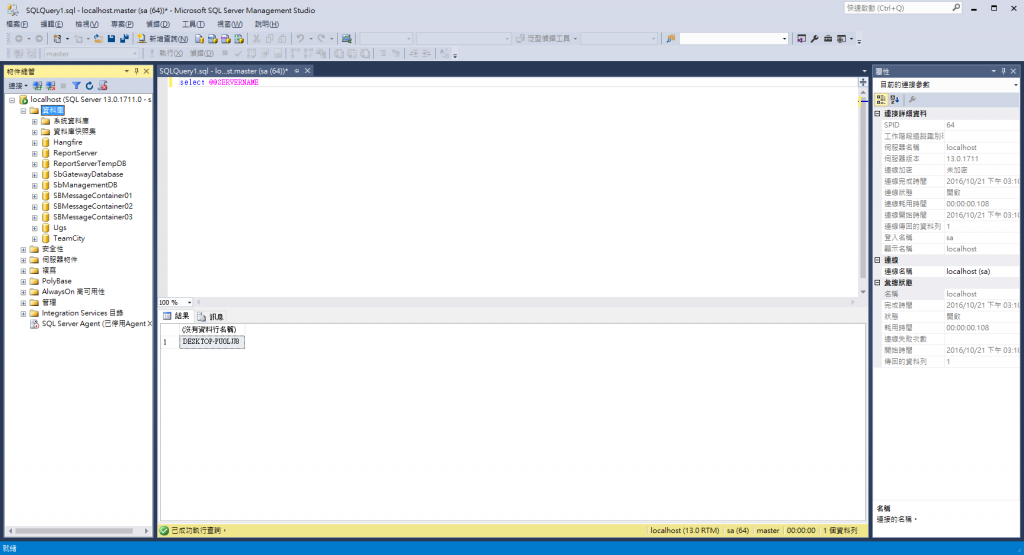
Step 20 新增完成後,點選上方新增查詢,輸入指令查詢DB instance name(等等輸入資料會用到)
Select @@SERVERNAME
Step 21 依序輸入相關資訊(如圖所示,第二項為 Step 20 所查詢的資料)
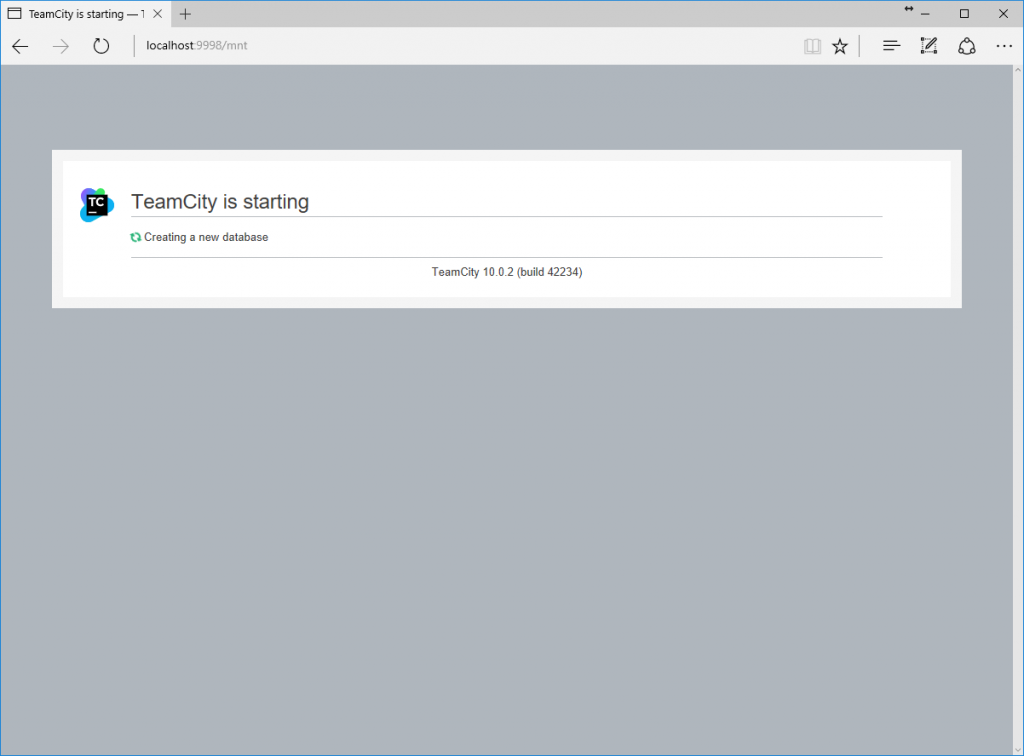
Step 22 點選確定,TeamCity建立資料庫中...
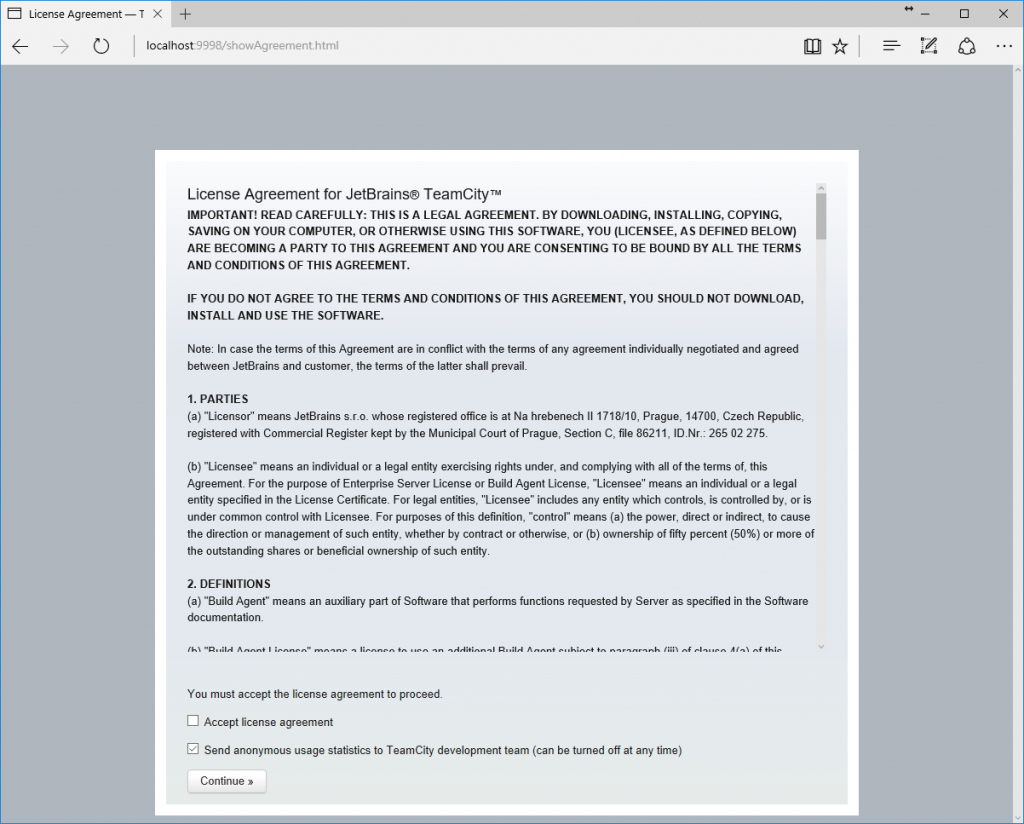
Step 23 勾選 Accept license argeement -> 點選 contunue
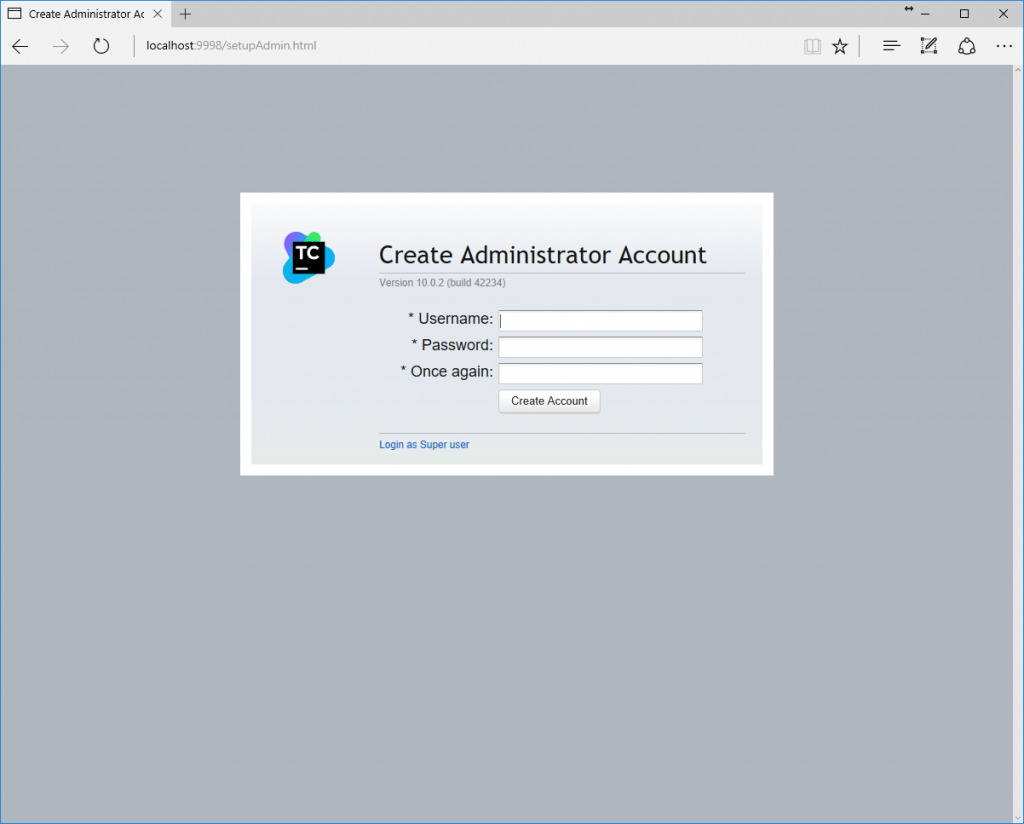
Step 24 建立您的帳號密碼
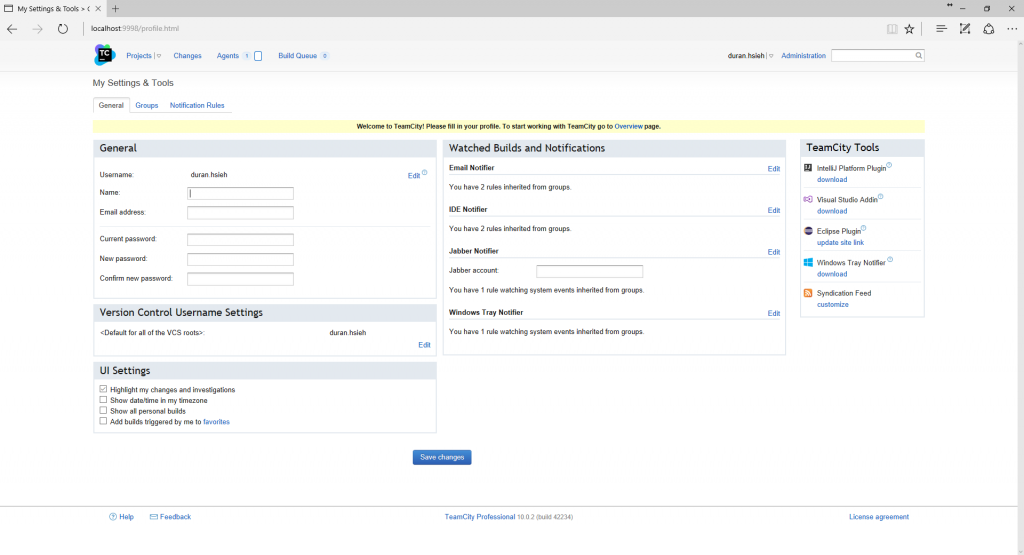
Step 25 TeamCity 個人設定畫面
到這邊,我們已經完成 TeamCity 安裝。下一章節我們將講解如何增加 Agent。
上一篇:序
下一篇:如何在 TeamCity 增加 Agents
返回目錄
參考資料
http://www.petekcchen.com/2015/04/teamcity-introduction-and-installation.html
註:本系列文章將於2016 IT邦幫忙鐵人賽進行同時,一併發佈於個人blogger與dotblog。