隨手紀錄安裝多版本的方式,同時多版本的安裝也能滿足在Mac OS 雙開專案的可行性
官方文件(2016/09/02):Installing Multiple Versions of Unity
PC
- Install Unity 4.0 (www.unity3d.com/download)
- When you install on PC it will select the previously installed directory - do not install here
- Create a new directory named sensibly e.g. “Unity_4”
- Name any shortcuts so you know which version you are launching
- Hold Alt when you launch the editor to force Unity to let you choose which project to open (otherwise it will try and upgrade the last opened project)
- Choose your projectname_4 directory to open your backed up project
Do not rename each Editor folder inside a single Unity folder! You will overwrite the MonoDevelop folder and this will causeserious stability problems and unexpected crashes.
Mac
The installer for Mac will always install Unity into a folder called
/Applications/Unity. This will overwrite any previous install in that folder. On the Mac the folder name can be changed without it affecting Unity provided Unity is not running.
- Find your existing Unity application folder and rename appropriately e.g
/Applications/Unity350.- Install Unity 4.x (downloaded from www.unity3d.com/download).
- Name any shortcuts so you know which version you are launching
- Hold Alt when you launch to force Unity to let you choose which project to open (otherwise Unity will load the last opened project and and upgrade it.)
- Choose your projectname_4 directory to open your backed up project
以上是官方的文件說明,因為Unity最近這幾年文件的頁面名稱常常更改,所以網路上找到的教學提供的網址常常會掛掉
所以說自訂頁面名稱不要一直改是有道理的
然後簡單記一下圖解
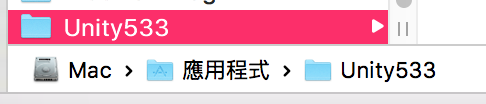
首先如果你是MAC,你要找到你應用程式的資料夾中的Unity,將整個資料夾重新命名,建議是以自己能辨識的名稱為主所以我們通常是加上版本號
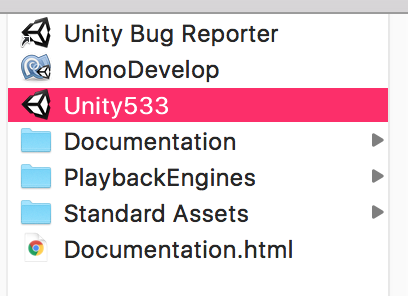
 接著把裡面的Unity執行檔也改名稱,這邊就不是一定要改,可是一般來說我們為了鑑別開的是什麼版本也建議修改
接著到官網下載,一路使用懶人點選法什麼都不看就按確認安裝的版本,等待安裝完畢
安裝完之後一樣把安裝完的Unity資料夾更改成方便識別的資料夾名稱,連帶底下的執行檔也修改
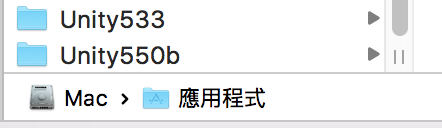
完成了,這樣你就可以同一台電腦上開啟兩個以上不同版本的專案了,當然你硬碟空間太多你也可以安裝同個版本開

Windows 其實方法也相同,你改一下安裝的路徑就能裝了,甚至其實你想裝哪就裝哪沒差
參考來源:http://wordpress-tw.marcpov.com/install-multiple-unity-versions.htm
感謝觀看,若你能夠留下一些建議與感想
都會成為我寫文章的動力,感謝!!
