SignalR 2.0 Web 聊天室 Demo
SignalR 介紹:SignalR 再次超越你對 Web 的想像
環境:Visual Studio 2015 UPDATE 1
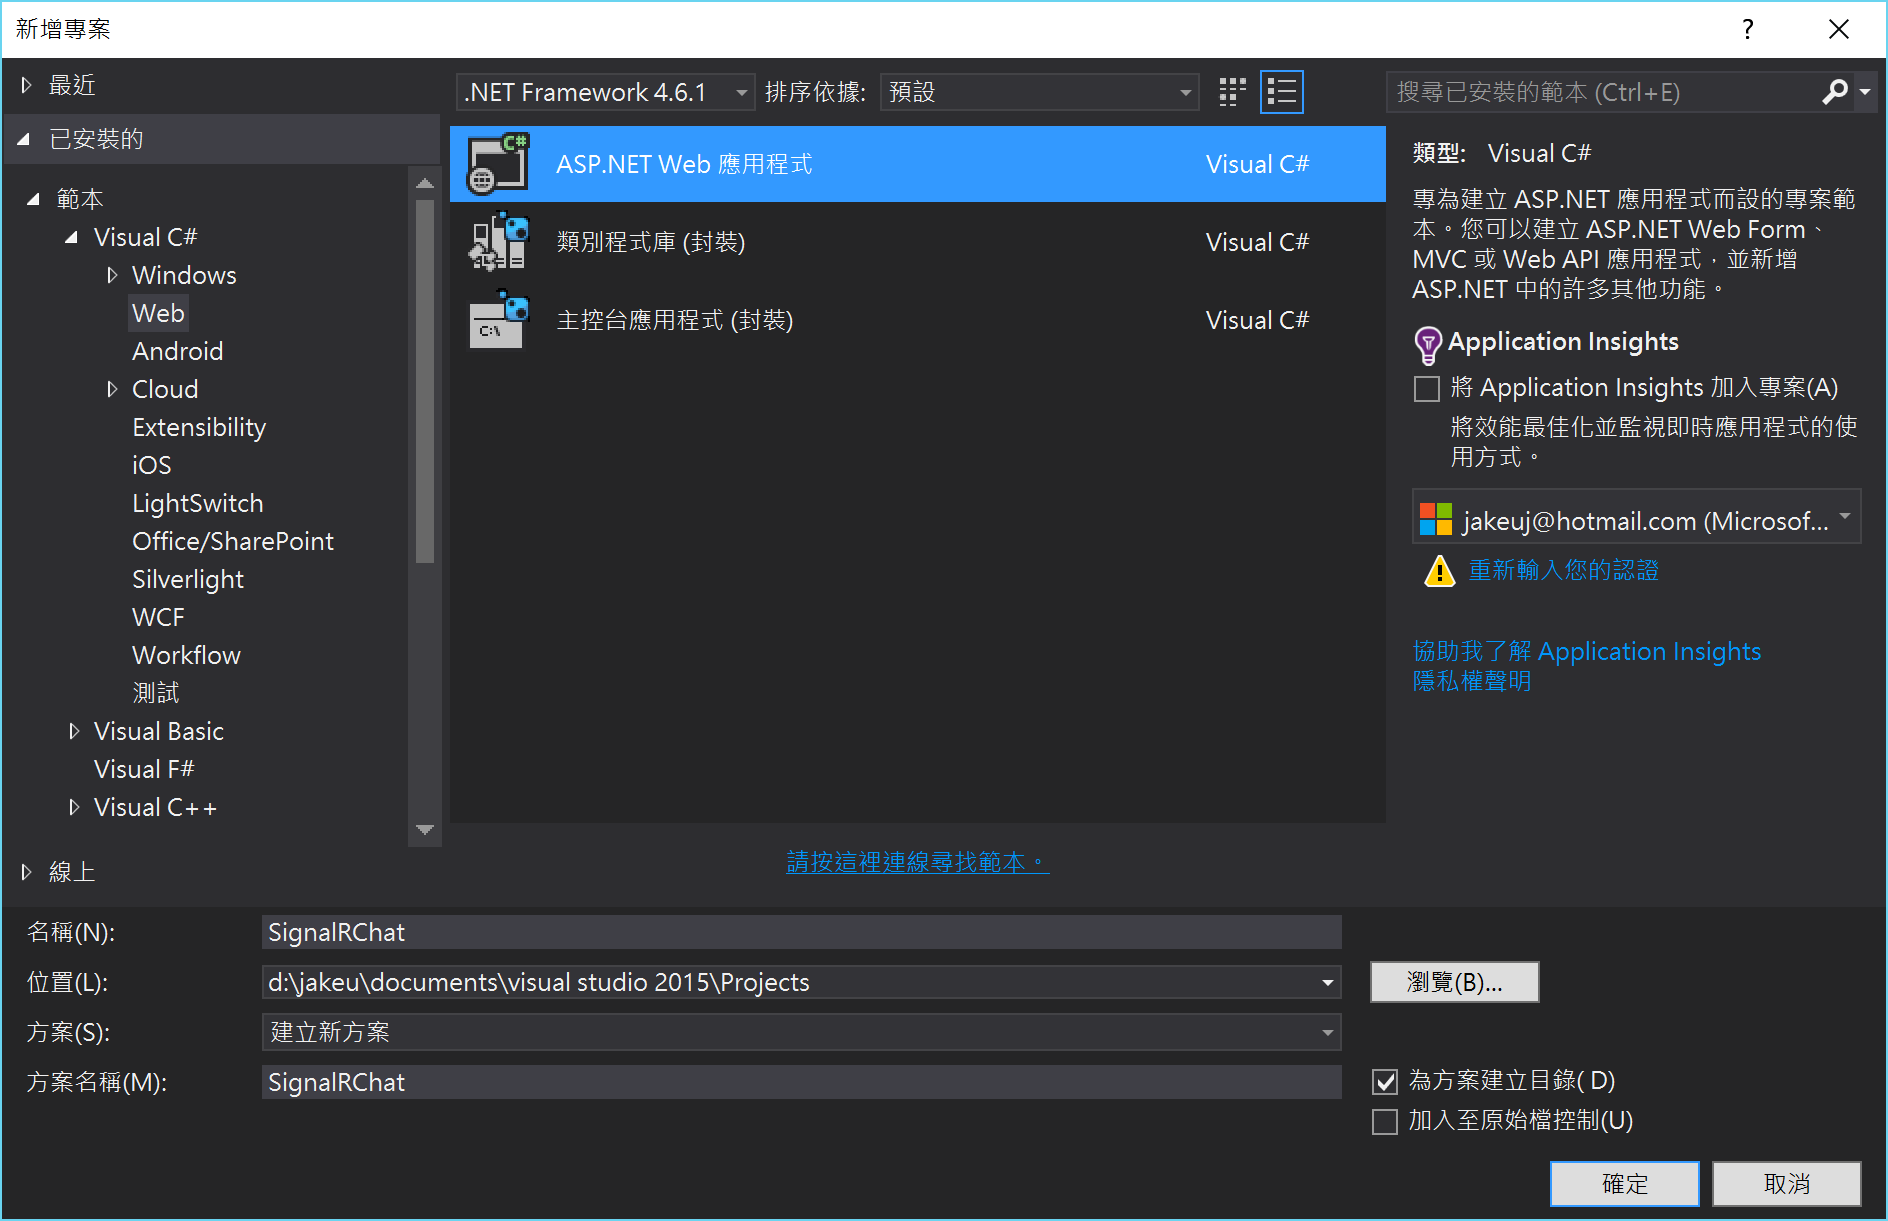
1.於Visual Studio建立C# ASP.NET Web 應用程式專案,框架使用.NET Framework 4.6.1,名稱為 SignalRChat 並按確定以新增專案。
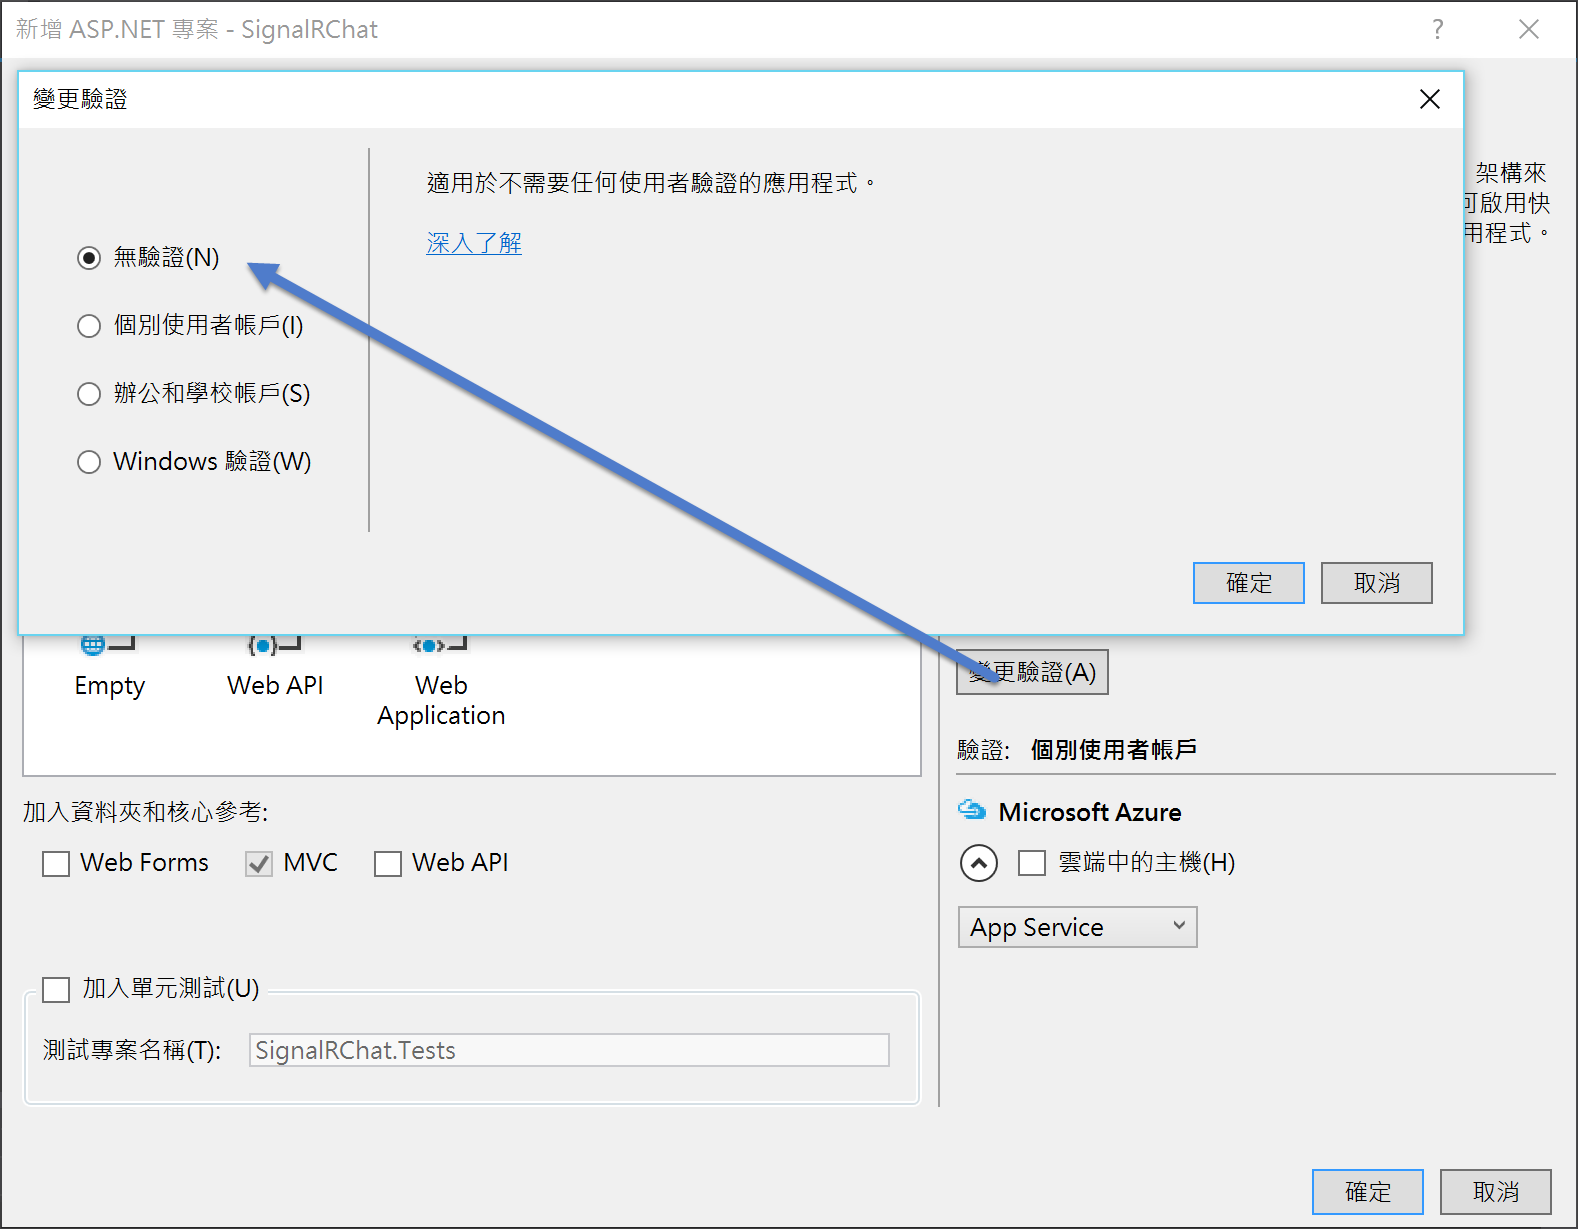
2.在 新增 ASP.NET 專案,選擇MVC,並於右方點擊"變更驗證",改為"無驗證",並按下確定以建立專案。

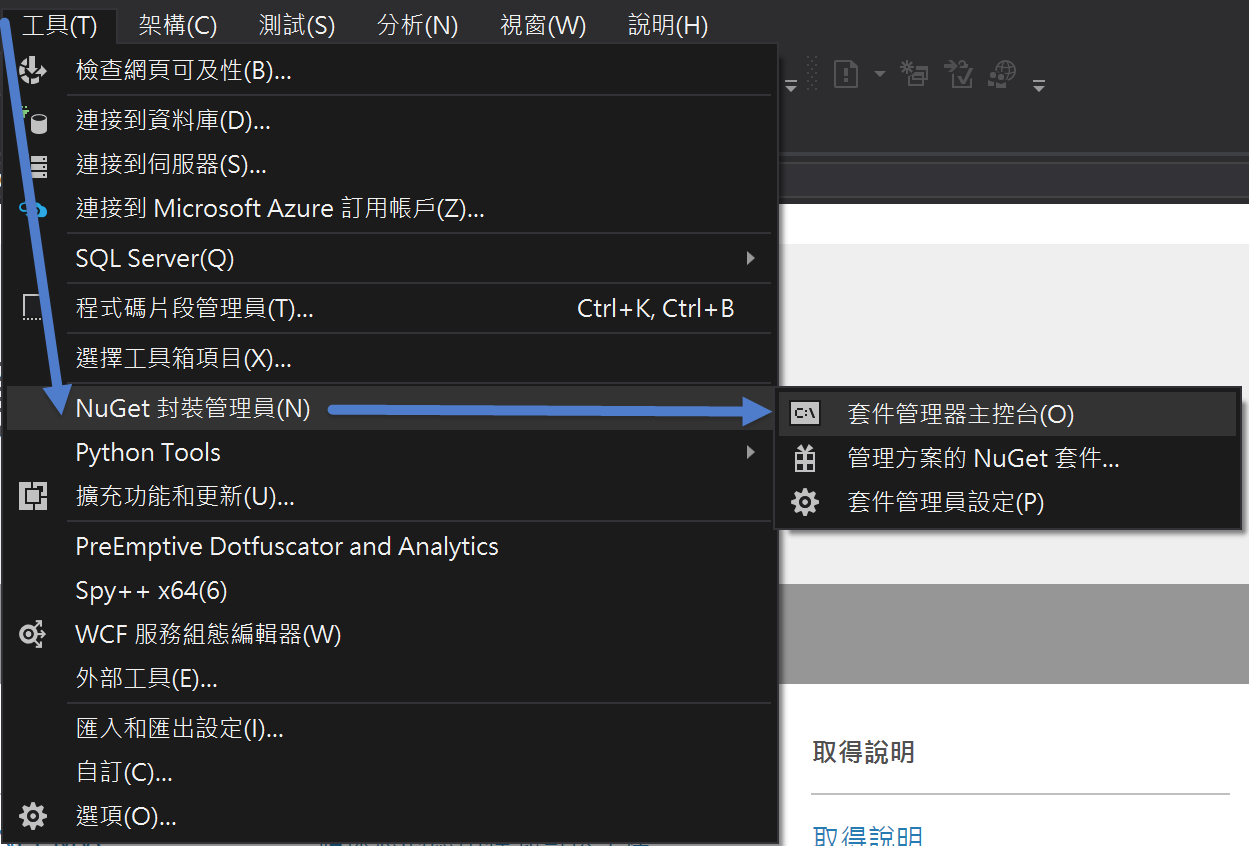
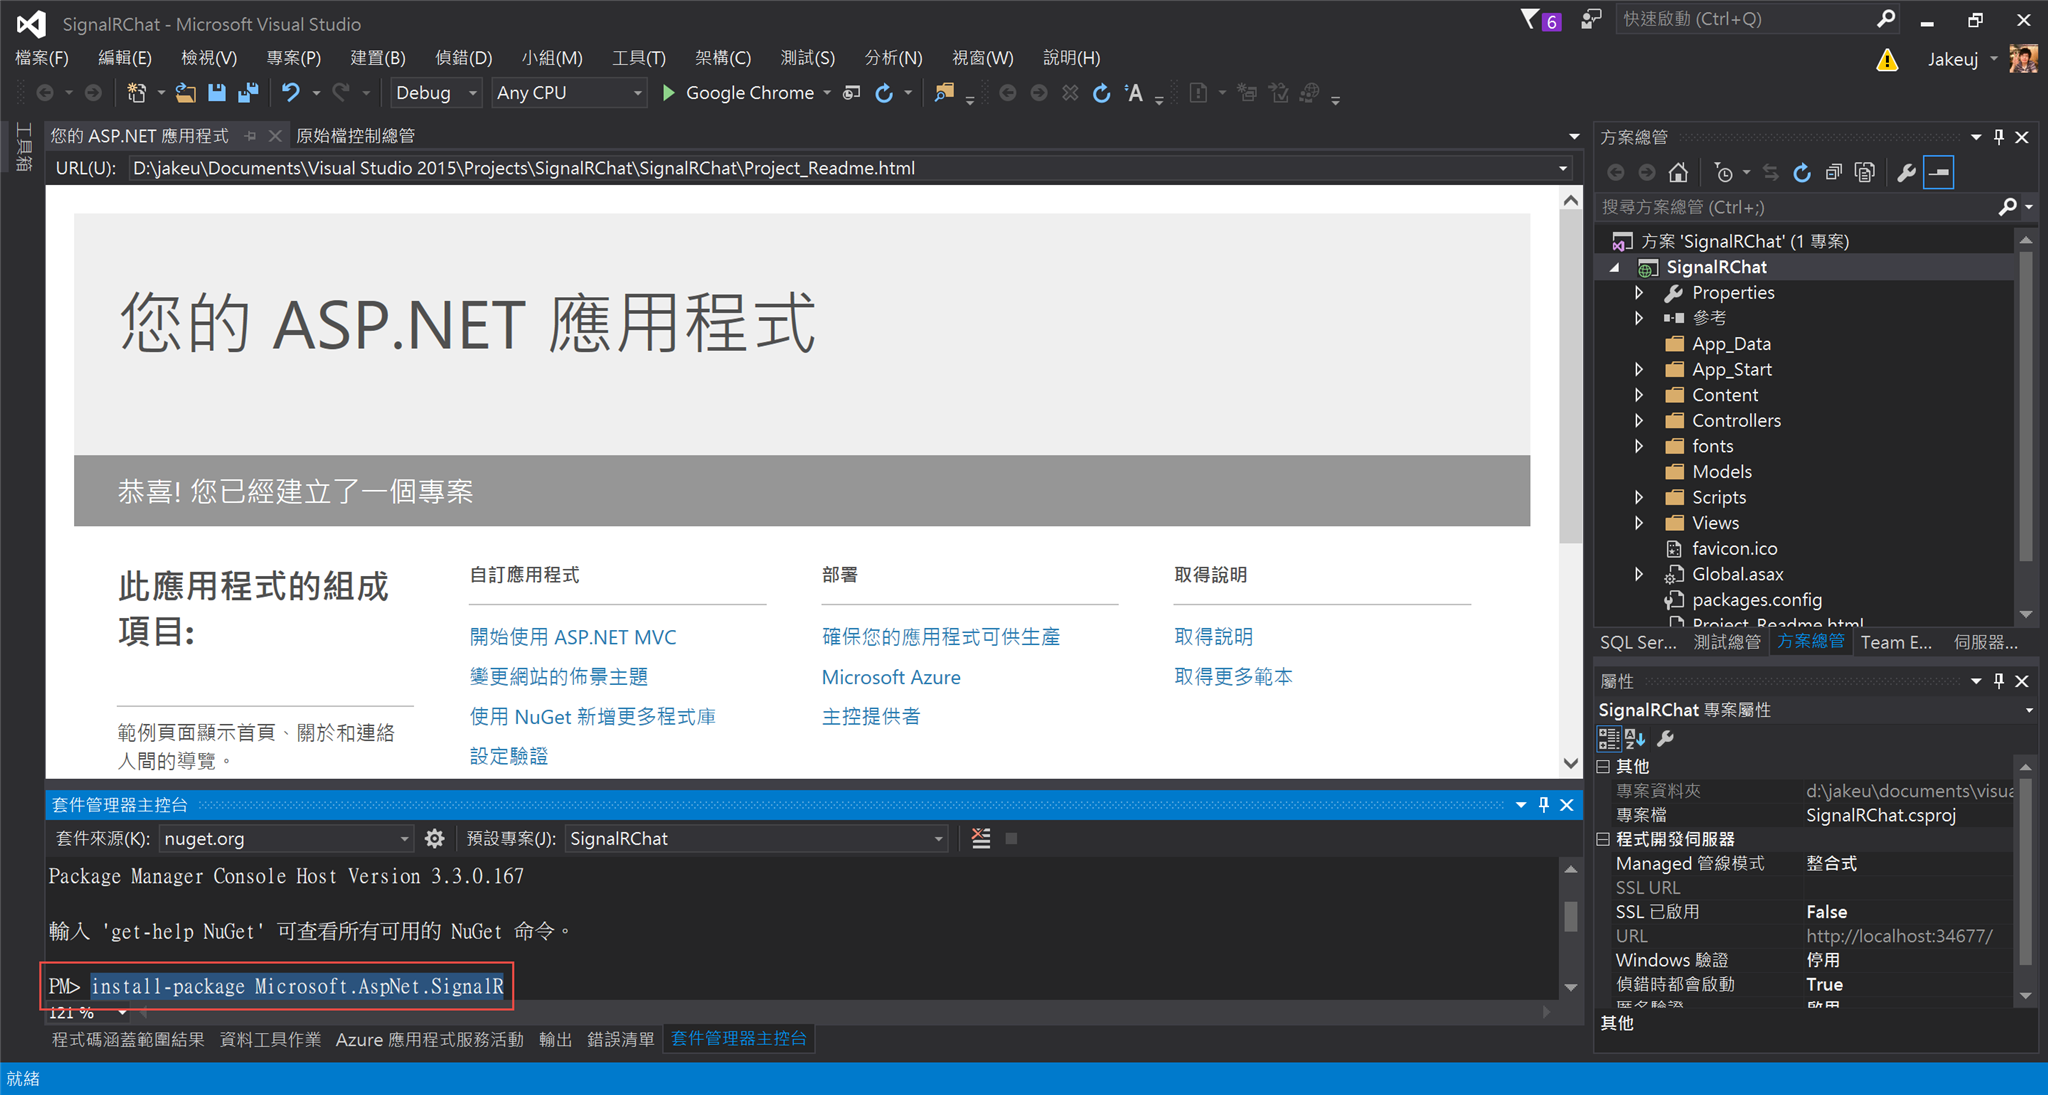
3.透過 NuGet 來安裝 SignalR 套件,使用 "套件管理器主控台" 輸入以下指令進行安裝:
install-package Microsoft.AspNet.SignalR
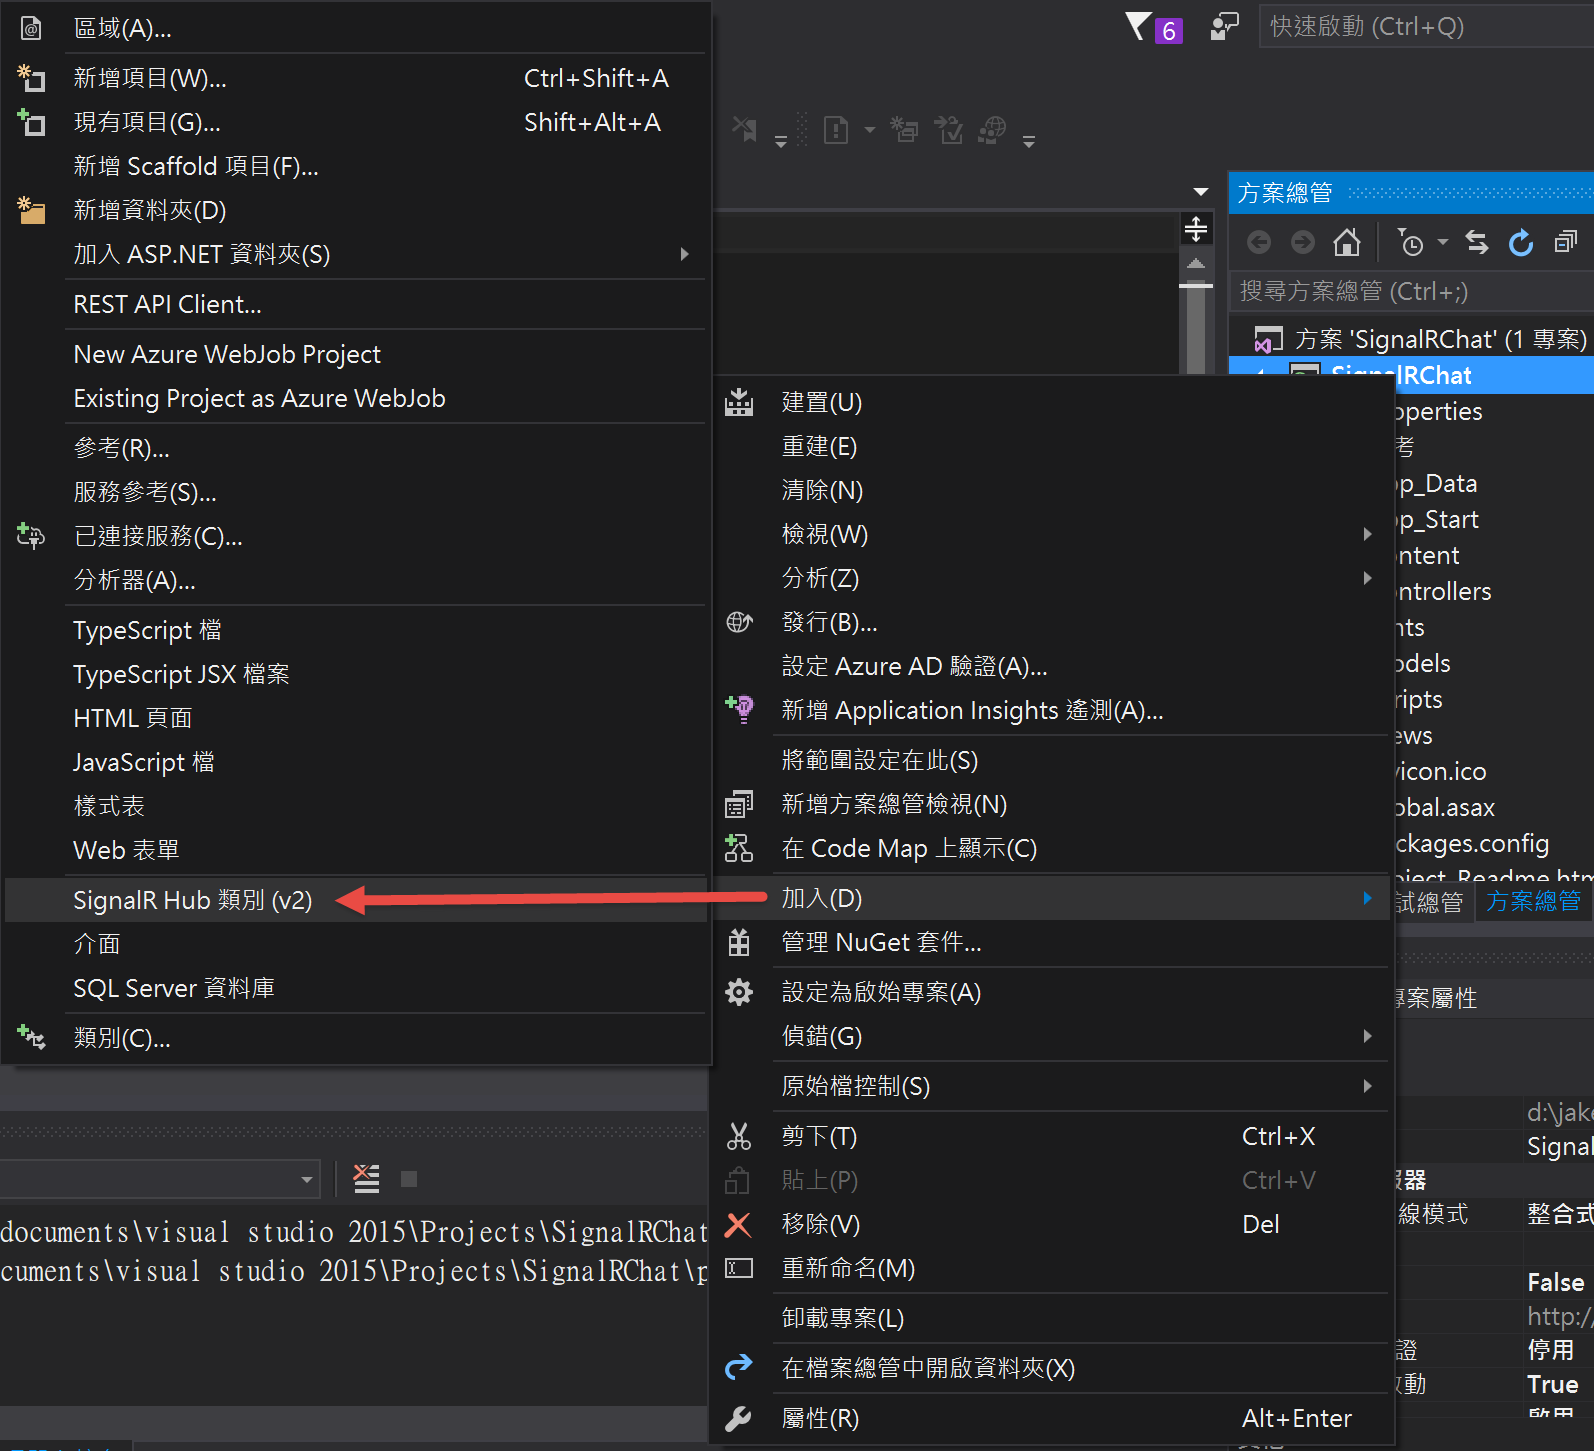
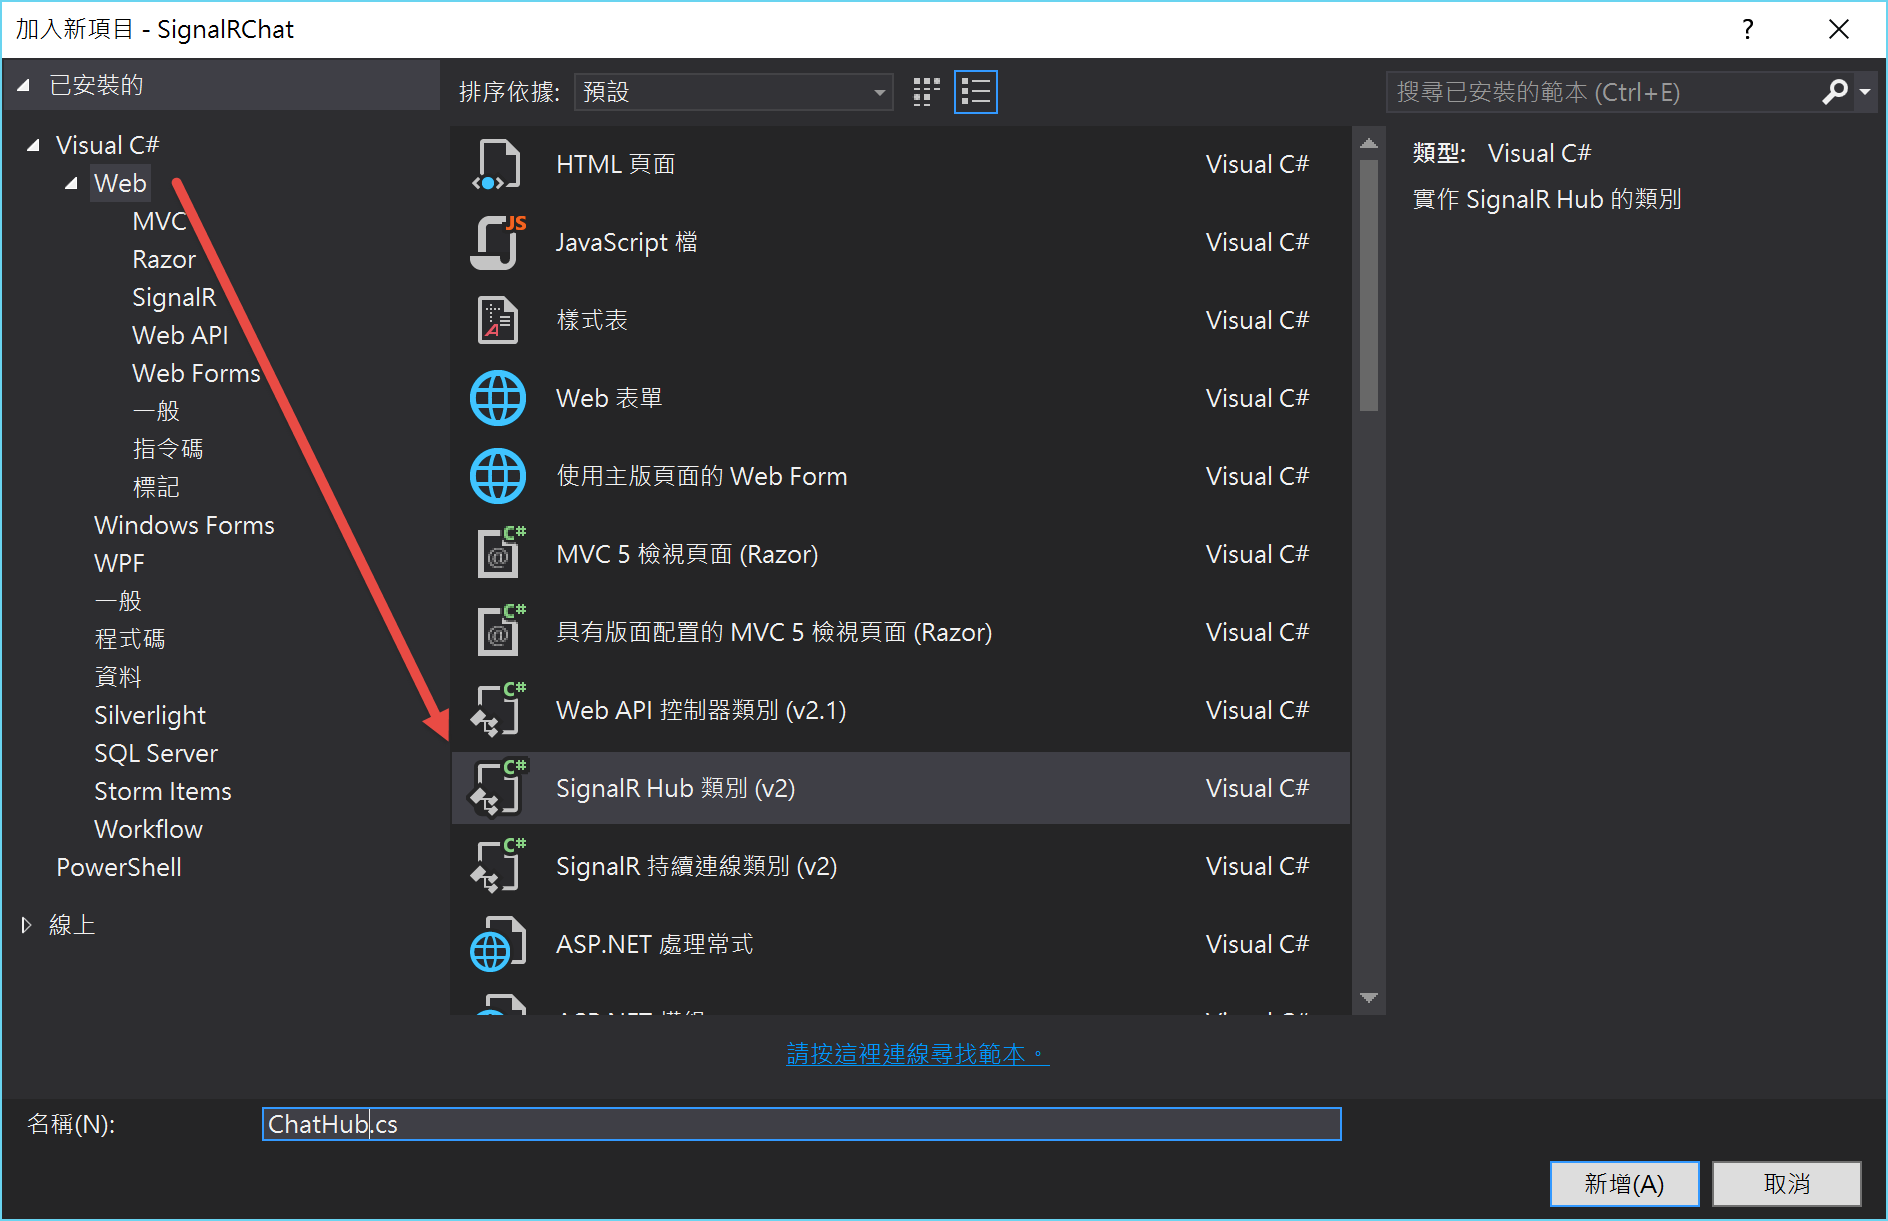
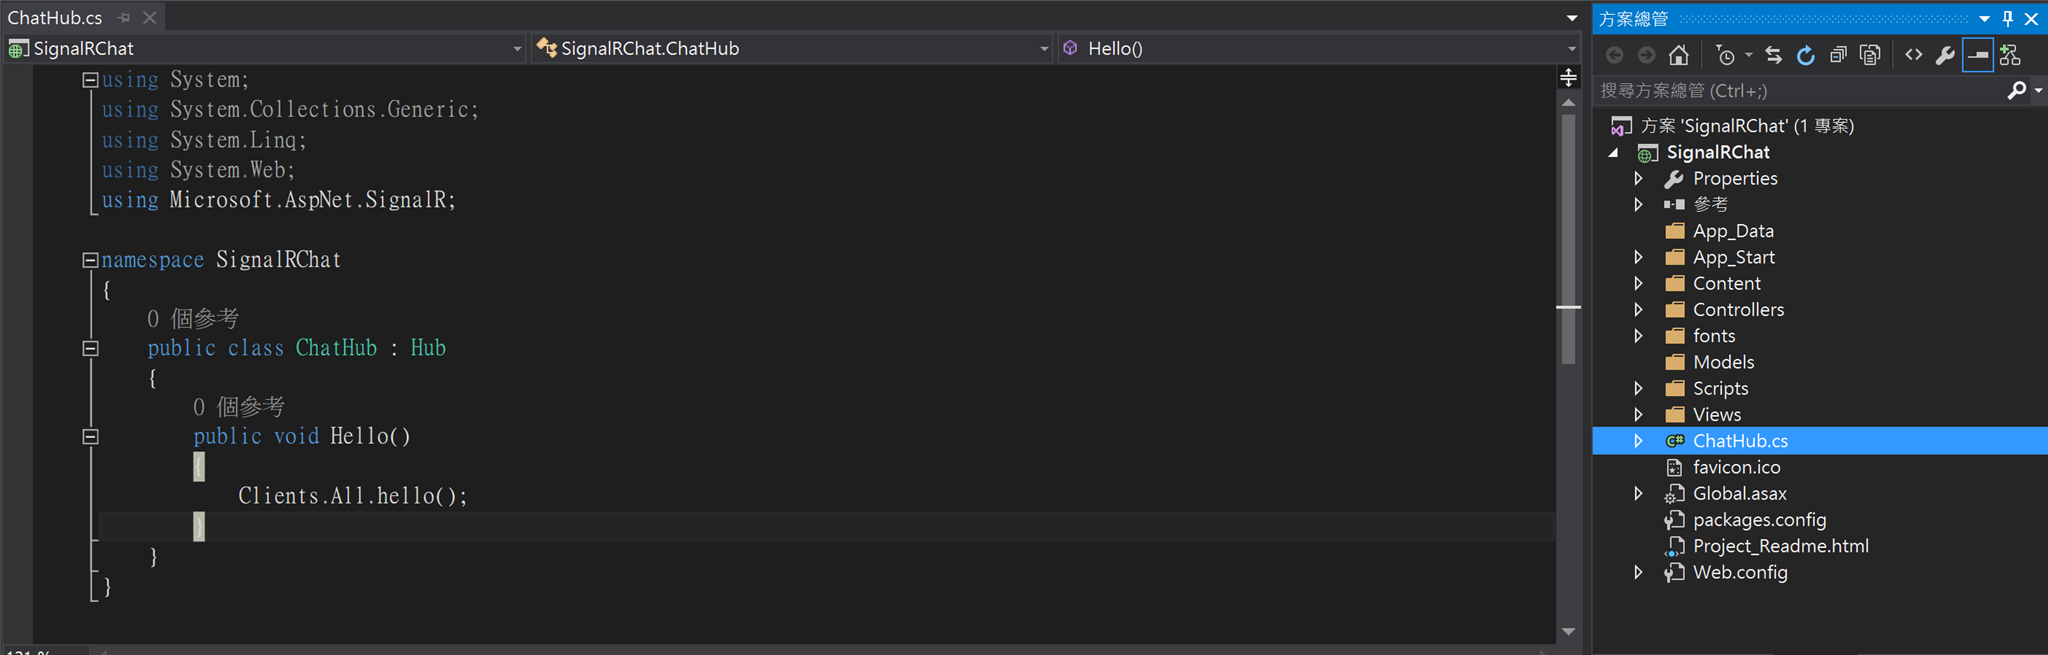
4.於專案跟目錄,新增一個 SignalR Hub Class (v2) 類別,且命名為 ChatHub.cs,並建立。
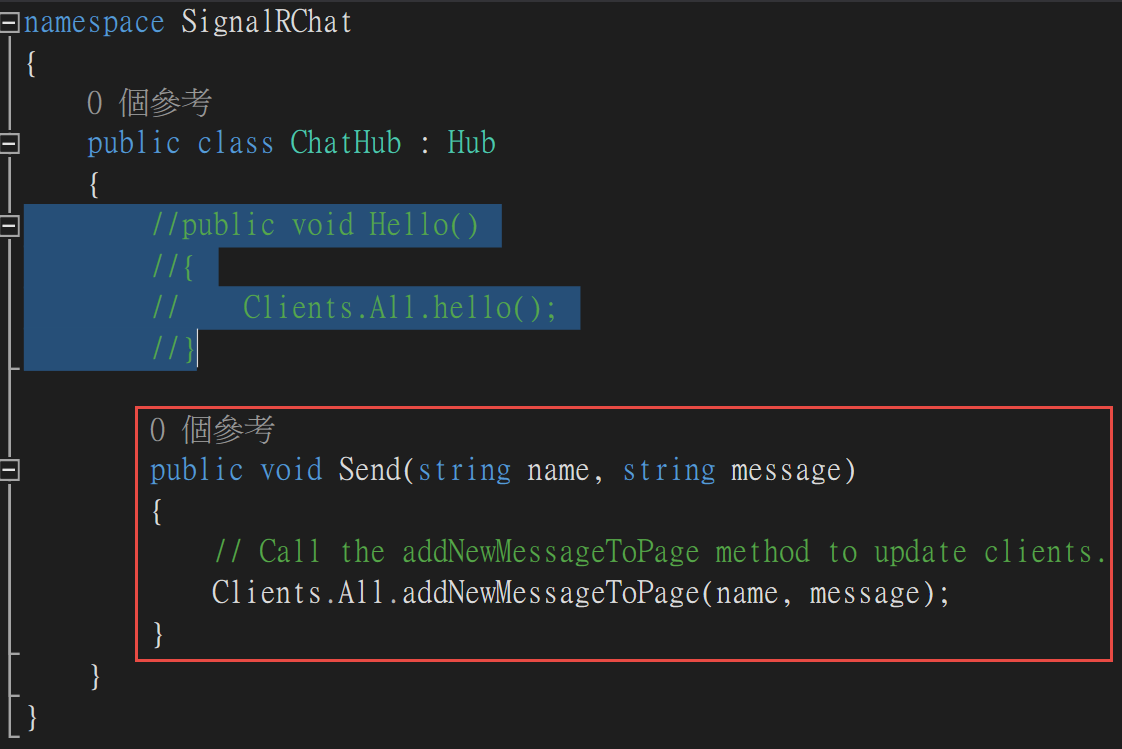
5.修改其內容以實作 SignalR Server
using Microsoft.AspNet.SignalR;

namespace SignalRChat
{
    public class ChatHub : Hub
    {
        public void Send(string name, string message)
        {
            // Call the addNewMessageToPage method to update clients.
            Clients.All.addNewMessageToPage(name, message);
        }
    }
}
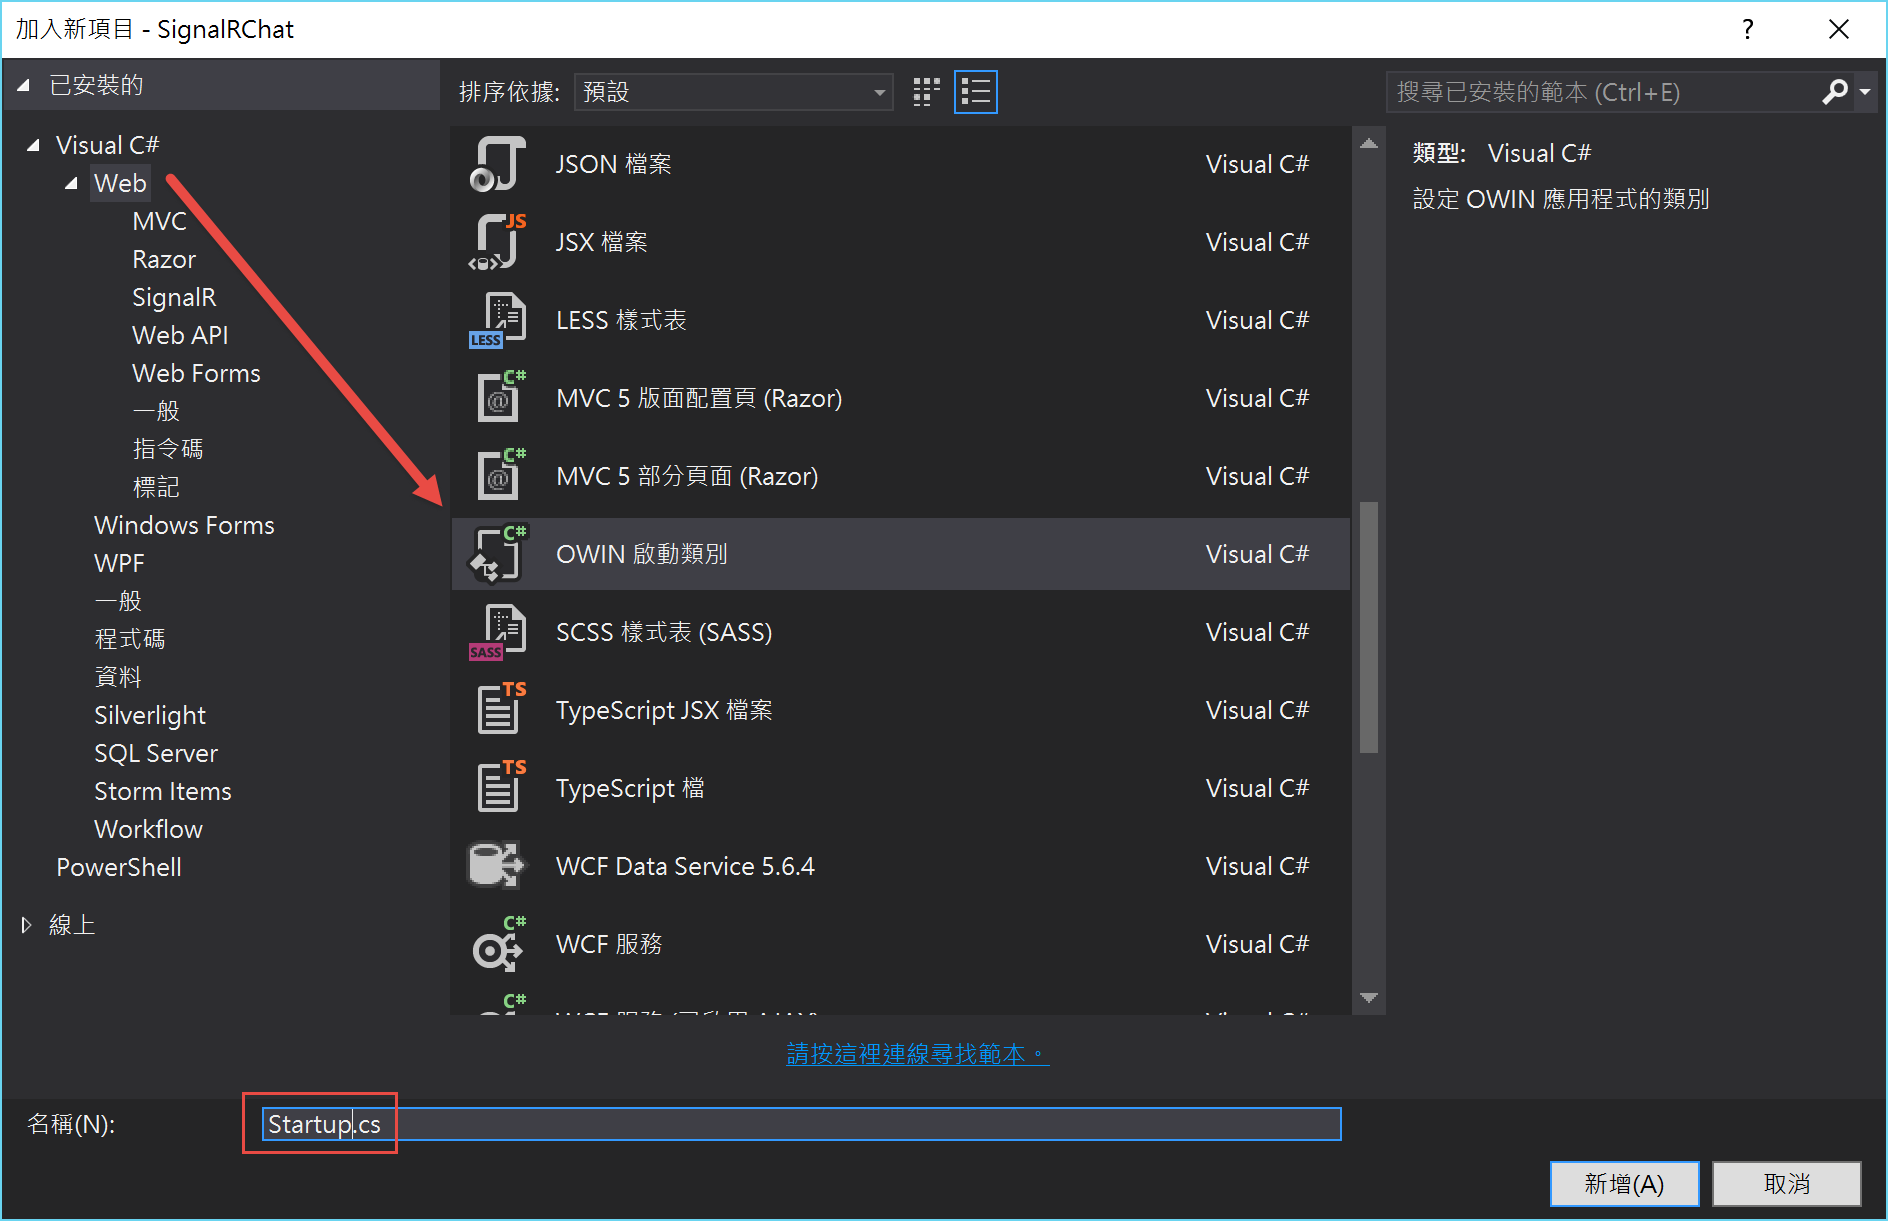
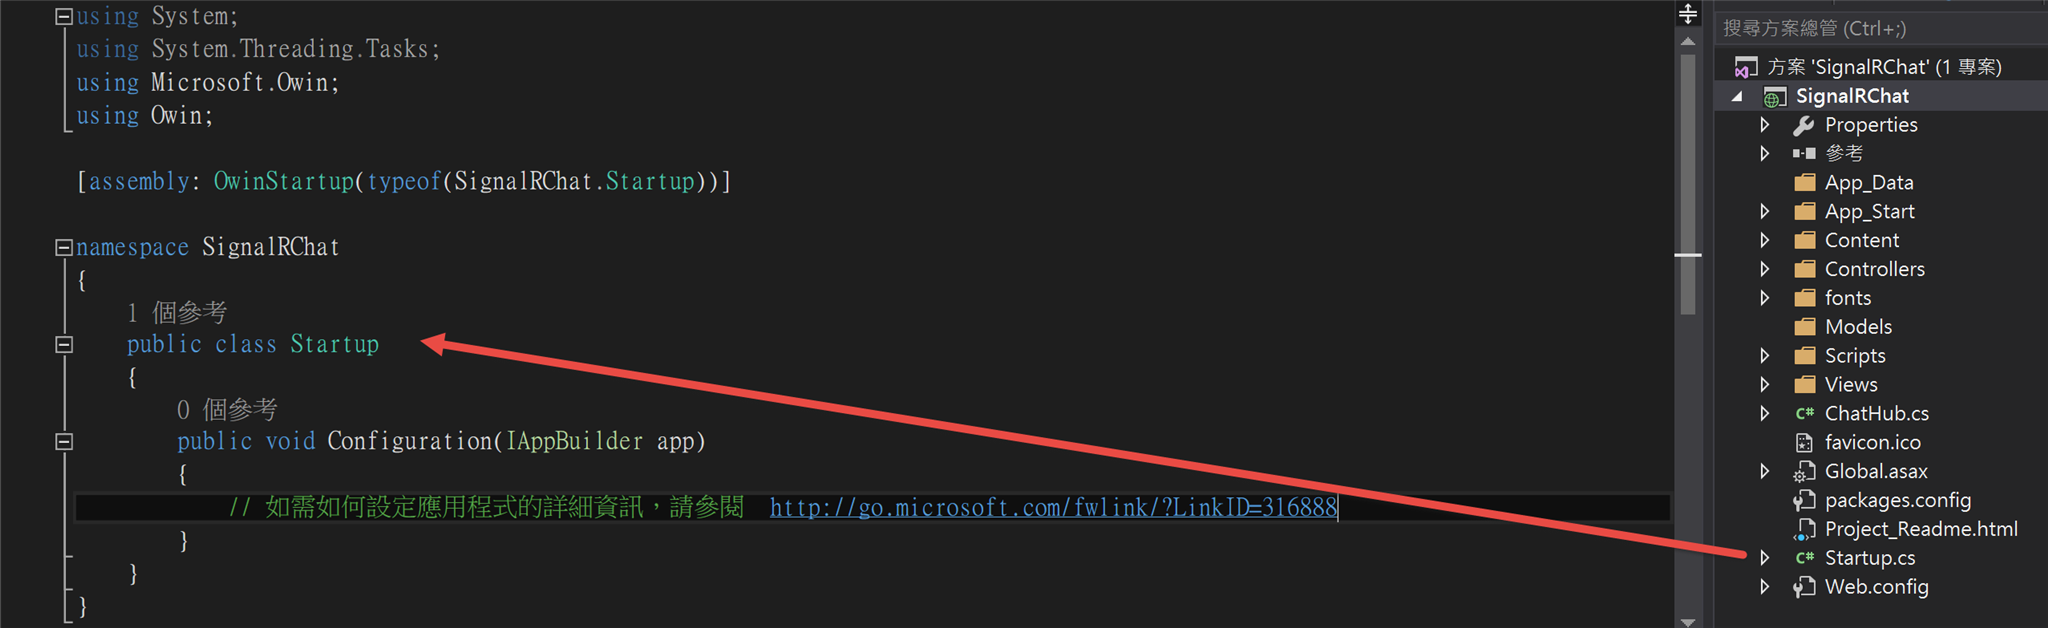
6.加上一個新項目 -- OWIN啟動類別(OWIN startup class),命名為"Startup.cs",並修改其內容
using Microsoft.Owin;
using Owin;
[assembly: OwinStartup(typeof(SignalRChat.Startup))]
namespace SignalRChat
{
public class Startup
{
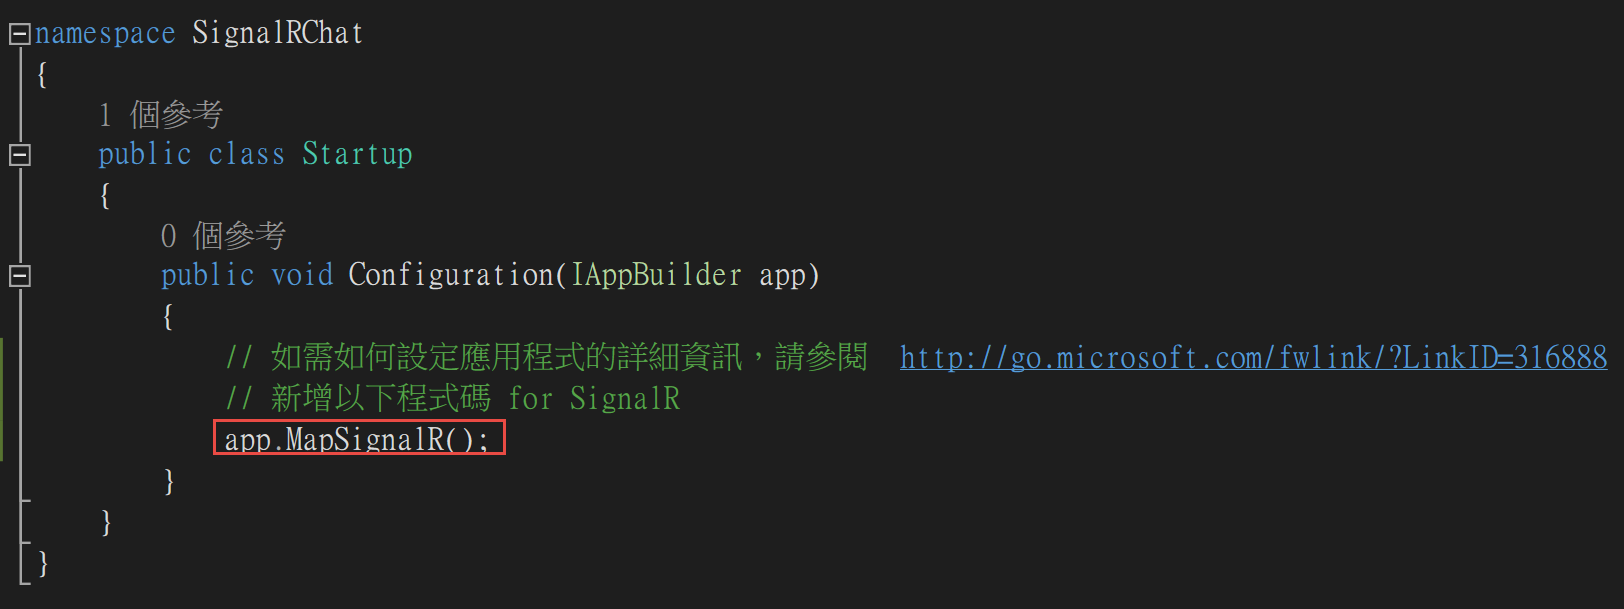
public void Configuration(IAppBuilder app)
{
// Any connection or hub wire up and configuration should go here
app.MapSignalR();
}
}
}
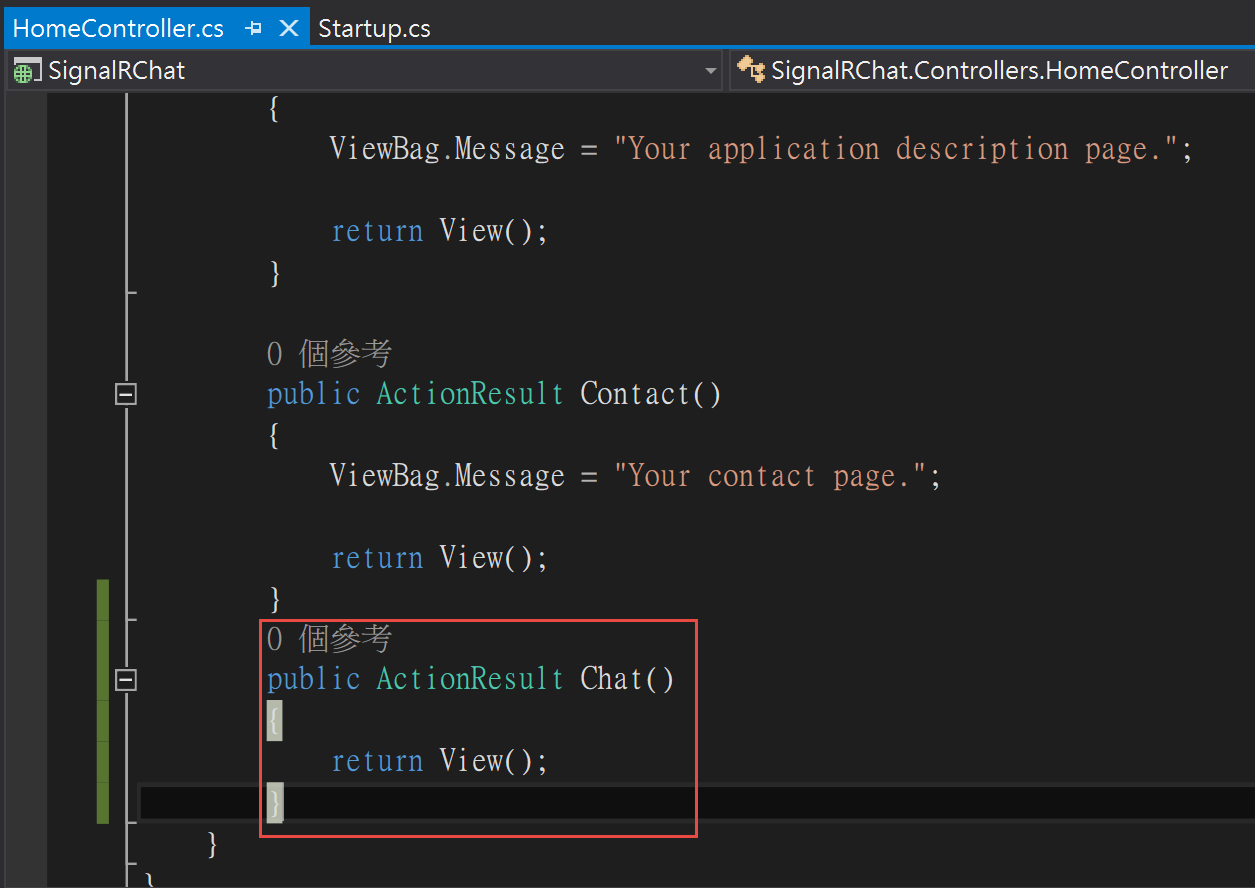
7.開啟Controllers/HomeController.cs,並增加Action方法,名稱為Chat,內容如下
public ActionResult Chat()
{
    return View();
}
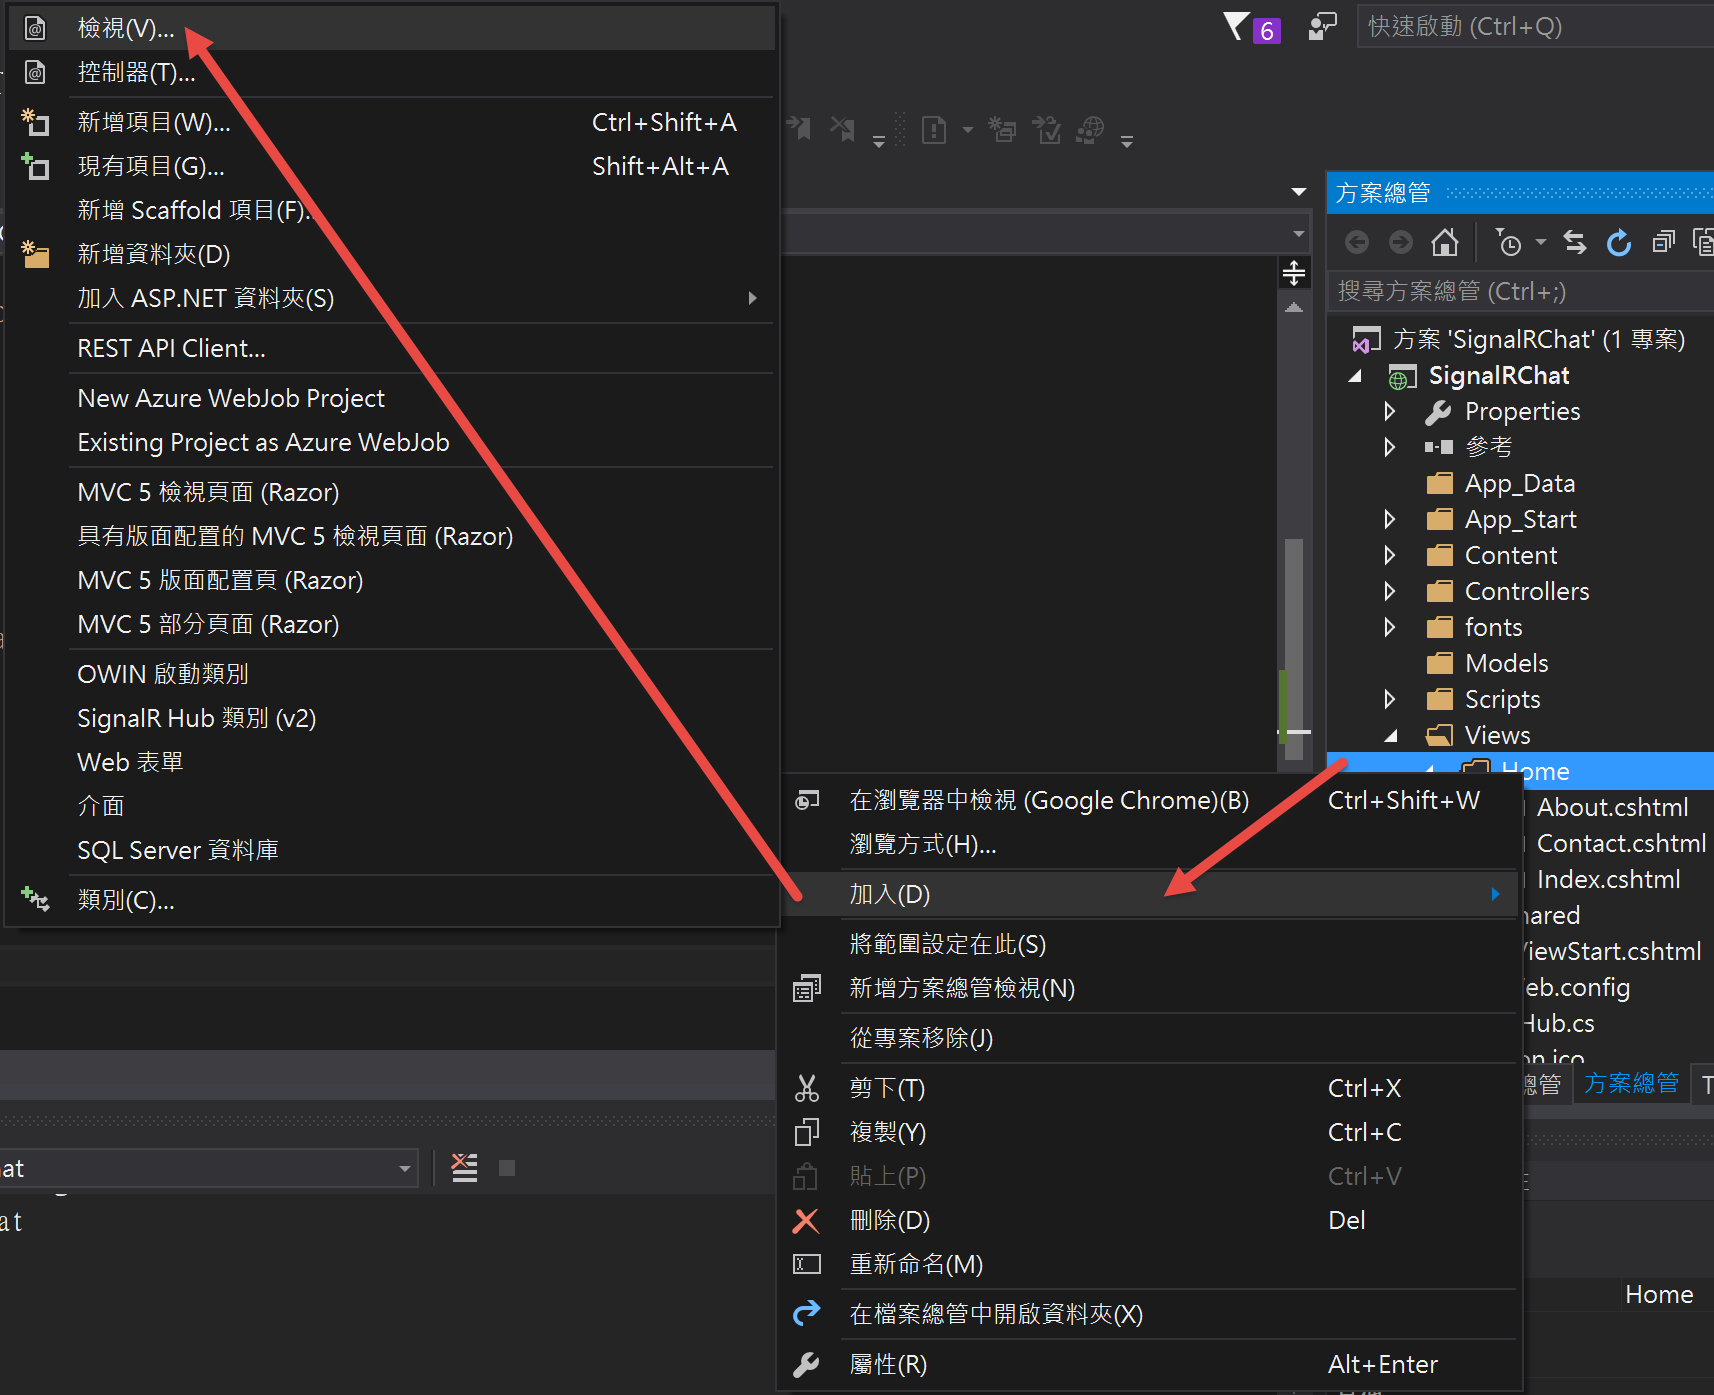
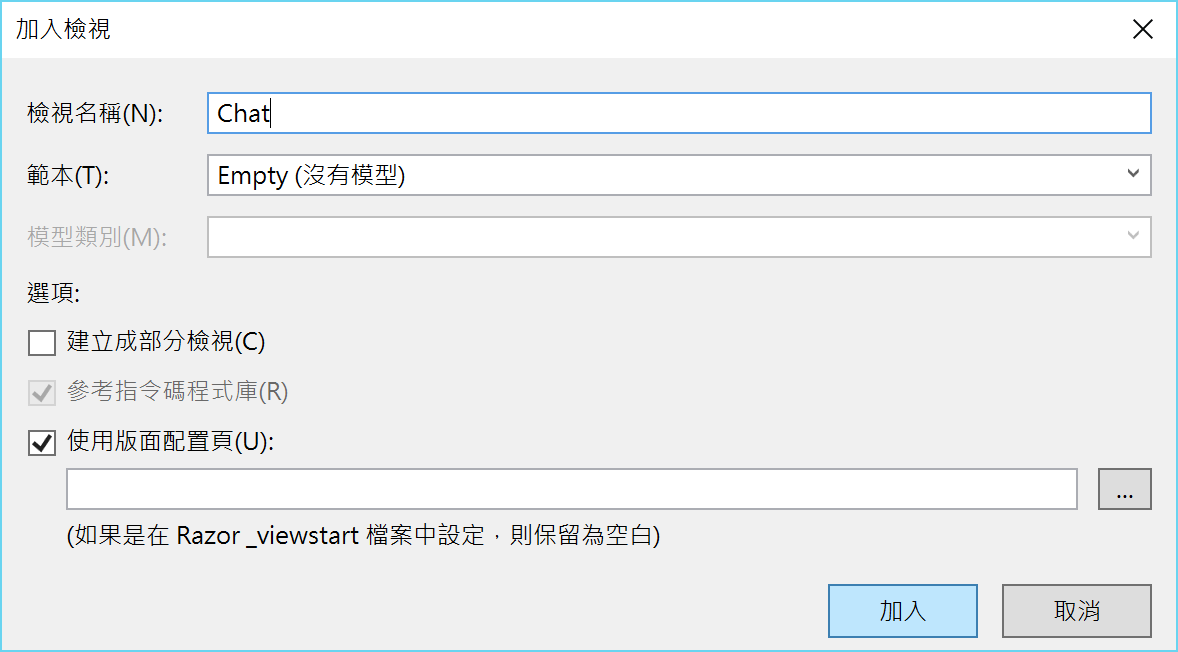
8.於方案總管 Views/Home 目錄下按右鍵,新增檢視,名稱為Chat
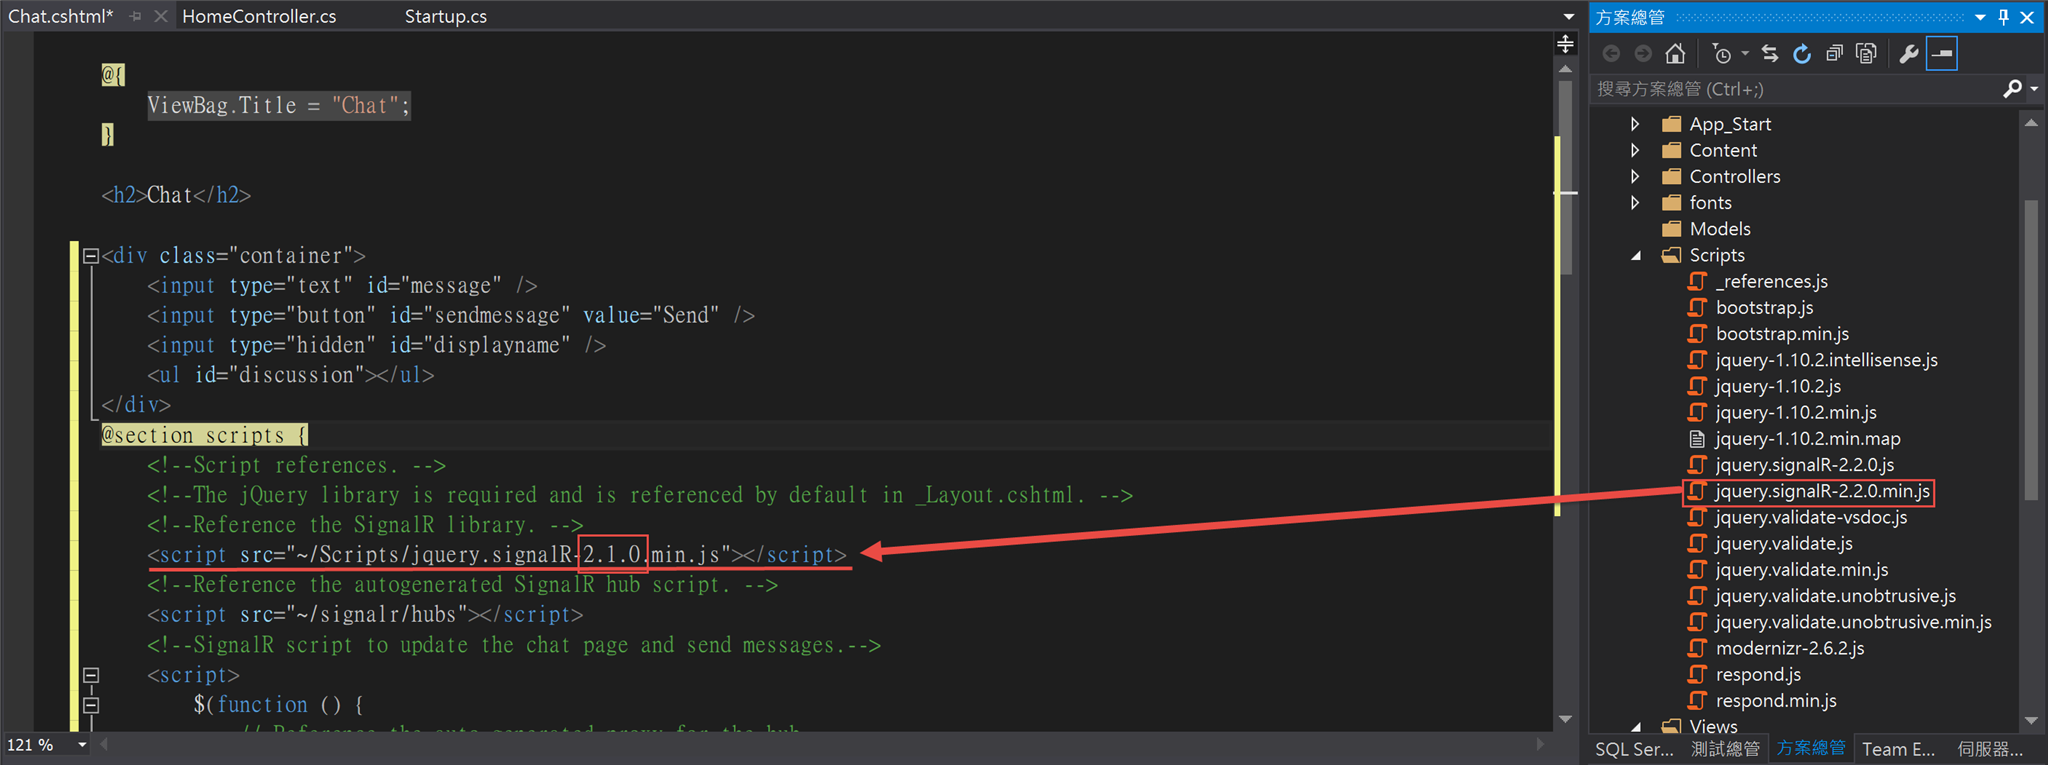
9.將剛剛新增的 Chat.cshtml 內容修改為以下Code
注意,其中引用的SignalR的JS需要修改符合目前專案內的版本號碼
在這邊最新的版號為2.2.0,所以路徑如下
~/Scripts/jquery.signalR-2.2.0.min.js
@{
    ViewBag.Title = "Chat";
}

<h2>Chat</h2>

<div class="container">
    <input type="text" id="message" />
    <input type="button" id="sendmessage" value="Send" />
    <input type="hidden" id="displayname" />
    <ul id="discussion"></ul>
</div>
@section scripts {
    <!--Script references. -->
    <!--The jQuery library is required and is referenced by default in _Layout.cshtml. -->
    <!--Reference the SignalR library. -->
    <script src="~/Scripts/jquery.signalR-2.2.0.min.js"></script>
    <!--Reference the autogenerated SignalR hub script. -->
    <script src="~/signalr/hubs"></script>
    <!--SignalR script to update the chat page and send messages.-->
    <script>
        $(function () {
            // Reference the auto-generated proxy for the hub.
            var chat = $.connection.chatHub;
            // Create a function that the hub can call back to display messages.
            chat.client.addNewMessageToPage = function (name, message) {
                // Add the message to the page.
                $('#discussion').append('<li><strong>' + htmlEncode(name)
                    + '</strong>: ' + htmlEncode(message) + '</li>');
            };
            // Get the user name and store it to prepend to messages.
            $('#displayname').val(prompt('Enter your name:', ''));
            // Set initial focus to message input box.
            $('#message').focus();
            // Start the connection.
            $.connection.hub.start().done(function () {
                $('#sendmessage').click(function () {
                    // Call the Send method on the hub.
                    chat.server.send($('#displayname').val(), $('#message').val());
                    // Clear text box and reset focus for next comment.
                    $('#message').val('').focus();
                });
            });
        });
        // This optional function html-encodes messages for display in the page.
        function htmlEncode(value) {
            var encodedValue = $('<div />').text(value).html();
            return encodedValue;
        }
    </script>
}
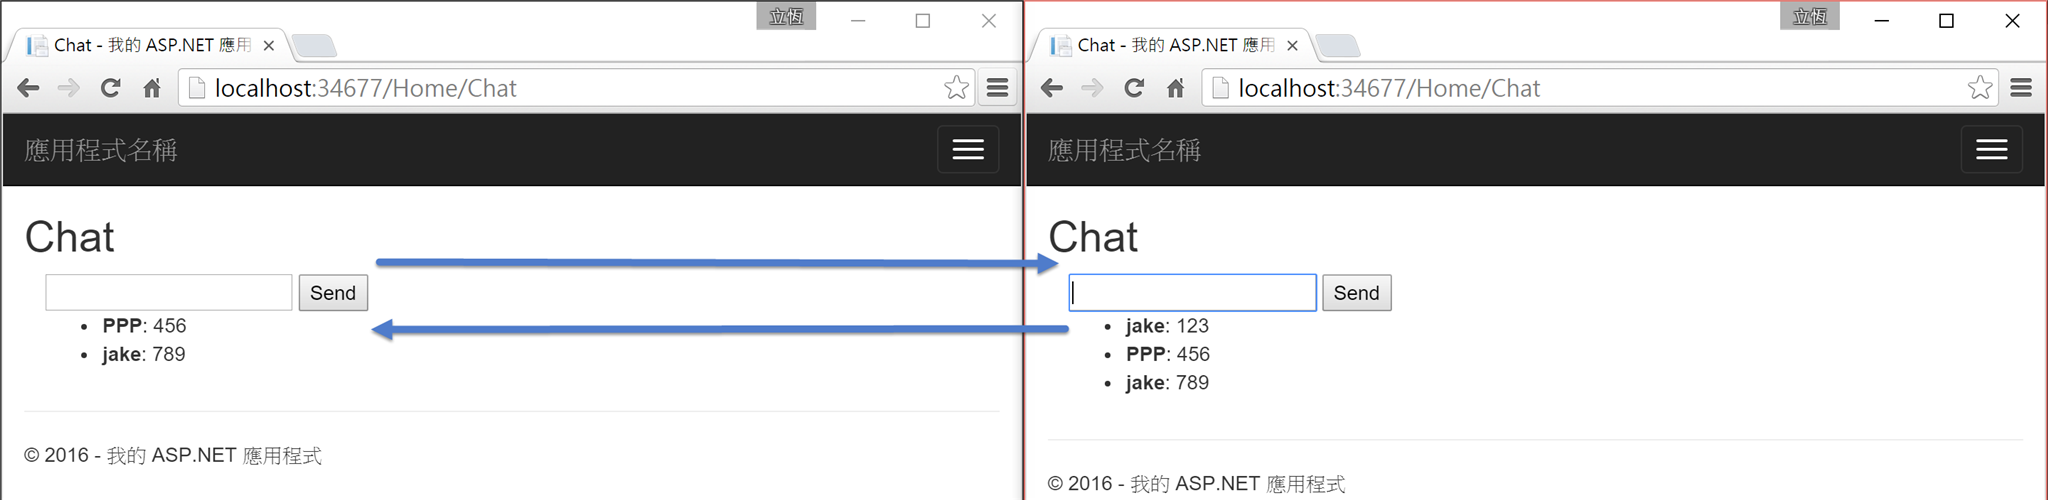
前端與後端的關係示意圖

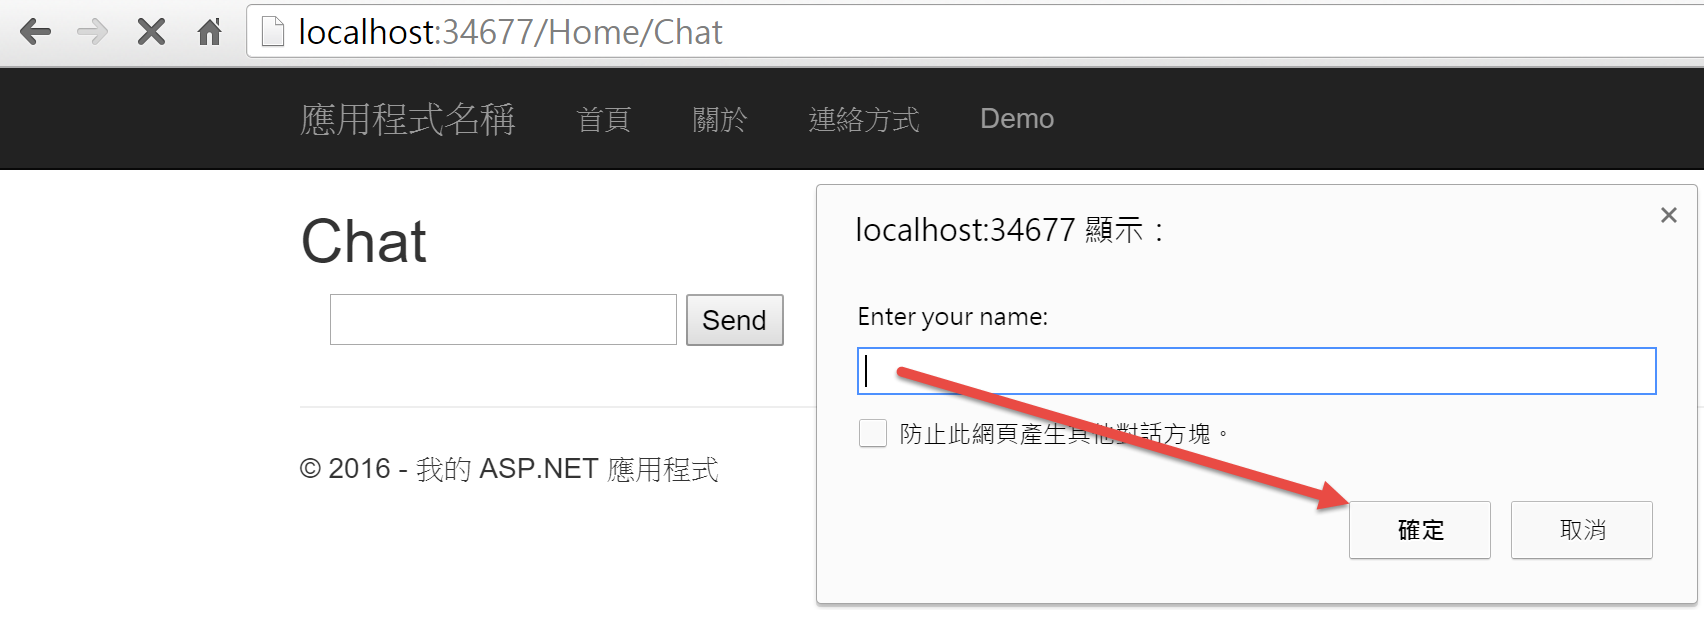
10.將此專案全部儲存,準備編譯並執行以上範例程式。
F5執行DEBUG模式,並將頁面往指定位於/home/chat
即可輸入暱稱後開始進行聊天。
11.參照:http://www.asp.net/signalr/overview/getting-started/tutorial-getting-started-with-signalr-and-mvc
