這篇接續上一篇 開發教學 Part 2 圖書列表頁
主要是前端的 CRUD 實作,所以這篇先不多做解釋,單純複製貼上,
如果對前端 Angular 實作沒有興趣,可以先跳過
當然如果你剛好負責專案的全端,又剛好要用 Angular ,那可以找時間看一下
其實這篇拿來做個簡易後台是很合適的
Web應用程序開發教程 - 第三章:創建、更新和刪除圖書
關於本教程
在本系列教程中,您將構建一個名稱Acme.BookStore的用於管理書籍及其作者列表的基於 ABP 的程序。是使用以下技術開發的:
- Entity Framework Core 為ORM 提供程序。
- Angular做為 UI 框架。
本教程分為以下部分:
- 第 1 部分:創建服務器端
- 第 2 部分:圖書列表頁面
- 第 3 部分:創建、更新和刪除書籍
- 第 4 部分:集成測試
- 第 5 部分:授權
- 第 6 部分:作者:領域層
- 第 7 部分:作者:數據庫集成
- 第 8 部分:作者:應用程序層
- 第 9 部分:作者:用戶界面
- 第 10 部分:圖書到作者的關係
下載源碼
本教程根據你的UI和數據庫首選項有多個版本,我們準備了一個模型下載的源碼組件:
創建新書
下面的章節中,你將學習到創建一個新的模態如何來創建一個新的書籍。
書本組件
打開 /src/app/book/book.component.ts使用以下內容替換:
import { ListService, PagedResultDto } from '@abp/ng.core';
import { Component, OnInit } from '@angular/core';
import { BookDto } from './models';
import { BookService } from './services';

@Component({
  selector: 'app-book',
  templateUrl: './book.component.html',
  styleUrls: ['./book.component.scss'],
  providers: [ListService],
})
export class BookComponent implements OnInit {
  book = { items: [], totalCount: 0 } as PagedResultDto<BookDto>;

  isModalOpen = false; // add this line

  constructor(public readonly list: ListService, private bookService: BookService) {}

  ngOnInit() {
    const bookStreamCreator = (query) => this.bookService.getListByInput(query);

    this.list.hookToQuery(bookStreamCreator).subscribe((response) => {
      this.book = response;
    });
  }

  // add new method
  createBook() {
    this.isModalOpen = true;
  }
}- 我們定義了一個未知
isModalOpen的變量和createBook方法。
打開/src/app/book/book.component.html做以下更改:
<div class="card">
  <div class="card-header">
    <div class="row">
      <div class="col col-md-6">
        <h5 class="card-title">{{ '::Menu:Books' | abpLocalization }}</h5>
      </div>
      <div class="text-right col col-md-6">

        <!-- Add the "new book" button here -->
        <div class="text-lg-right pt-2">
          <button id="create" class="btn btn-primary" type="button" (click)="createBook()">
            <i class="fa fa-plus mr-1"></i>
            <span>{{ "::NewBook" | abpLocalization }}</span>
          </button>
        </div>

      </div>
    </div>
  </div>
  <div class="card-body">
    <!-- ngx-datatable should be here! -->
  </div>
</div>

<!-- Add the modal here -->
<abp-modal [(visible)]="isModalOpen">
  <ng-template #abpHeader>
    <h3>{{ '::NewBook' | abpLocalization }}</h3>
  </ng-template>

  <ng-template #abpBody> </ng-template>

  <ng-template #abpFooter>
    <button type="button" class="btn btn-secondary" abpClose>
      {{ '::Close' | abpLocalization }}
    </button>
  </ng-template>
</abp-modal>- 添加了
New book按鈕到虛偽。 - 添加了
abp-modal渲染模態框,允許用戶創建新書。abp-modal是顯示模態框的預構建組件。你也可以使用其他方法顯示模態框,但abp-modal提供了一些附加的好處。
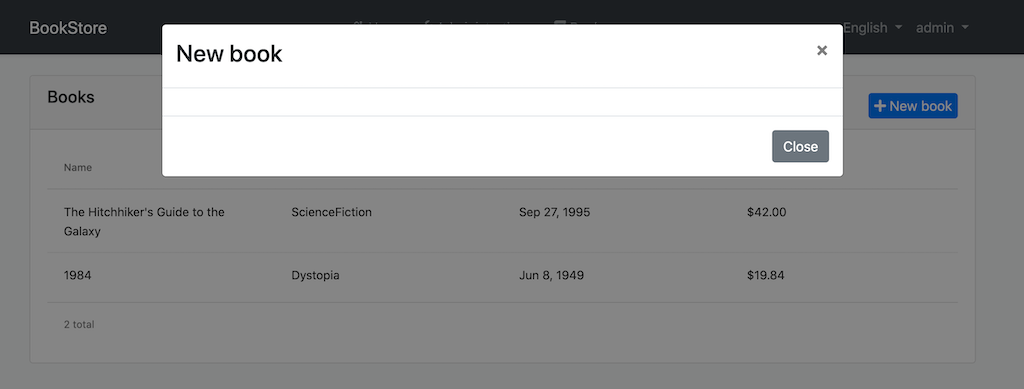
你可以打開瀏覽器,點擊新書按鈕看到模態框。

添加響應式表單
響應式表單提供了一種模型驅動的方法來處理其值隨時間變化的表單輸入。
打開 /src/app/book/book.component.ts使用以下內容替換:
import { ListService, PagedResultDto } from '@abp/ng.core';
import { Component, OnInit } from '@angular/core';
import { BookDto, BookType } from './models'; // add BookType
import { BookService } from './services';
import { FormGroup, FormBuilder, Validators } from '@angular/forms'; // add this

@Component({
  selector: 'app-book',
  templateUrl: './book.component.html',
  styleUrls: ['./book.component.scss'],
  providers: [ListService],
})
export class BookComponent implements OnInit {
  book = { items: [], totalCount: 0 } as PagedResultDto<BookDto>;

  form: FormGroup; // add this line

  bookType = BookType; // add this line

  // add bookTypes as a list of BookType enum members
  bookTypes = Object.keys(this.bookType).filter(
    (key) => typeof this.bookType[key] === 'number'
  );

  isModalOpen = false;

  constructor(
    public readonly list: ListService,
    private bookService: BookService,
    private fb: FormBuilder // inject FormBuilder
  ) {}

  ngOnInit() {
    const bookStreamCreator = (query) => this.bookService.getListByInput(query);

    this.list.hookToQuery(bookStreamCreator).subscribe((response) => {
      this.book = response;
    });
  }

  createBook() {
    this.buildForm(); // add this line
    this.isModalOpen = true;
  }

  // add buildForm method
  buildForm() {
    this.form = this.fb.group({
      name: ['', Validators.required],
      type: [null, Validators.required],
      publishDate: [null, Validators.required],
      price: [null, Validators.required],
    });
  }

  // add save method
  save() {
    if (this.form.invalid) {
      return;
    }

    this.bookService.createByInput(this.form.value).subscribe(() => {
      this.isModalOpen = false;
      this.form.reset();
      this.list.get();
    });
  }
}- 導入了
FormGroup, FormBuilder and Validators。 - 添加了
form: FormGroup變量。 - 添加
bookType屬性,你可以從模板中獲取BookType枚舉成員。 - 添加
bookTypes屬性作為BookType枚舉成員列表。將在表單選項中使用。 - 我們注入了
fb: FormBuilder服務到構造函數。FormBuilder服務為生成控件提供了方便的方法。它減少了複雜表單所需的樣板文件的數量。 - 我們添加了
buildForm方法到文件,在createBook方法調用buildForm()方法。該方法創建一個響應式表單去創建新書。 - 添加了
save方法。
打開/src/app/book/book.component.html,使用以下內容替換<ng-template #abpBody> </ng-template>:
<ng-template #abpBody>
  <form [formGroup]="form" (ngSubmit)="save()">
    <div class="form-group">
      <label for="book-name">Name</label><span> * </span>
      <input type="text" id="book-name" class="form-control" formControlName="name" autofocus />
    </div>

    <div class="form-group">
      <label for="book-price">Price</label><span> * </span>
      <input type="number" id="book-price" class="form-control" formControlName="price" />
    </div>

    <div class="form-group">
      <label for="book-type">Type</label><span> * </span>
      <select class="form-control" id="book-type" formControlName="type">
        <option [ngValue]="null">Select a book type</option>
        <option [ngValue]="bookType[type]" *ngFor="let type of bookTypes"> {{ type }}</option>
      </select>
    </div>

    <div class="form-group">
      <label>Publish date</label><span> * </span>
      <input
        #datepicker="ngbDatepicker"
        class="form-control"
        name="datepicker"
        formControlName="publishDate"
        ngbDatepicker
        (click)="datepicker.toggle()"
      />
    </div>
  </form>
</ng-template>同時使用下面的代碼部分替換<ng-template #abpFooter> </ng-template>:
<ng-template #abpFooter>
  <button type="button" class="btn btn-secondary" abpClose>
      {{ '::Close' | abpLocalization }}
  </button>

  <!--added save button-->
  <button class="btn btn-primary" (click)="save()" [disabled]="form.invalid">
        <i class="fa fa-check mr-1"></i>
        {{ '::Save' | abpLocalization }}
  </button>
</ng-template>
日期選擇器
我們在這個組件中使用了NgBootstrap datepicker。因此需要添加與此組件相關的依賴項。
打開/src/app/book/book.module.ts使用以下內容替換:
import { NgModule } from '@angular/core';
import { SharedModule } from '../shared/shared.module';
import { BookRoutingModule } from './book-routing.module';
import { BookComponent } from './book.component';
import { NgbDatepickerModule } from '@ng-bootstrap/ng-bootstrap'; // add this line

@NgModule({
  declarations: [BookComponent],
  imports: [
    BookRoutingModule,
    SharedModule,
    NgbDatepickerModule, // add this line
  ]
})
export class BookModule { }- 我們導入了
NgbDatepickerModule來使用日期選擇器。
打開 /src/app/book/book.component.ts使用範圍內的替換:
import { ListService, PagedResultDto } from '@abp/ng.core';
import { Component, OnInit } from '@angular/core';
import { BookDto, BookType } from './models';
import { BookService } from './services';
import { FormGroup, FormBuilder, Validators } from '@angular/forms';

// added this line
import { NgbDateNativeAdapter, NgbDateAdapter } from '@ng-bootstrap/ng-bootstrap';

@Component({
  selector: 'app-book',
  templateUrl: './book.component.html',
  styleUrls: ['./book.component.scss'],
  providers: [
    ListService,
    { provide: NgbDateAdapter, useClass: NgbDateNativeAdapter } // add this line
  ],
})
export class BookComponent implements OnInit {
  book = { items: [], totalCount: 0 } as PagedResultDto<BookDto>;

  form: FormGroup;

  bookType = BookType;

  bookTypes = Object.keys(this.bookType).filter(
    (key) => typeof this.bookType[key] === 'number'
  );

  isModalOpen = false;

  constructor(
    public readonly list: ListService,
    private bookService: BookService,
    private fb: FormBuilder
  ) {}

  ngOnInit() {
    const bookStreamCreator = (query) => this.bookService.getListByInput(query);

    this.list.hookToQuery(bookStreamCreator).subscribe((response) => {
      this.book = response;
    });
  }

  createBook() {
    this.buildForm();
    this.isModalOpen = true;
  }

  buildForm() {
    this.form = this.fb.group({
      name: ['', Validators.required],
      type: [null, Validators.required],
      publishDate: [null, Validators.required],
      price: [null, Validators.required],
    });
  }

  save() {
    if (this.form.invalid) {
      return;
    }

    this.bookService.createByInput(this.form.value).subscribe(() => {
      this.isModalOpen = false;
      this.form.reset();
      this.list.get();
    });
  }
}- 導入了
NgbDateNativeAdapter和NgbDateAdapter。 - 我們添加了一個新的
NgbDateAdapter提供程序,為Date類型數據選擇器值轉換。有關更多詳細信息,請參閱日期選擇器適配器。
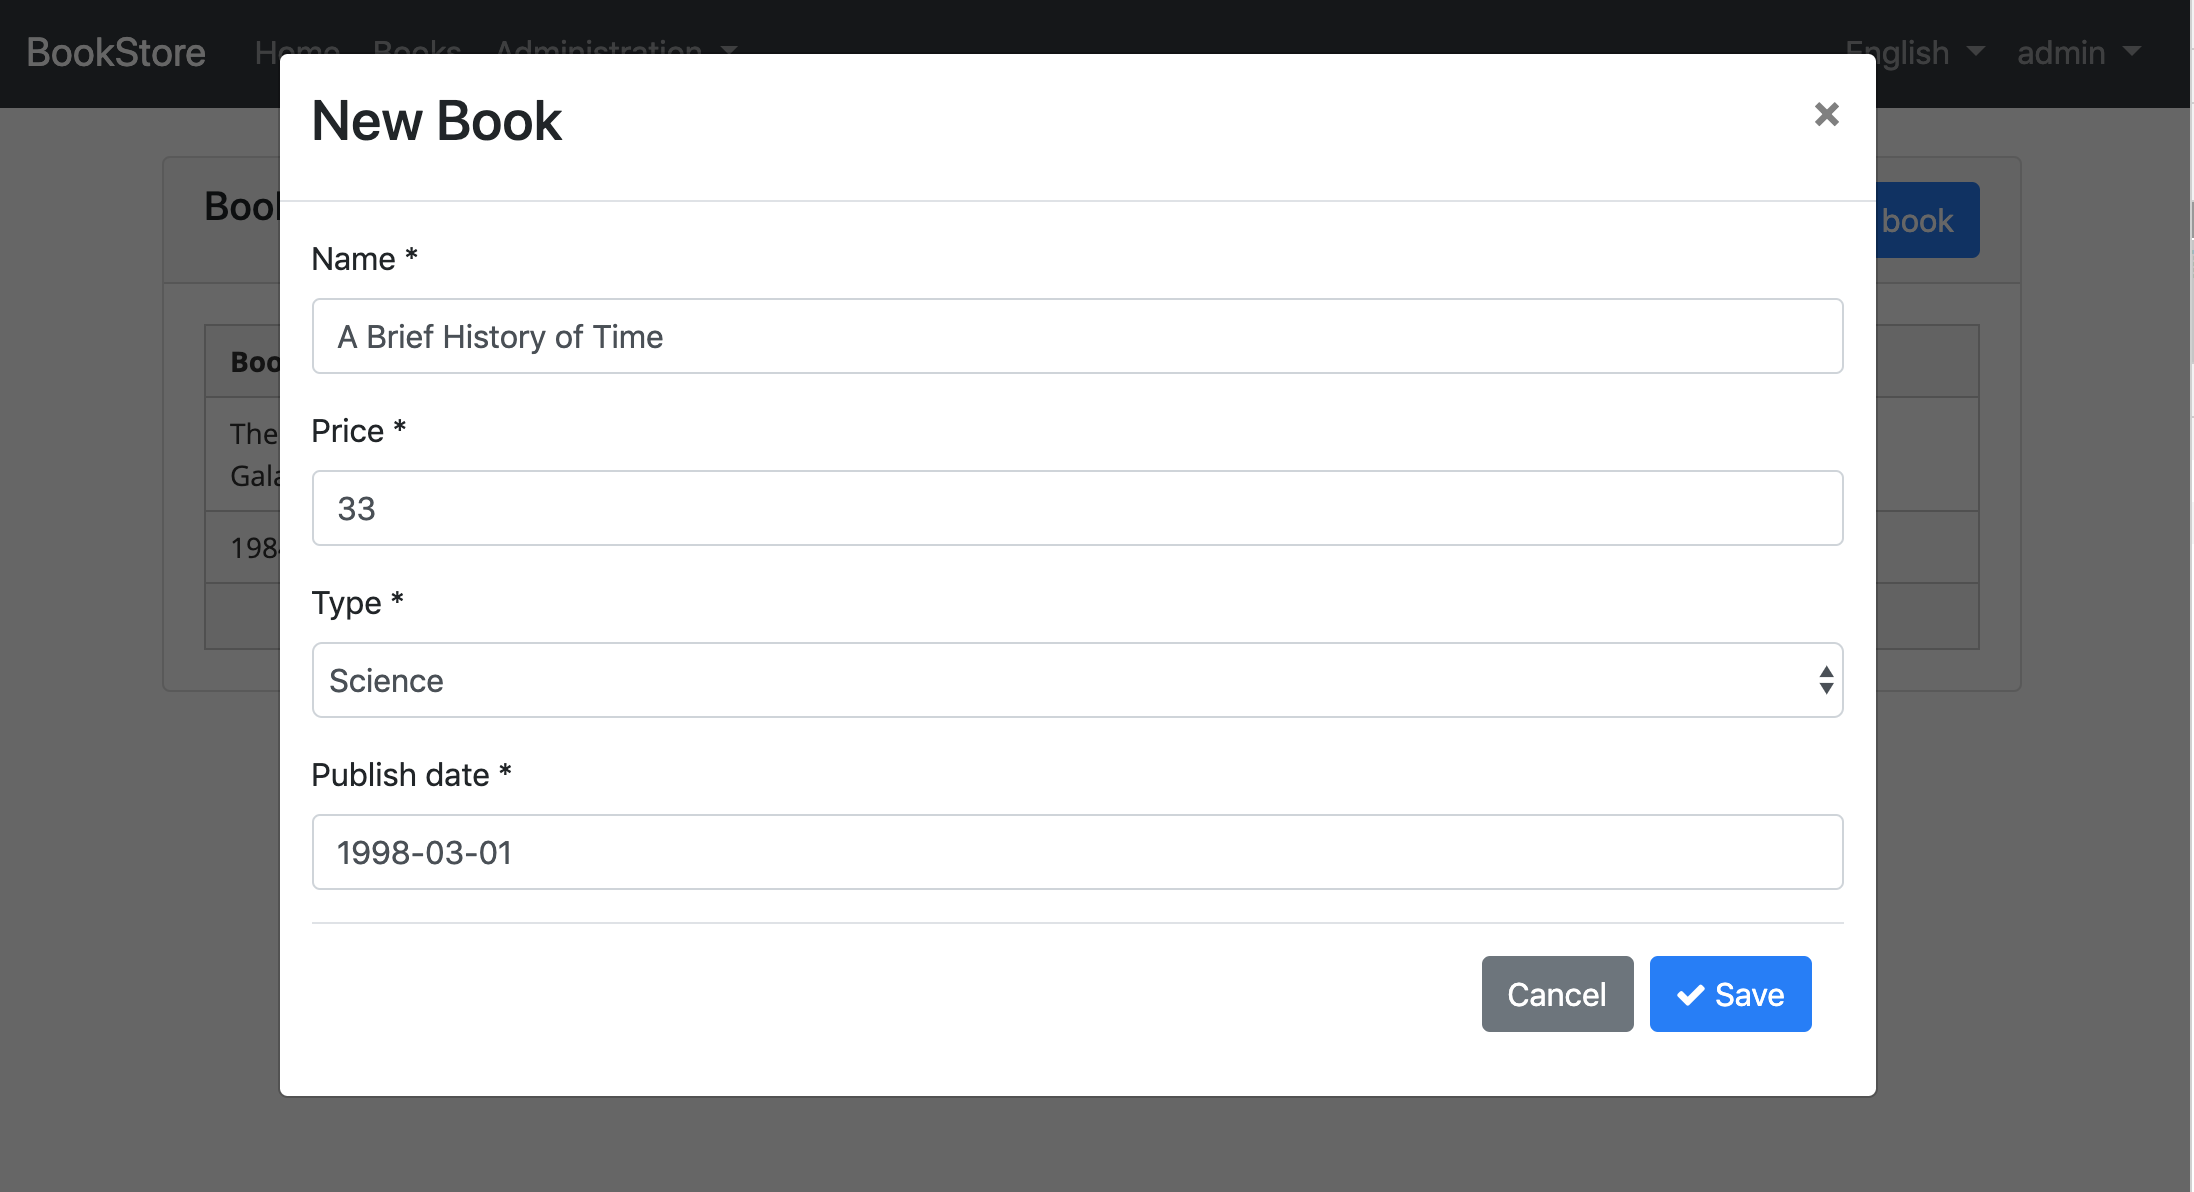
現在你可以打開瀏覽器看到以下變化:

更新書籍
打開/src/app/book/book.component.ts使用以下內容替換:
import { ListService, PagedResultDto } from '@abp/ng.core';
import { Component, OnInit } from '@angular/core';
import { BookDto, BookType, CreateUpdateBookDto } from './models';
import { BookService } from './services';
import { FormGroup, FormBuilder, Validators } from '@angular/forms';
import { NgbDateNativeAdapter, NgbDateAdapter } from '@ng-bootstrap/ng-bootstrap';

@Component({
  selector: 'app-book',
  templateUrl: './book.component.html',
  styleUrls: ['./book.component.scss'],
  providers: [ListService, { provide: NgbDateAdapter, useClass: NgbDateNativeAdapter }],
})
export class BookComponent implements OnInit {
  book = { items: [], totalCount: 0 } as PagedResultDto<BookDto>;

  selectedBook = new BookDto(); // declare selectedBook

  form: FormGroup;

  bookType = BookType;

  bookTypes = Object.keys(this.bookType).filter(
    (key) => typeof this.bookType[key] === 'number'
  );

  isModalOpen = false;

  constructor(
    public readonly list: ListService,
    private bookService: BookService,
    private fb: FormBuilder
  ) {}

  ngOnInit() {
    const bookStreamCreator = (query) => this.bookService.getListByInput(query);

    this.list.hookToQuery(bookStreamCreator).subscribe((response) => {
      this.book = response;
    });
  }

  createBook() {
    this.selectedBook = new BookDto(); // reset the selected book
    this.buildForm();
    this.isModalOpen = true;
  }

  // Add editBook method
  editBook(id: string) {
    this.bookService.getById(id).subscribe((book) => {
      this.selectedBook = book;
      this.buildForm();
      this.isModalOpen = true;
    });
  }

  buildForm() {
    this.form = this.fb.group({
      name: [this.selectedBook.name || '', Validators.required],
      type: [this.selectedBook.type || null, Validators.required],
      publishDate: [
        this.selectedBook.publishDate ? new Date(this.selectedBook.publishDate) : null,
        Validators.required,
      ],
      price: [this.selectedBook.price || null, Validators.required],
    });
  }

  // change the save method
  save() {
    if (this.form.invalid) {
      return;
    }

    const request = this.selectedBook.id
      ? this.bookService.updateByIdAndInput(this.form.value, this.selectedBook.id)
      : this.bookService.createByInput(this.form.value);

    request.subscribe(() => {
      this.isModalOpen = false;
      this.form.reset();
      this.list.get();
    });
  }
}- 我們聲明了類型為
BookDto的selectedBook變量。 - 我們添加了
editBook方法,根據給定圖書Id設置selectedBook對象。 - 我們替換了
buildForm方法使用selectedBook數據創建表單。 - 我們替換了
createBook方法,設置selectedBook為空對象。 - 我們替換了
save方法。
添加“操作” 下拉框到表格
打開/src/app/book/book.component.html 在ngx-datatable第一列添加 ngx-datatable-column 定義:
<ngx-datatable-column
  [name]="'::Actions' | abpLocalization"
  [maxWidth]="150"
  [sortable]="false"
>
  <ng-template let-row="row" ngx-datatable-cell-template>
    <div ngbDropdown container="body" class="d-inline-block">
      <button
        class="btn btn-primary btn-sm dropdown-toggle"
        data-toggle="dropdown"
        aria-haspopup="true"
        ngbDropdownToggle
      >
        <i class="fa fa-cog mr-1"></i>{{ '::Actions' | abpLocalization }}
      </button>
      <div ngbDropdownMenu>
        <button ngbDropdownItem (click)="editBook(row.id)">
          {{ '::Edit' | abpLocalization }}
        </button>
      </div>
    </div>
  </ng-template>
</ngx-datatable-column>
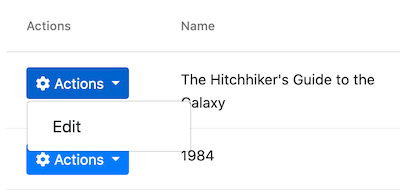
在第一列表格中添加了一個“動作”下拉菜單,如下圖所示:

同時如下所示更改ng-template #abpHeader部分:
<ng-template #abpHeader>
    <h3>{{ (selectedBook.id ? '::Edit' : '::NewBook' ) | abpLocalization }}</h3>
</ng-template>模板將在標題中顯示編輯文本用於編輯記錄操作,新書用於添加新記錄操作。
刪除書籍
打開/src/app/book/book.component.ts注入ConfirmationService。
所示替換構造函數:
// ...

// add new imports
import { ConfirmationService, Confirmation } from '@abp/ng.theme.shared';

//change the constructor
constructor(
  public readonly list: ListService,
  private bookService: BookService,
  private fb: FormBuilder,
  private confirmation: ConfirmationService // inject the ConfirmationService
) {}

// Add a delete method
delete(id: string) {
  this.confirmation.warn('::AreYouSureToDelete', '::AreYouSure').subscribe((status) => {
    if (status === Confirmation.Status.confirm) {
      this.bookService.deleteById(id).subscribe(() => this.list.get());
    }
  });
}- 我們注入了
ConfirmationService。 - 我們注入了
ConfirmationService到構造函數。 - 添加了
delete方法。
請參閱確認彈層文檔了解該服務的更多信息。
添加刪除按鈕:
打開/src/app/book/book.component.html修改ngbDropdownMenu添加刪除按鈕:
<div ngbDropdownMenu>
  <!-- add the Delete button -->
    <button ngbDropdownItem (click)="delete(row.id)">
        {{ '::Delete' | abpLocalization }}
    </button>
</div>
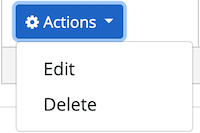
最終操作下拉框UI如下:

點擊delete動作調用delete方法,然後無法顯示一個確認彈層如下圖所示。

下一章
查看本教程的下一章。
