Autofac 實作筆記
前置作業部分
首先先做一個Interface
namespace myInterface
{
    public interface IPen
    {
        string doDraw(string txt);
        string doWrite(string txt);
    }

}
接著寫一個實作的程式
    public class PenSevice : IPen
    {
        string IPen.doDraw(string txt)
        {
            return string.Format("Use Draw : {0}" , txt);
        }
        string IPen.doWrite(string txt)
        {
            return string.Format("Use Write : {0}", txt);
        }
    }
正式部分開始
1.使用NuGet安裝Autofac

2.在Global.asax中加入
public static void AutofacRegistration()
        {
            var builder = new ContainerBuilder();
            // Controller
            builder.RegisterControllers(Assembly.GetExecutingAssembly());

            builder.RegisterType<PenSevice>().As<IPen>();

            //此段落依據個人需求增減
            //builder.RegisterAssemblyTypes(Assembly.GetExecutingAssembly())
            // .Where(t => t.Name.StartsWith("Repository"))
            // .AsImplementedInterfaces();

            var container = builder.Build();

            DependencyResolver.SetResolver(new AutofacDependencyResolver(container));

        }
3.在Application_Start()中加入AutofacRegistration();
protected void Application_Start()
        {
            AreaRegistration.RegisterAllAreas();
            FilterConfig.RegisterGlobalFilters(GlobalFilters.Filters);
            RouteConfig.RegisterRoutes(RouteTable.Routes);
            BundleConfig.RegisterBundles(BundleTable.Bundles);
            // autofac
            AutofacRegistration();
        }
4.直接在Controller中宣告好變數(本範例為interface IPen的變數) ,並在Controller建構式中加入,完成後在底下的ActionResult就可以直接使用囉
    public class HomeController : Controller
    {
        private IPen _myPenService;
        public HomeController(IPen myPenService)
        {
            _myPenService = myPenService;
        }
        public ActionResult Index()
        {
            string DrawResult = _myPenService.doDraw("Hello");
            string WriteResult = _myPenService.doWrite("Hello");
            ViewBag.DrawResult = DrawResult;
            ViewBag.WriteResult = WriteResult;
            return View();
        }
    }
5.在對應的view中加入輸出結果
<div>
    @ViewBag.DrawResult
    <br>
    @ViewBag.WriteResult
</div>
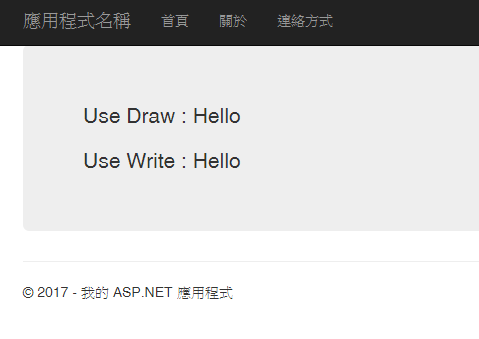
6.完成! 結果正確!

範例檔: