[C#.NET][VB.NET][Winform][User Control] 自訂控制項工具箱圖示 - ToolboxBitmap Attribute
ToolboxBitmap是定義自訂控制項在VS工具箱的圖示,如MSDN所述 http://msdn.microsoft.com/zh-tw/library/4wk1wc0a%28VS.80%29.aspx
//C#
// Specifies the bitmap associated with the Button type.
[ToolboxBitmap(typeof(Button))]
class MyControl1 : UserControl
{
}
// Specifies a bitmap file.
[ToolboxBitmap(@"C:\Documents and Settings\Joe\MyPics\myImage.bmp")]
class MyControl2 : UserControl
{
}
// Specifies a type that indicates the assembly to search, and the name
// of an image resource to look for.
[ToolboxBitmap(typeof(MyControl), "MyControlBitmap")]
class MyControl : UserControl
{
}
'VB
'Specifies the bitmap associated with the Button type.
<ToolboxBitmap(GetType(Button))> Class MyControl1
'Specifies a bitmap file.
End Class
<ToolboxBitmap("C:\Documents and Settings\Joe\MyPics\myImage.bmp")> _
   Class MyControl2
End Class
'Specifies a type that indicates the assembly to search, and the name
'of an image resource to look for.
<ToolboxBitmap(GetType(MyControl), "MyControlBitmap")> Class MyControl
End Class
很好~看完說明後,我只懂用絕對路徑那一個多載。不過我們不能因為看不懂就放棄,要不斷的找資料測試直到瞭解為止。
接下來我們將實作MSDN講的東西
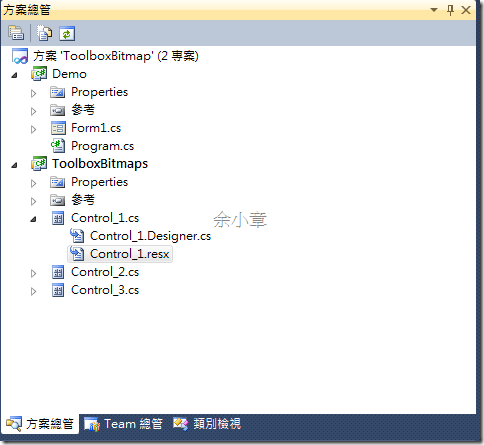
準備工作,首先,建立一個自訂控制項的專案,並分別建立Control_1~3項目,再建立一個WinForm的測試專案
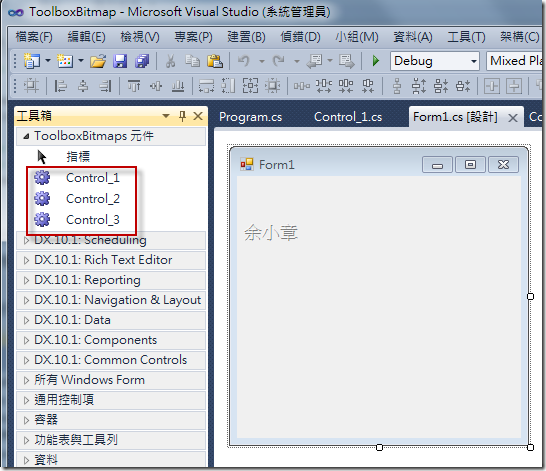
加入WinForm後會看到工具箱出現了我們自訂控制項的原件了,但這還沒有圖形,把它們都砍了吧,屬性建立好後再重新加入到工具箱
PS.基於效能原因,[工具箱] 自動填入區域的元件不會顯示自訂點陣圖,且不支援 ToolboxBitmapAttribute。 若要在 [工具箱] 中顯示自訂元件的圖示,請使用 [選擇工具箱項目] 對話方塊載入您的元件。http://msdn.microsoft.com/zh-tw/library/fw694kde.aspx
法一:
1.再來準備一張圖片ICON1.PNG(什麼圖片格式應該都可以,大小也不用理他,反正他最後會變成16*16 .bmp)丟到C:
2.為類別建立屬性
[ToolboxBitmap(@"C:\ICON1.png")]
public partial class Control_1 : UserControl
{
    public Control_1()
    {
        InitializeComponent();
    }
}
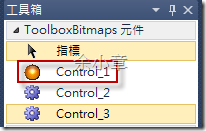
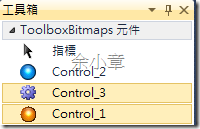
3.完成,接下來把寫好的自訂控制項加入工具箱,便可得到以下結果
Note:
優點:建構步驟最快
缺點:檔案路徑為絕對路徑,管理相當不易。
用途:不建議使用。
法二:
1.準備一張圖片ICON.bmp 16*16(這個方法需要準備正確的檔案格式及大小圖形格式)
2.將圖片加入專案,
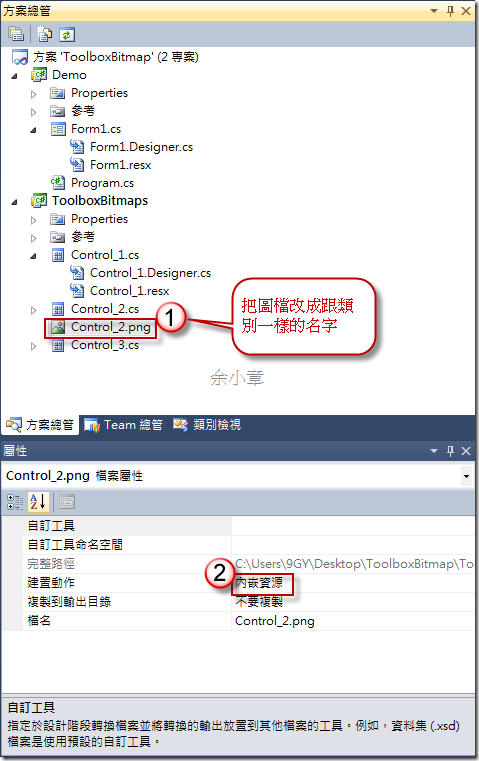
2-1. 把圖檔改成跟類別一樣的名字
2-2. 修改建置動作為內嵌資源
3.為類別建立屬性
[ToolboxBitmap(typeof(Control_2))]
public partial class Control_2 : UserControl
{
    public Control_2()
    {
        InitializeComponent();
    }
}
4.完成後如下
Note:
優點:建立類別圖形時,需與類別名稱相同,可易於分辨
缺點:因圖形存放路徑需在專案的跟目錄,若類別太多則不易管理圖形
用途:適合用於結構較小的專案
法三:
1.準備一張圖片ICON3.PNG(什麼圖片格式應該都可以,大小也不用理他,反正他最後會變成16*16 .bmp)
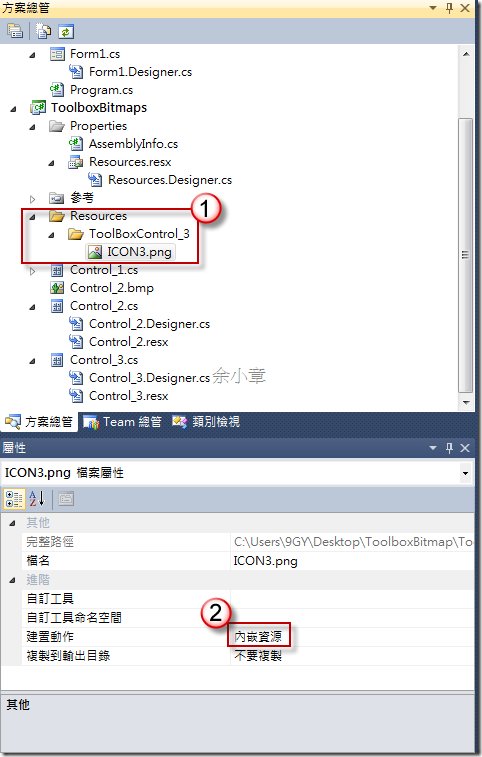
2.建立專案資料夾結構,
2-1. 加入圖檔
2-2. 修改建置動作為內嵌資源
3.為類別建立屬性
[ToolboxBitmap(typeof(Control_3), "Resources.ToolBoxControl_3.ICON3.png")]
public partial class Control_3 : UserControl
{
    public Control_3()
    {
        InitializeComponent();
    }
}
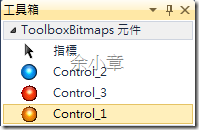
4.完成後如下
Note:
優點:面臨類別多的專案容易管理。
缺點:因需要分類,所以目錄架構較複雜,Code也比較長一點。
用途:適合用於結構較大的專案
範例下載:
若有謬誤,煩請告知,新手發帖請多包涵
Microsoft MVP Award 2010~2017 C# 第四季
Microsoft MVP Award 2018~2022 .NET
