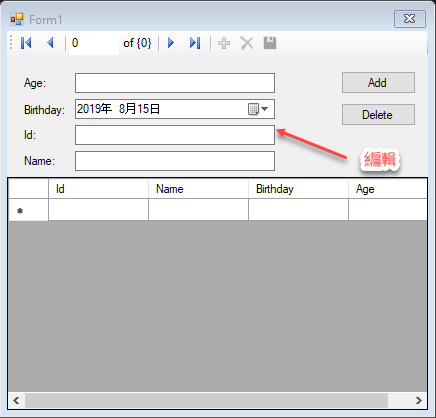
畫面上有 BindingNavigator、DataGridView,它們的資料都來自 BindingSource,我希望透過上方的編輯區塊進行編輯、驗證的互動,不是 GridView,畫面設計如下圖:

我想要做的功能很簡:單當移動"列"時,驗證當下的所有欄位,驗證失敗不准離開
開發環境
- WIndows 10 Enterprise
- VS 2017 Enterprise
事前準備
ErrorProvider
首先要來做驗證,這裡我採用的是 ErrorProvider,它的用法很簡單
設定錯誤:errorProvider1.SetError(textBox1, "Not an integer value.");
清除錯誤:errorProvider1.Clear(); 詳請請參考文件
https://docs.microsoft.com/zh-tw/dotnet/framework/winforms/controls/display-error-icons-for-form-validation-with-wf-errorprovider
https://docs.microsoft.com/zh-tw/dotnet/framework/winforms/controls/view-errors-within-a-dataset-with-wf-errorprovider-component
為了快速設定控制項的 Error,我先用 Validator.TryValidateObject 找出驗證失敗的欄位,再用 ErrorProvider1.SetError() 將問題的欄位呈現出來
public static bool ValidateControl<T>(this Control                      container,
                                      T                                 instance,
                                      ErrorProvider                     errorProvider,
                                      out ICollection<ValidationResult> validationResults)
    where T : class, new()
{
    var innerControls = new Dictionary<string, Control>();
    container.GetAllInnerControls<T>(ref innerControls);

    errorProvider.Clear();
    var validationContext = new ValidationContext(instance, null, null);
    validationResults = new List<ValidationResult>();
    var isValid = Validator.TryValidateObject(instance, validationContext, validationResults, true);
    if (isValid)
    {
        return isValid;
    }

    foreach (var validationResult in validationResults)
    {
        foreach (var member in validationResult.MemberNames)
        {
            if (!innerControls.ContainsKey(member))
            {
                continue;
            }

            var control = innerControls[member];
            errorProvider.SetError(control, validationResult.ErrorMessage);
        }
    }

    return isValid;
}
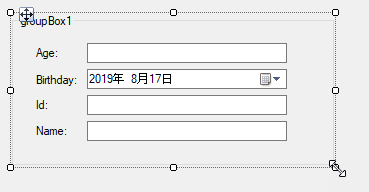
ValidateControl 擴充方法擴充了 Control 型別,跑遞迴搜尋所有的控制項,設計畫面時可以用一個容器控制項管理其他的控制項,就像下圖這樣

控制項的命名要用 "欄位_" 開頭,比如 Age_TextBox,我會用物件的屬性去找符合的控制項
代碼如下
var isValid = group1.ValidateControl(insertRequest, errorProvider, out var errorValidationResults);
if (!isValid)
{
	return;
}
完整代碼如下
畫面設計與資料細節
接著要設計 ViewModel
public class InsertRequest : INotifyPropertyChanged
{
    private Guid? _id;
    private string _name;
    private DateTime? _birthday;
    private int? _age;

    [Required]
    public Guid? Id
    {
        get => this._id;
        set
        {
            if (value.Equals(this._id)) return;

            this._id = value;
            this.OnPropertyChanged();
        }
    }

    [StringLength(50)]
    [Required]
    public string Name
    {
        get => this._name;
        set
        {
            if (value == this._name) return;

            this._name = value;
            this.OnPropertyChanged();
        }
    }

    [Required]
    public DateTime? Birthday
    {
        get => this._birthday;
        set
        {
            if (value.Equals(this._birthday)) return;

            this._birthday = value;
            this.OnPropertyChanged();
        }
    }

    [Range(1, 150)]
    [Required]
    public int? Age
    {
        get => this._age;
        set
        {
            if (value == this._age) return;

            this._age = value;
            this.OnPropertyChanged();
        }
    }

    public event PropertyChangedEventHandler PropertyChanged;

    [NotifyPropertyChangedInvocator]
    protected virtual void OnPropertyChanged([CallerMemberName] string propertyName = null)
    {
        this.PropertyChanged?.Invoke(this, new PropertyChangedEventArgs(propertyName));
    }
}
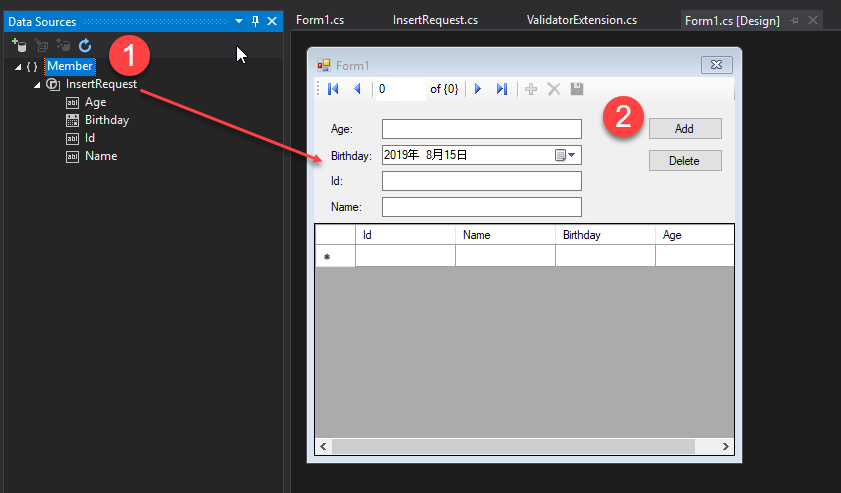
接著拉出控制項,然後修正控制項的命名規則

最主要的關鍵是利用 BindingSource.PositionChanged、DataGridView.SelectionChanged 事件,記住當下的 BindingSource.Position,當移動"列"時,驗證當下的所有欄位,驗證失敗不准離開
private void InsertRequest_BindingSource_PositionChanged(object sender, EventArgs e)
{
    var insertRequestBinding = (BindingSource) sender;
    var insertRequest        = this._previousInsertRequest;
    var errorProvider        = this.ErrorProvider;

    if (this._isDelete)
    {
        this._isDelete = false;
        this.SetPreviousRow();
        this.StayCurrentRow();
        errorProvider.Clear();
        return;
    }

    insertRequestBinding.EndEdit();
    this.RegisterChangeRowEvent(false);
    var isValid = this.ValidateControl(insertRequest, errorProvider, out var errorValidationResults);
    if (!isValid)
    {
        this.StayCurrentRow();
        this.RegisterChangeRowEvent(true);
        return;
    }

    this.RegisterChangeRowEvent(true);
    this.SetPreviousRow();
}

private void InsertRequest_DataGridView_SelectionChanged(object sender, EventArgs e)
{
    if (this._isDelete)
    {
        this._isDelete = false;
        return;
    }

    this.RegisterChangeRowEvent(false);
    this.StayCurrentRow();
    this.RegisterChangeRowEvent(true);
}
演示畫面
在實作的過程中碰到比較特別的點
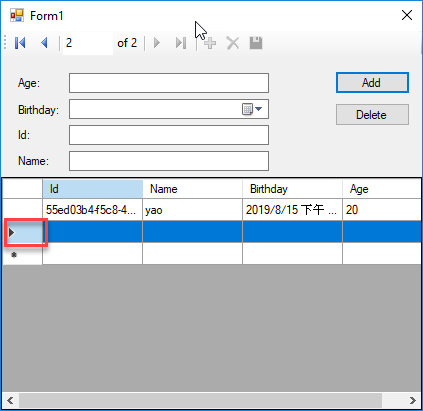
DataGridView 指定目前所在資料行,要使用 CurrentCell 屬性
insertRequestGrid.CurrentCell = previousCell;
就是下圖紅框的箭頭

DataGridView 反白特定的列,要用 Row.Selected屬性
insertRequestGrid
                .Rows[this._previousBindingPosition]
                .Selected = true;
DateTimePicker 要呈現空白,要用 CustomFormat、Format 兩個屬性
this.Birthday_DateTimePicker.CustomFormat = " ";
this.Birthday_DateTimePicker.Format       =  DateTimePickerFormat.Custom;
然後在特定的事件設定 CustomFormat 為 "yyyy/MM/dd hh:mm:ss"
private static readonly string DateTimeFormat = "yyyy/MM/dd hh:mm:ss";
public Form1()
{
    ....
    this.Birthday_DateTimePicker.Format       =  DateTimePickerFormat.Custom;
    this.Birthday_DateTimePicker.CustomFormat =  DateTimeFormat;
    this.Birthday_DateTimePicker.ValueChanged += this.Birthday_DateTimePicker_ValueChanged;
}
private void Birthday_DateTimePicker_ValueChanged(object sender, EventArgs e)
{
    this.Birthday_DateTimePicker.CustomFormat = DateTimeFormat;
}

private void Add_Button_Click(object sender, EventArgs e)
{
    this.InsertRequest_BindingSource.AddNew();
    this.Birthday_DateTimePicker.CustomFormat = " ";
}
若有謬誤,煩請告知,新手發帖請多包涵
Microsoft MVP Award 2010~2017 C# 第四季
Microsoft MVP Award 2018~2022 .NET