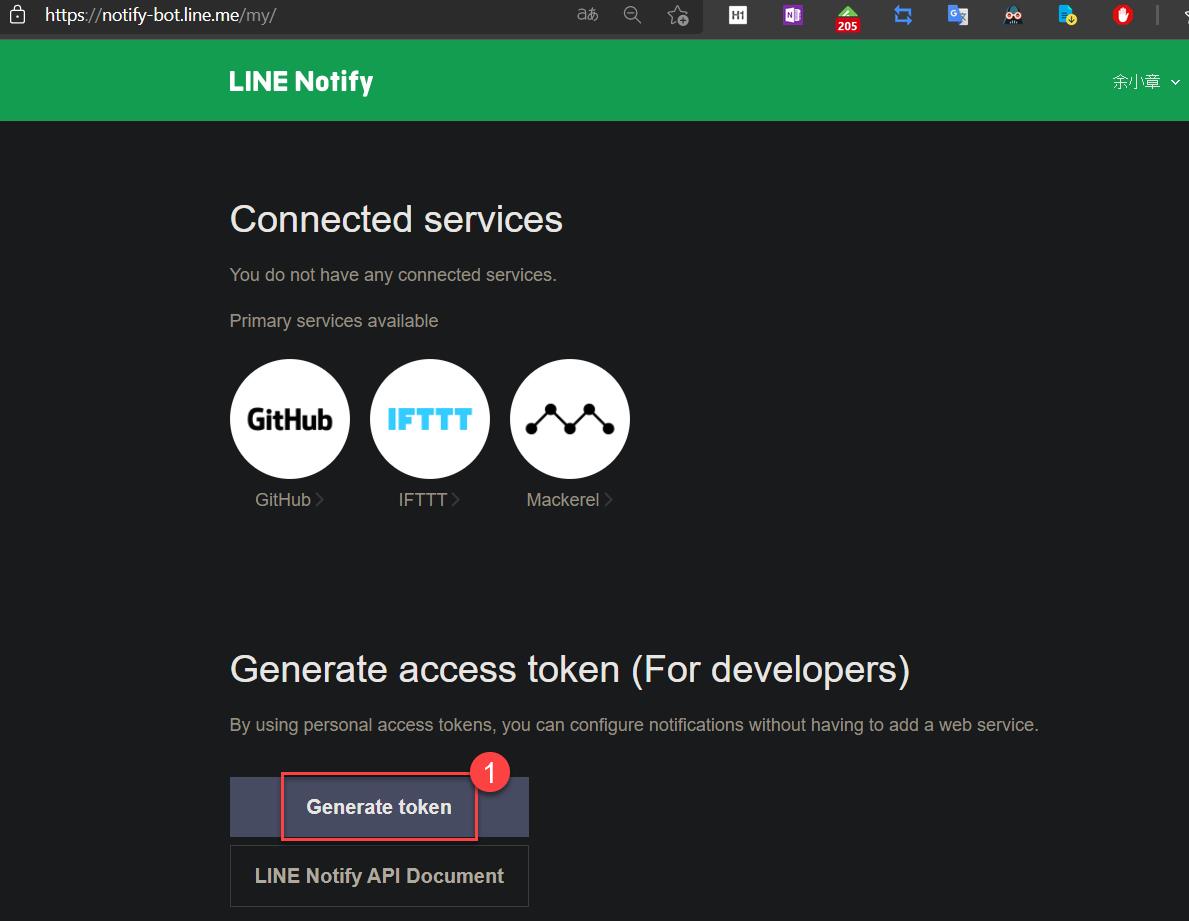
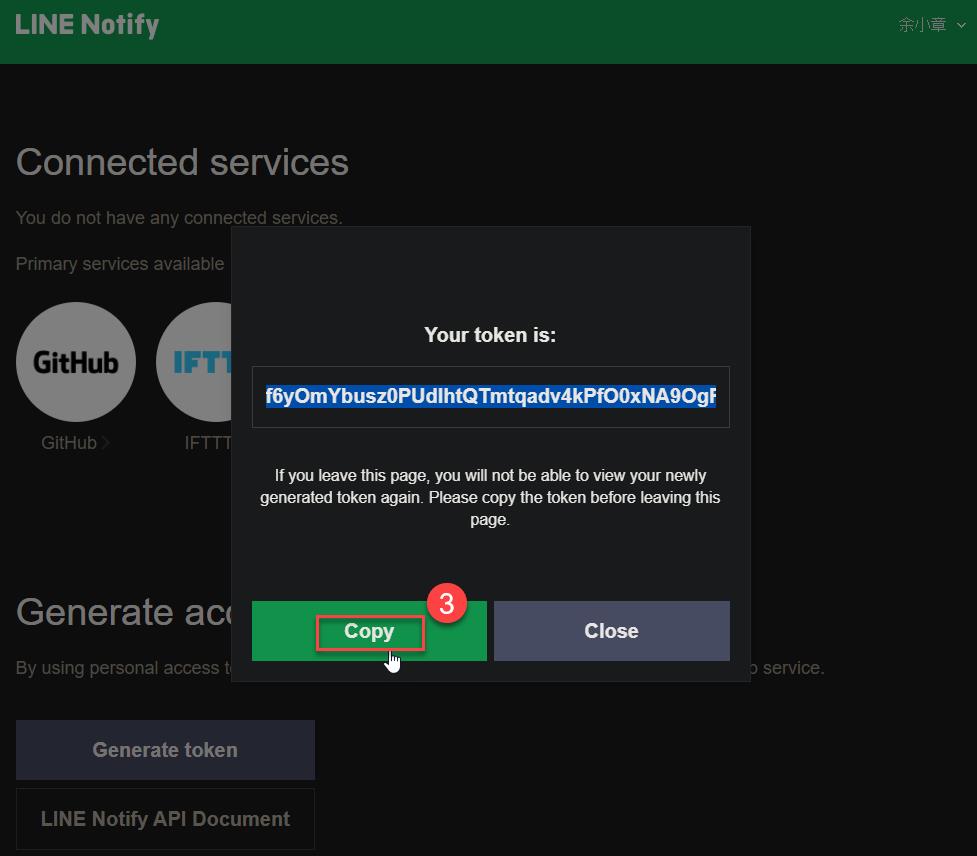
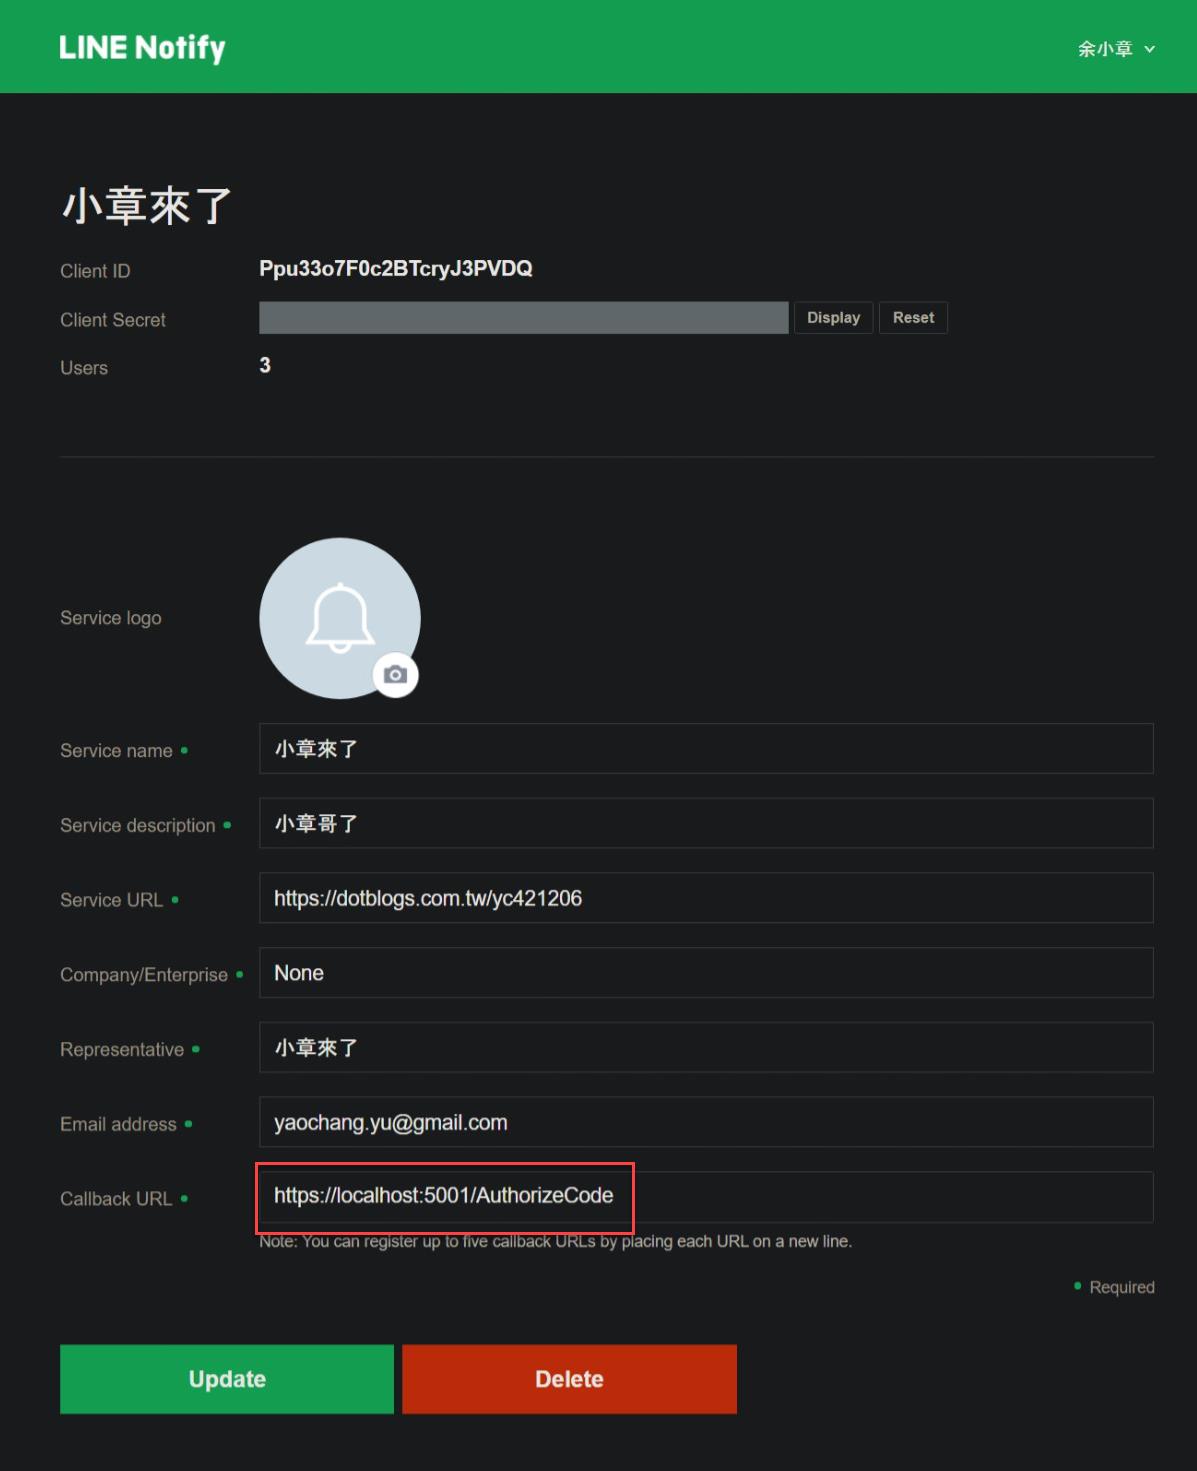
LINE 服務有一個 LINE Notify 帳號,這是一個 LINEBot 機器人,專門用來發送訊息的帳號,只要你曾經有訂閱任何一個 LINE Notify 通知服務,它就能發訊息給你;或是把 LINE Notify 帳號加入群組也可以。LINE Notify 可以讓開發人員免費的發送訊息 + 表情或是圖片給用戶,在需要即時的通知用戶的場景下,是一個相當實惠的解決方案;尤其在台灣 LINE 等於是一個基礎建設,人手都有帳號,用 LINE 整合訊息通知應該是比較方便的。
[TestMethod]
public void 發送訊息和表情()
{
var provider = new LineNotifyProvider();
var response = provider.NotifyAsync(new NotifyWithStickerRequest
{
AccessToken = "3lZwryen62tiQ4BKfh3uH3NFoFtALF4SrfgLWMIKrXh",
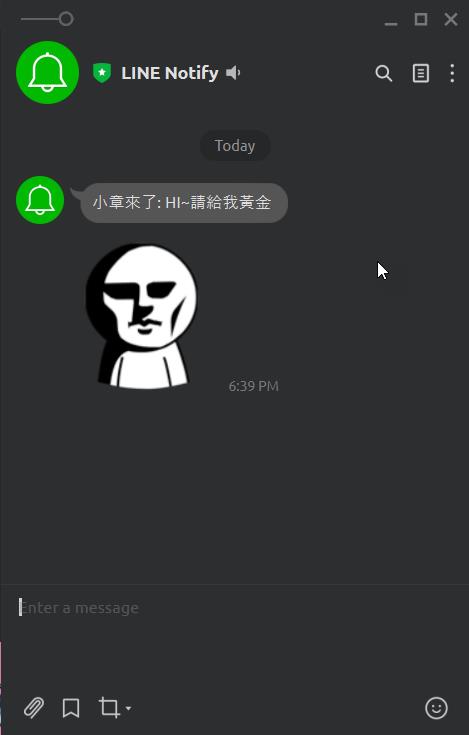
Message = "HI~請給我黃金",
StickerPackageId = 1.ToString(),
StickerId = 113.ToString()
}, CancellationToken.None)
.Result;
Assert.AreEqual(200, response.Status);
}
演練結果如下圖:
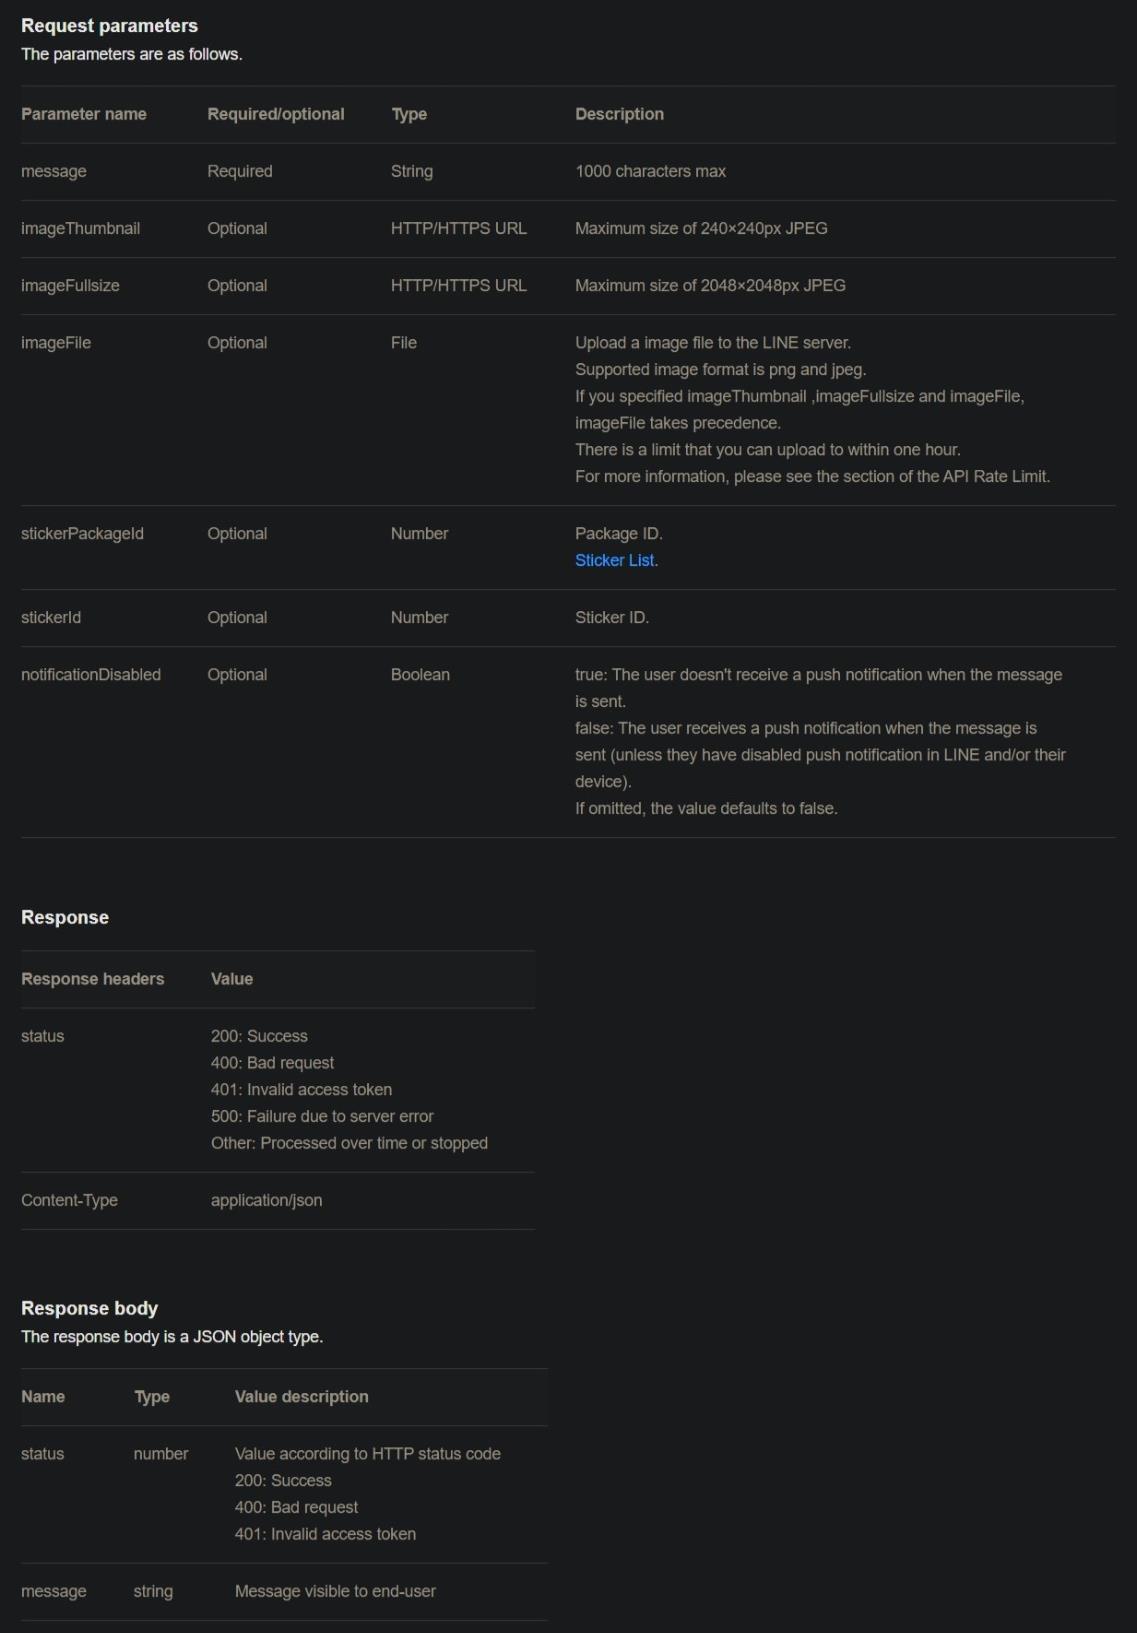
發送訊息+圖片
public async Task<GenericResponse> NotifyAsync(NotifyWithImageRequest request,
											   CancellationToken      cancelToken)
{
	Validation.Validate(request);
	var       url             = $"api/notify?message={request.Message}";
	using var formDataContent = new MultipartFormDataContent();

	var imageName    = Path.GetFileName(request.FilePath);
	var mimeType     = MimeTypeMapping.GetMimeType(imageName);
	var imageContent = new ByteArrayContent(request.FileBytes);
	imageContent.Headers.ContentType = new MediaTypeHeaderValue(mimeType);

	formDataContent.Add(imageContent, "imageFile", imageName);

	var httpRequest = new HttpRequestMessage(HttpMethod.Post, url)
	{
		Headers = {Authorization = new AuthenticationHeaderValue("Bearer", request.AccessToken)},
		Content = formDataContent
	};

	using var client   = this.CreateApiClient();
	var       response = await client.SendAsync(httpRequest, cancelToken);

	if (response.StatusCode != HttpStatusCode.OK)
	{
		if (this.IsThrowInternalError)
		{
			var error = await response.Content.ReadAsStringAsync(cancelToken);
			throw new LineNotifyProviderException(error);
		}
	}

	return await response.Content.ReadAsAsync<GenericResponse>(cancelToken);
}
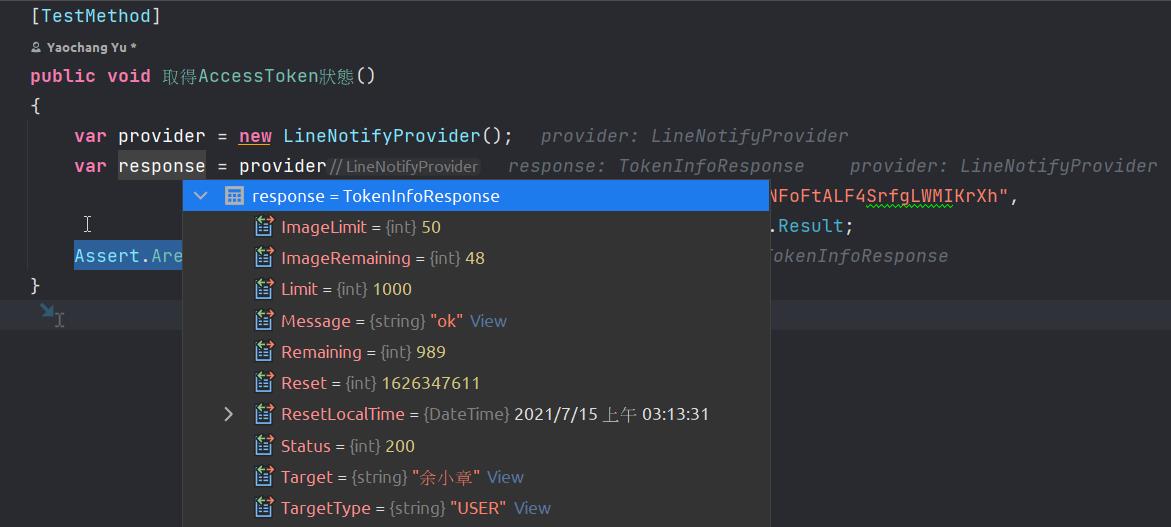
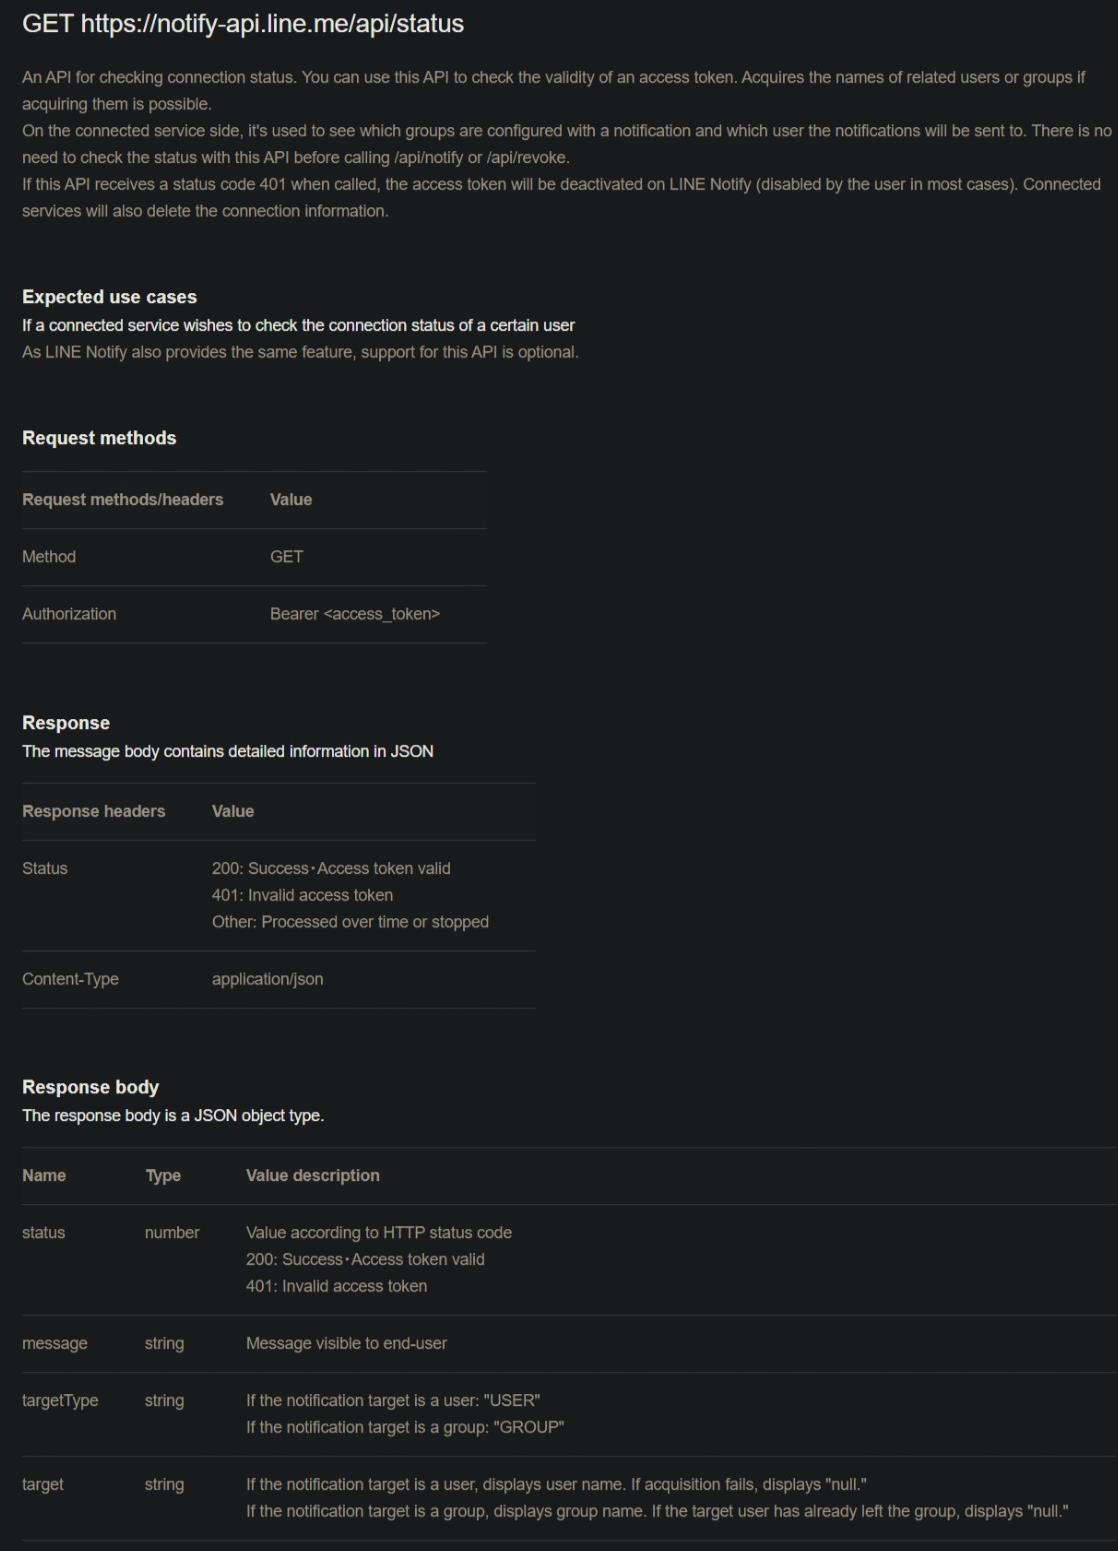
[TestMethod]
public void 取得AccessToken狀態()
{
	var provider = new LineNotifyProvider();
	var response = provider
				   .GetAccessTokenInfoAsync("3lZwryen62tiQ4BKfh3uH3NFoFtALF4SrfgLWMIKrXh",
											CancellationToken.None).Result;
	Assert.AreEqual(200, response.Status);
}
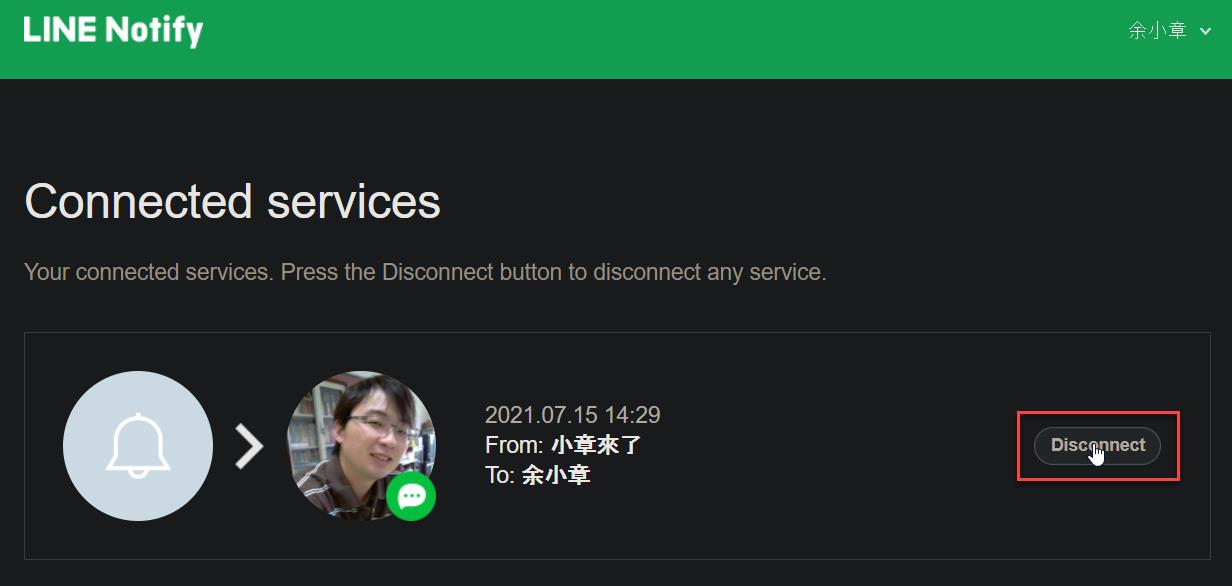
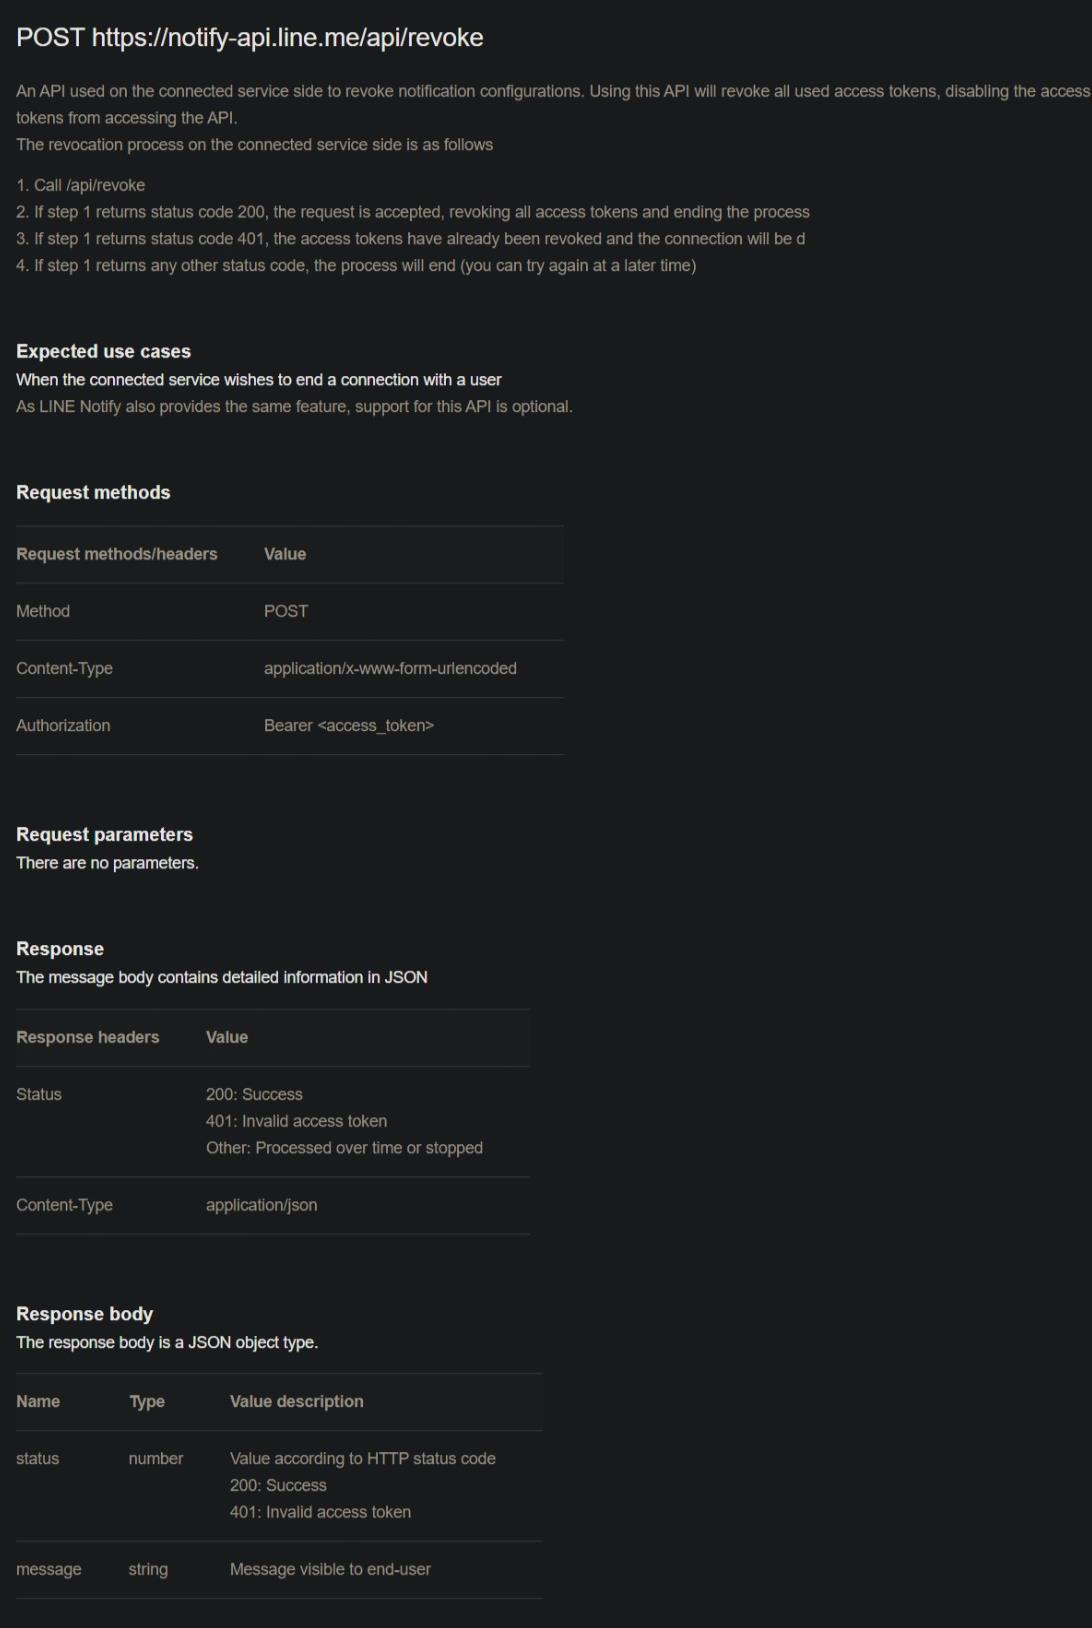
public async Task<GenericResponse> RevokeAsync(string accessToken, CancellationToken cancelToken)
{
	if (string.IsNullOrWhiteSpace(accessToken))
	{
		throw new ArgumentNullException(nameof(accessToken));
	}

	var url = "api/revoke";
	var httpRequest = new HttpRequestMessage(HttpMethod.Post, url)
	{
		Headers = {Authorization = new AuthenticationHeaderValue("Bearer", accessToken)},
		Content = new FormUrlEncodedContent(new Dictionary<string, string>()),
	};

	using var client   = this.CreateApiClient();
	var       response = await client.SendAsync(httpRequest, cancelToken);

	if (response.StatusCode != HttpStatusCode.OK)
	{
		if (this.IsThrowInternalError)
		{
			var error = await response.Content.ReadAsStringAsync();
			throw new LineNotifyProviderException(error);
		}
	}

	return await response.Content.ReadAsAsync<GenericResponse>(cancelToken);
}
測試程式碼如下:
[TestMethod]
public void 註銷AccessToken()
{
	var provider = new LineNotifyProvider();
	var response = provider.RevokeAsync("3lZwryen62tiQ4BKfh3uH3NFoFtALF4SrfgLWMIKrXh",
										CancellationToken.None)
						   .Result;
	Assert.AreEqual(200, response.Status);
}