簡單紀錄一下如何透過Unity提供的PostProcessBuild Attribute功能,
設定臉書SDK 串接登入功能所需的Info.plist設定值
前情提要
由於到了新創,從原先Gameplay研發變成了一站式(開發、打包、發行)的開發負責
其中客戶的需求就有了需要把最終的XCode Project給它們,但不要Unity原始檔的這種買櫝還珠的簡易需求
為此,配合公司仍未看見的CI /CD流程,在Build iOS版本的時候順便把未來可能用到的自動化做簡單的處理
查找所需參數
對應不同版本的SDK,臉書登入所需的參數,可以透過以下步驟找到
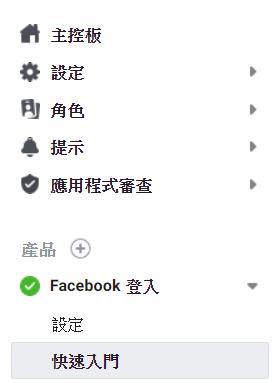
- 開啟已建立的臉書應用程式 (如果還沒有建立對應的臉書應用,請直接點擊 這個臉書開發人員的連結)
- 從主控版或產品中找到想要加入的功能區塊,這邊舉Facebook登入功能當例子

- 然後點選快速入門,依照指示就能看到所需的參數
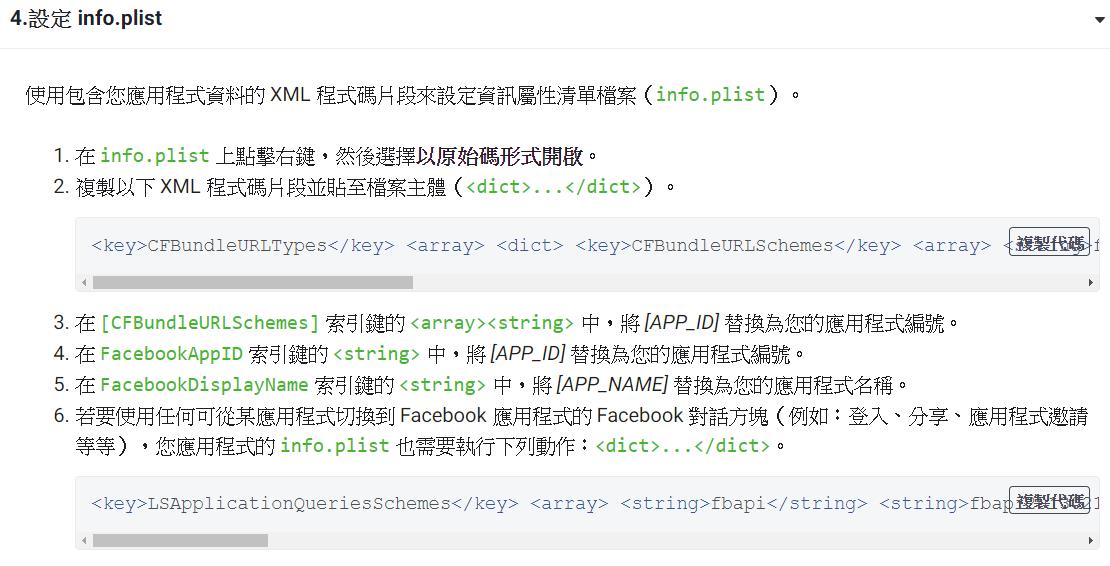
就登入功能的例子來說,我們目前會在官方的快速入門說明中的步驟4找到以下內容

轉換邏輯
為了使用前面所提到的Unity所提供的PostProcessBuild Attribute,藉以在Unity Build的時候就自動填入設定好的內容
我們來分析前面所需的幾個參數的欄位類型
CFBundleURLSchemes:在Array中的string欄位FacebookAppID:單純的string欄位FacebookDisplayName:單純的string欄位
依目前版本的SDK中,主要可以把需求分成兩種:
- 新增Array,並新增一個string欄位
- 單純新增string欄位
確定目標後,再回過頭來看Unity所提供的功能如何使用
首先,為了讀取 / 生成XCode所需的info.plist,基本上會使用到 UnityEditor.iOS.Xcode 的內容
我們會用到 PlistDocument 在程式碼中存取這個檔案,並透過繼承 PlistElement 的物件來操作對應型別的欄位內容
有興趣的人可以再透過官方網站深入
以下直接將所需的欄位內容使用Unity提供的方法進行轉換
#if UNITY_EDITOR
using UnityEditor;
using UnityEditor.Callbacks;
#if UNITY_IOS
using System.IO;
using UnityEditor.iOS.Xcode;
#endif

public class XcodeAssistant
{
	[PostProcessBuild]
	public static void OnPostprocessBuild(BuildTarget buildTarget, string path)
	{
#if UNITY_IOS
		// Read plist
		var plistPath = Path.Combine(path, "Info.plist");
		var plist = new PlistDocument();
		plist.ReadFromFile(plistPath);

		PlistElementDict rootDict = plist.root;
		// Update value - Facebook Info
		rootDict.SetString("FacebookAppID", /*你的APP_ID,只有數字部分*/);
		rootDict.SetString("FacebookDisplayName", /*你的APP_NAME*/);

		// Update value - Facebook Permission
		PlistElementArray QueriesSchemes = plist.root["LSApplicationQueriesSchemes"] as PlistElementArray;
		if (QueriesSchemes == null)
		{
			QueriesSchemes = plist.root.CreateArray("LSApplicationQueriesSchemes");
		}

		// Update value - Facebook URLTypes
		PlistElementArray urlTypes = plist.root["URL Types"] as PlistElementArray;
		if (urlTypes == null)
		{
			urlTypes = plist.root.CreateArray("URL Types");
		}
		PlistElementDict dict = urlTypes.AddDict();
		PlistElementArray urlSchemes = dict.CreateArray("URL Schemes");
		urlSchemes.AddString(/*你的APP_ID,要加fb前綴*/);


		// Write plist
		File.WriteAllText(plistPath, plist.WriteToString());
#endif
	}

}

#endif
這樣基本上就能將所需的參數在Build XCode Project的階段就直接設定好了
注意事項
大體上比較值得注意的還有幾點
- Info.plist 檔案 有可能在其他第三方套件有可能會使用,如果發現衝突
- 同上,LSApplicationQueriesSchemes 有可能會在其他SDK,使用前最好確認是否已經設定了
- 由於會用到UnityEditor 與 UnityEditor.Callbacks,如果沒有放置在Editor資料夾的話,記得加上UNITY_EDITOR的preprocessor
- 同上,UnityEditor.iOS.Xcode只有在iOS平台才能使用,這部分就一定要記得包含對info.plist的操作片段都要用 UNITY_IOS 的preprocessor 作處理
感謝觀看,若你能夠留下一些建議與感想
都會成為我寫文章的動力,感謝!!