有時會因為臨時的課程需求,需要把來參與課程的學員的 email (但該 email 必須要先是 Microsoft Account) 給邀請到自己 Azure 的訂閱帳戶中的目錄下。
然後再發個 Email 邀請函到學員所給的 email ,透過該 email 當中的連結(雖然看起來像極了詐騙 email),登入帳號後就可以加入到該 Azure 的訂閱帳戶中的作用目錄裡。
在 Azure 當中操作 AAD (現稱 Microsoft Entra ID)的動作中,手動單一加入 email 帳號完成邀請,可以。
但當人數的數量變多的時候,這樣純手工在介面上一筆一筆加入是有點蠢的。
所以研究了一下,如何在 Azure 當中能直接快速多量的去處理這件事的方法。
在 Azure Portal 的 首頁 → 管理 → 使用者:
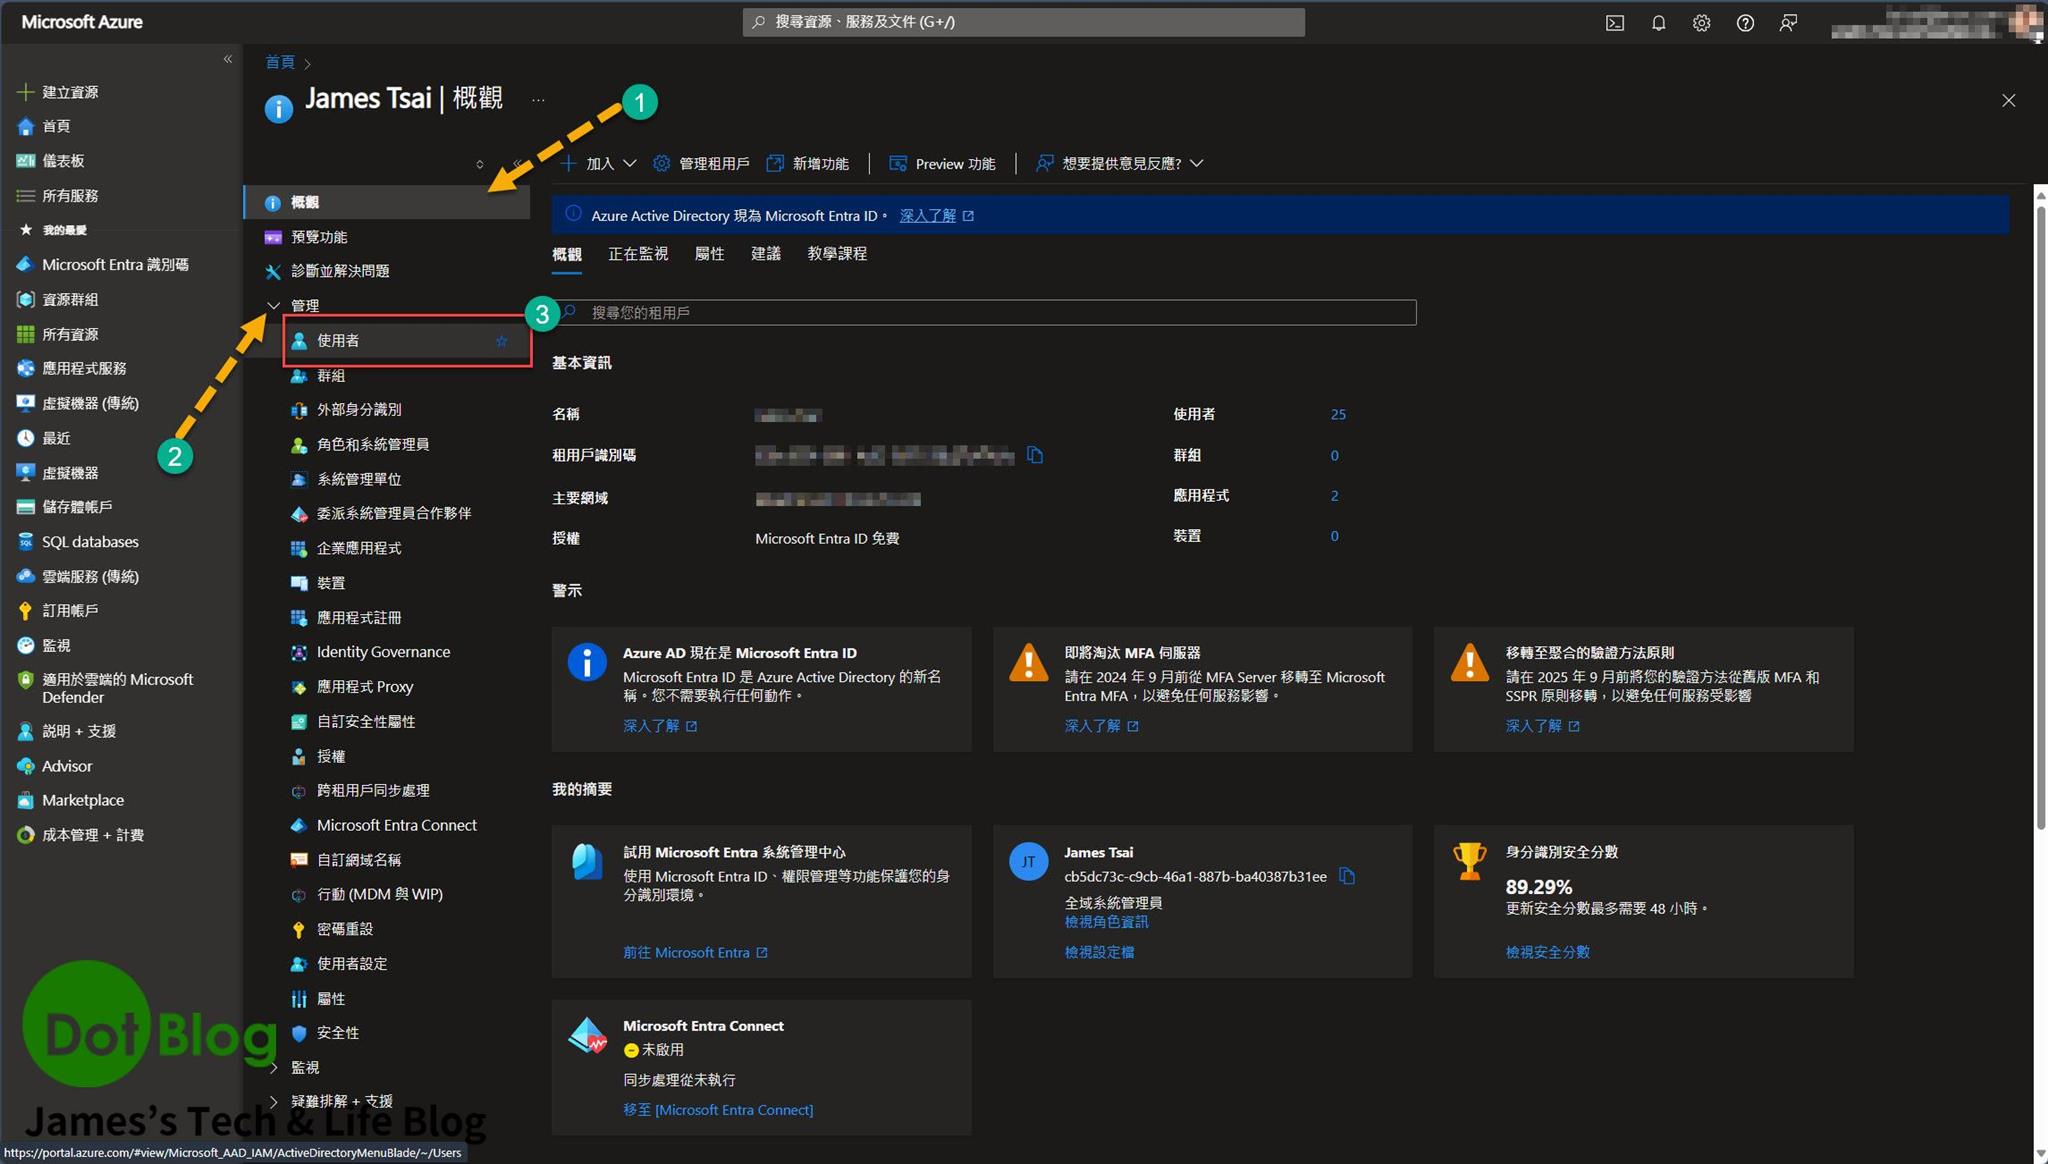
進到 "使用者" 頁面後,找到 "大量作業":
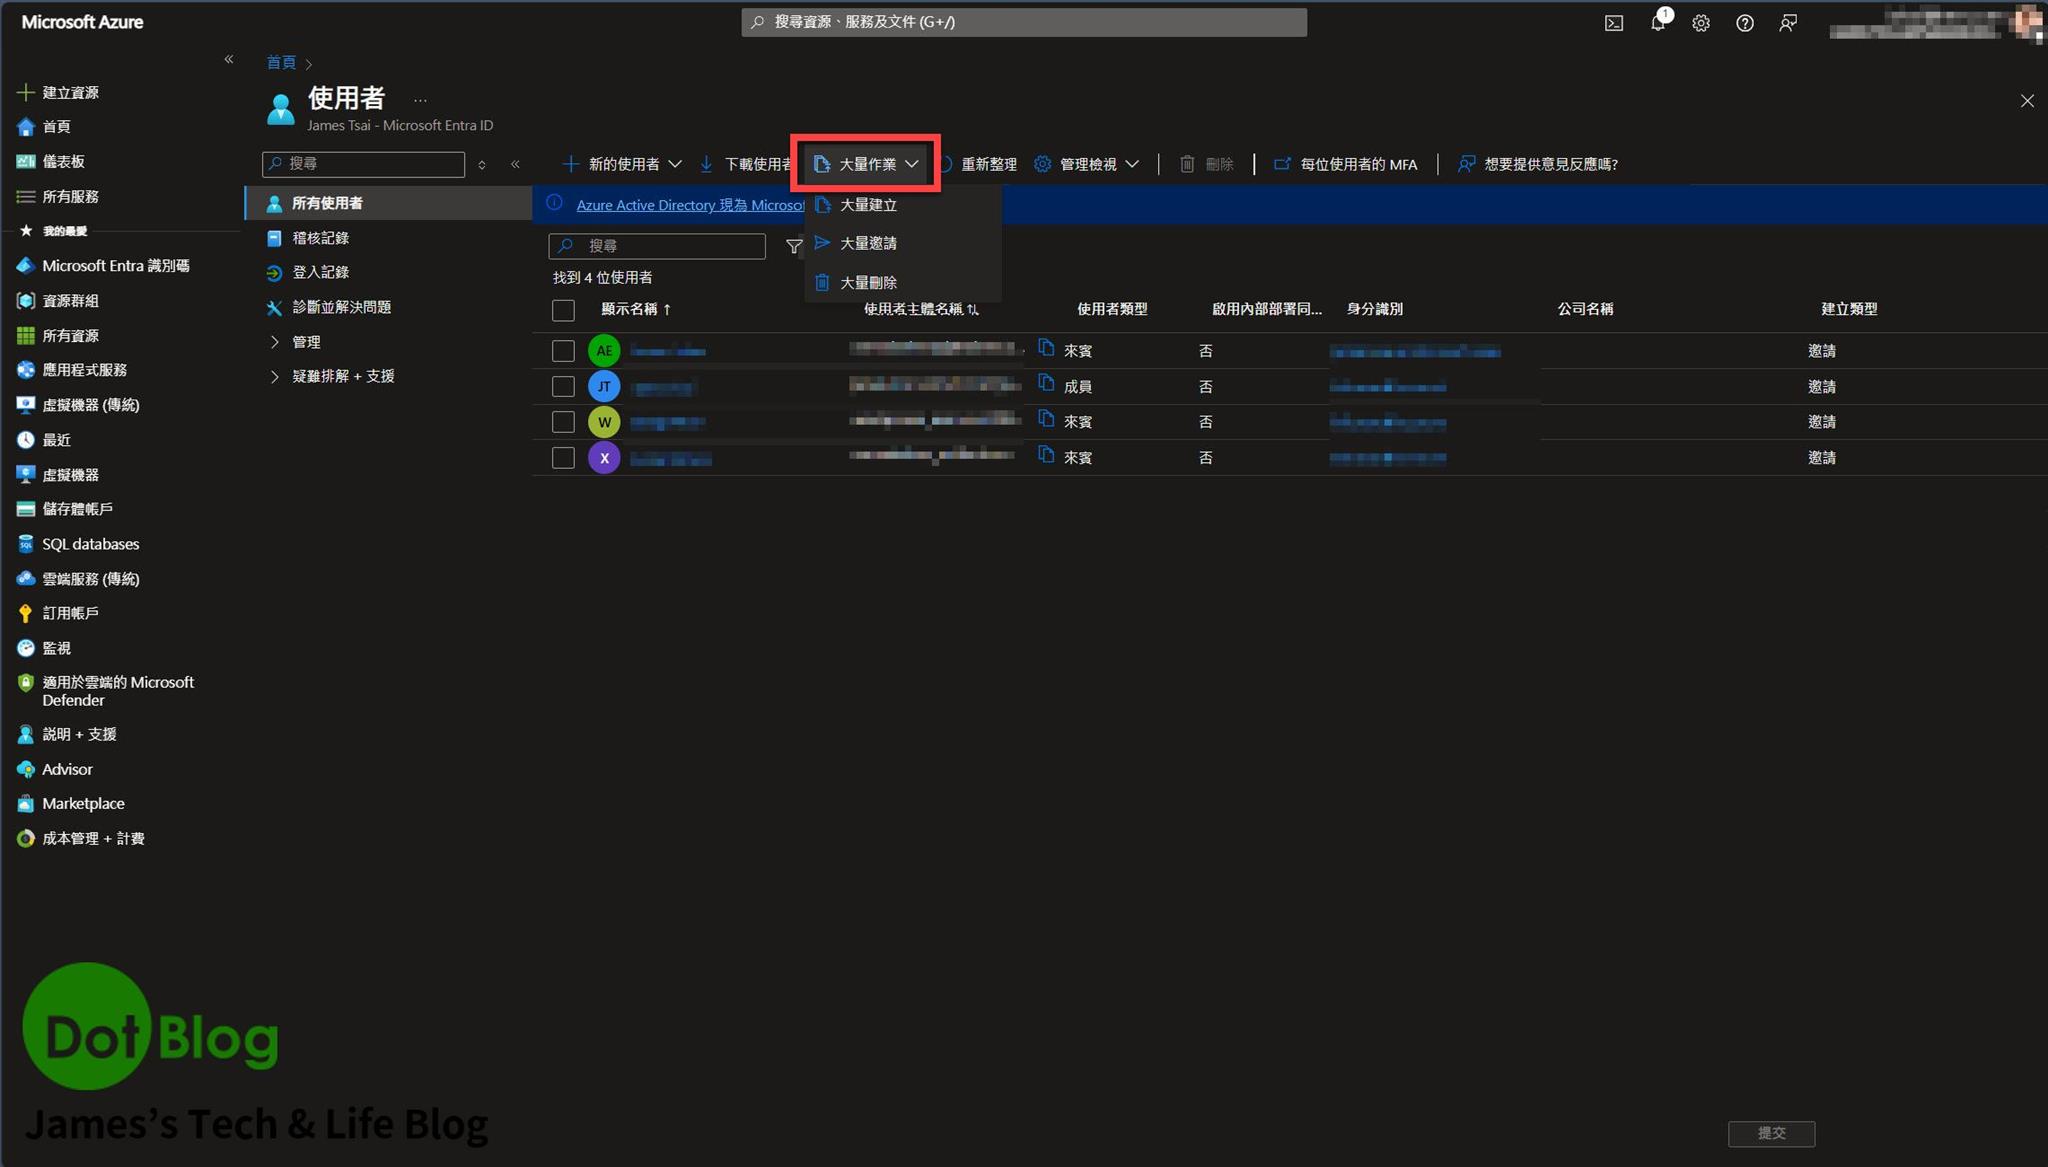
在選單中點選 "大量邀請":
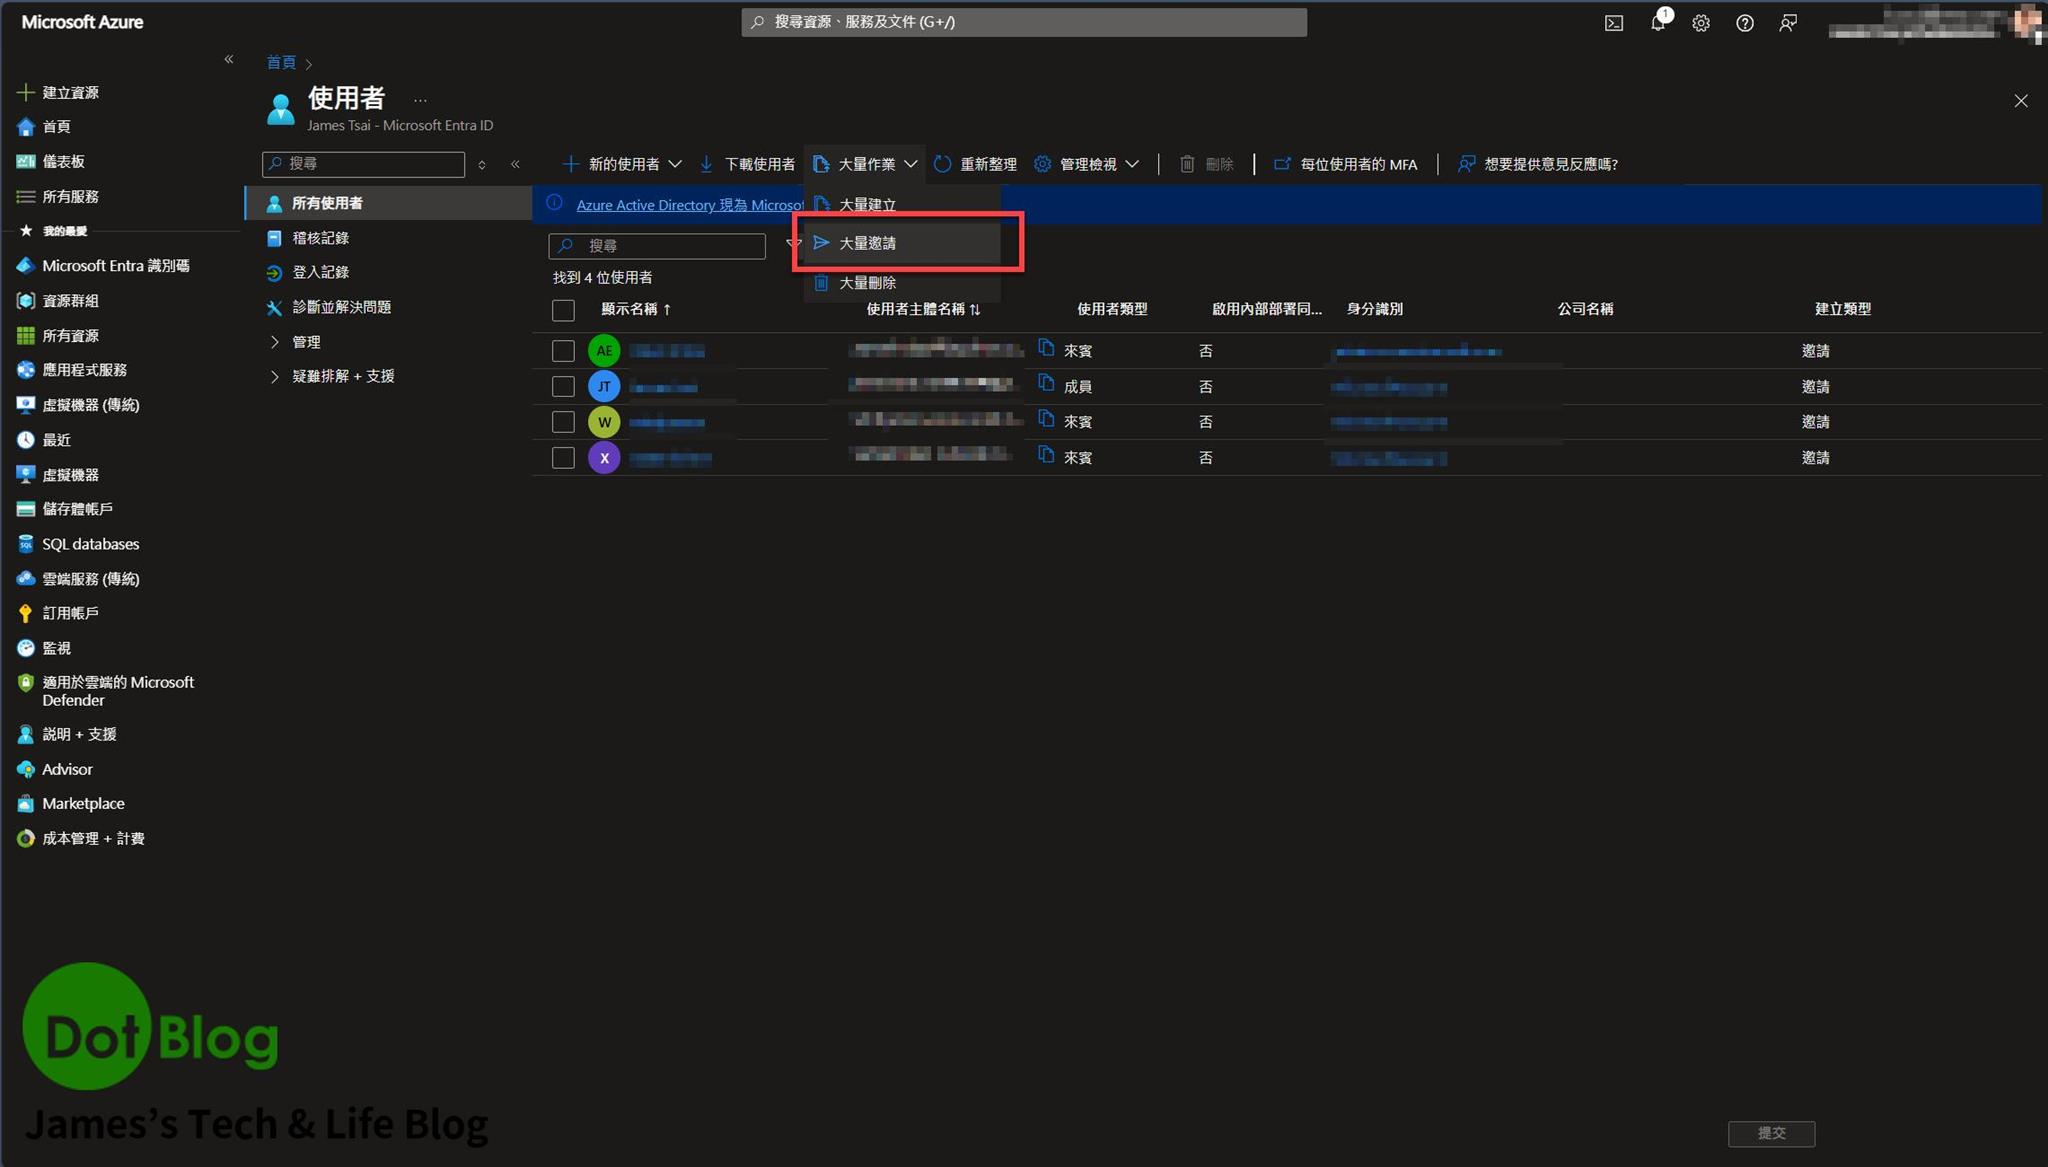
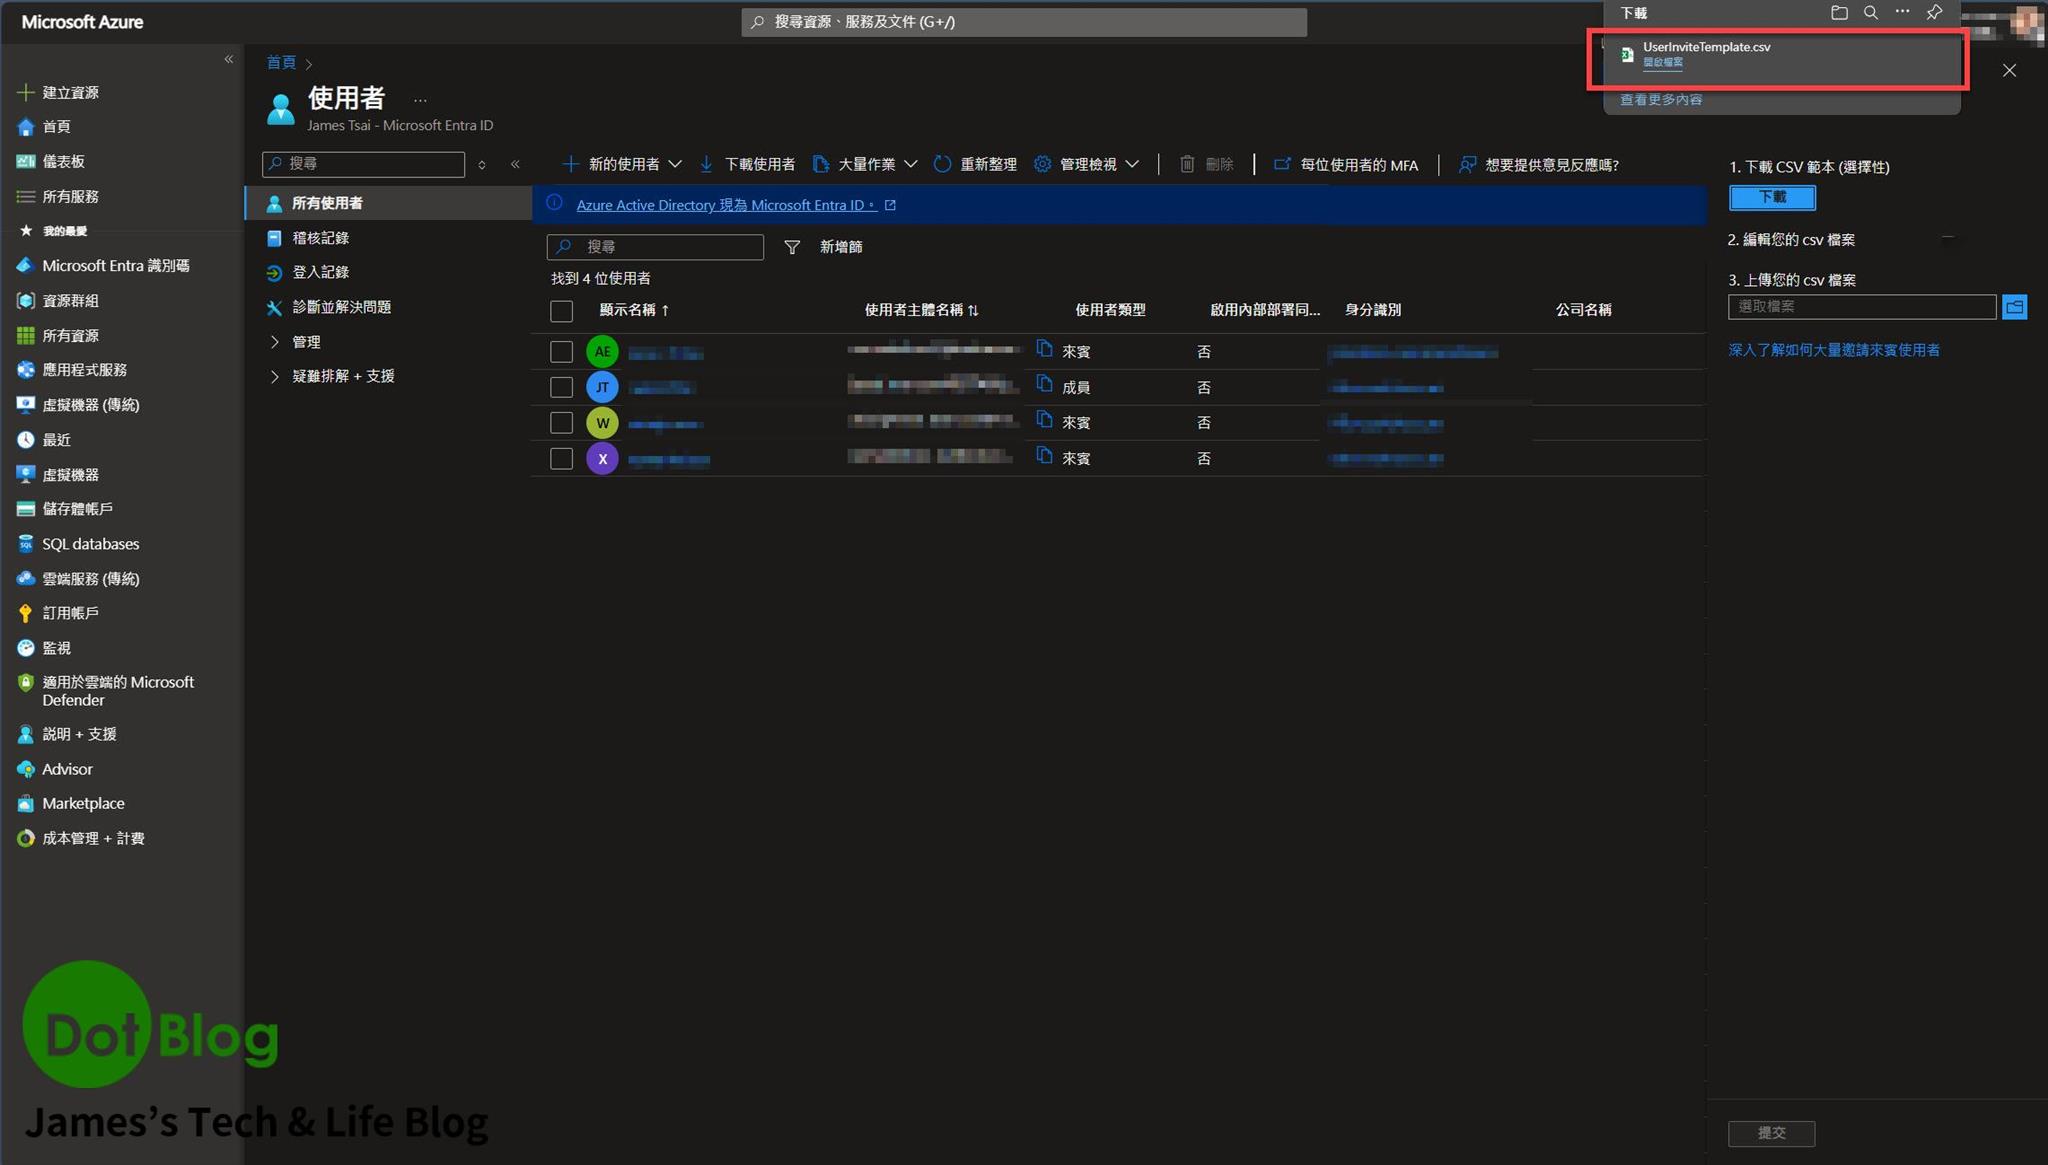
接著在畫面的右邊會出現 "大量邀請使用者" 的頁籤,點選 下載 CSV 範本的 "下載":

會看到瀏覽器下載了一份 "UserInviteTemplate.csv" 的檔案:
找到該份檔案,直接透過 Excel 開啟(當然既然是 CSV 檔,也可以用任意的文字編輯器開啟):
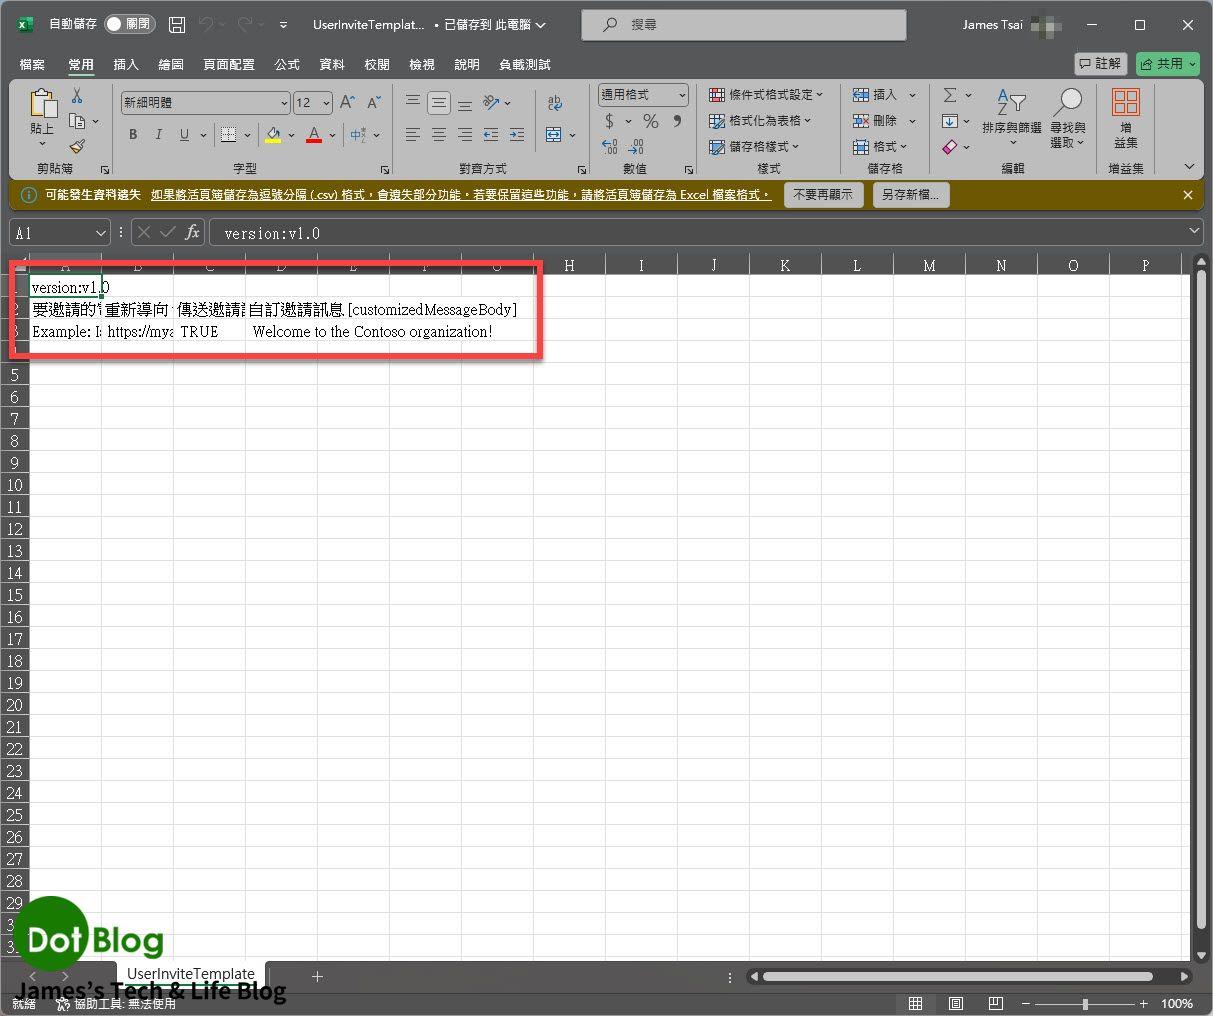
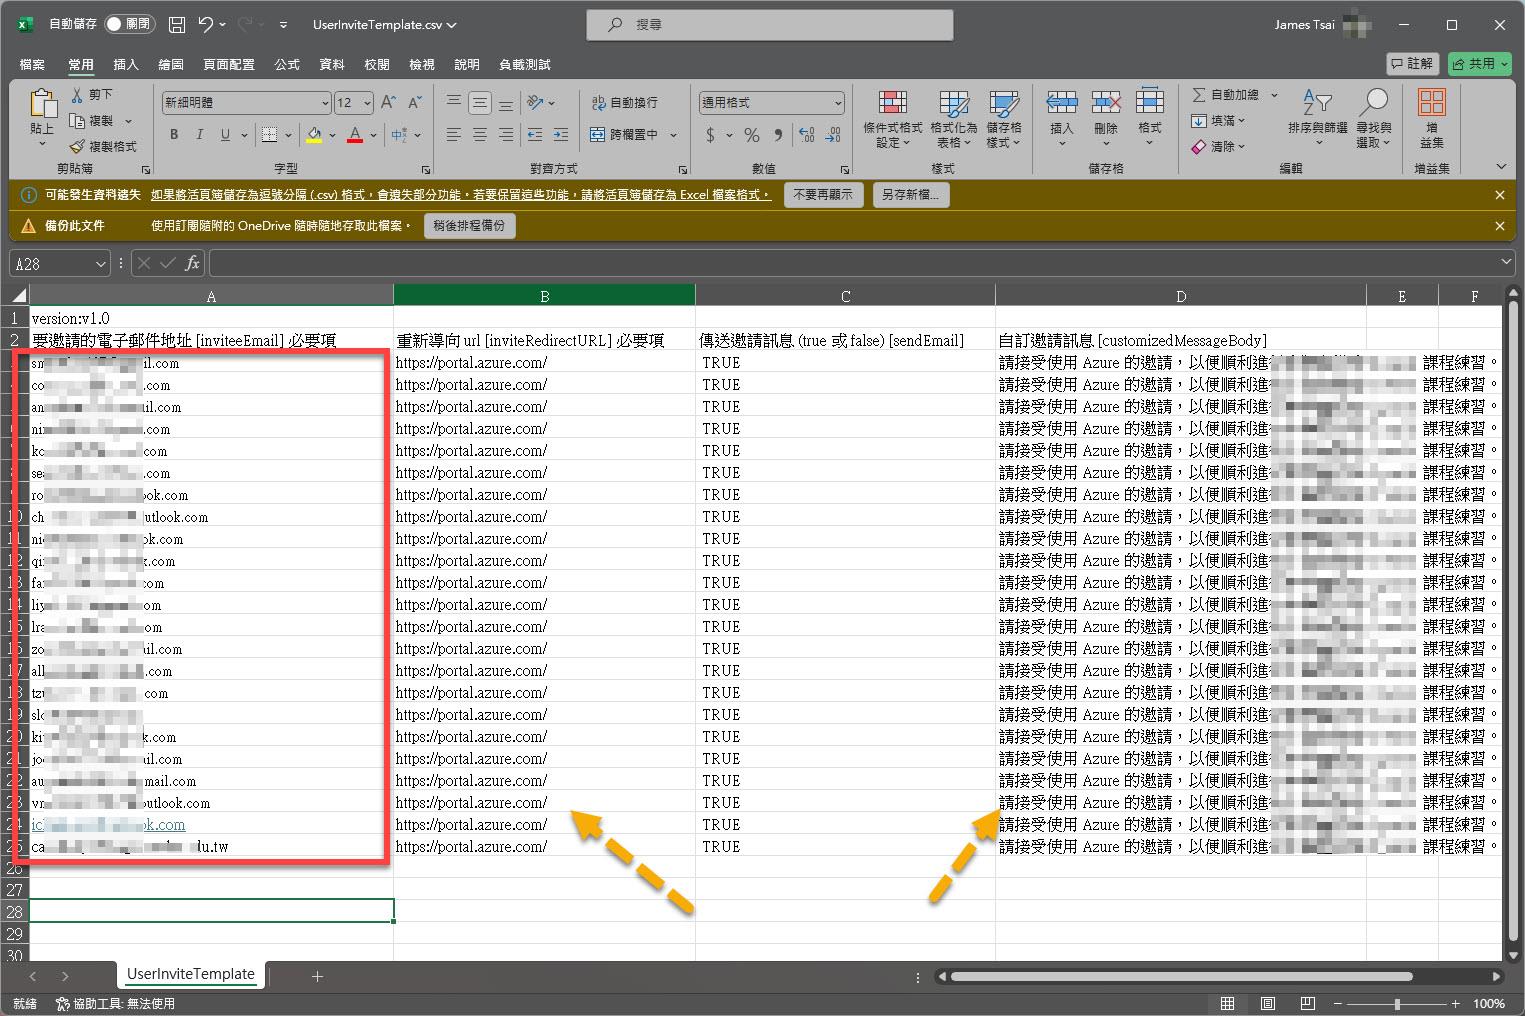
看到這份 CSV 檔案的內容定義,大概就知道是要做什麼了,把要邀請加入到該 Azure 的訂閱帳戶中的作用目錄裡的 Email 名單填入。
重新導向 url、自訂邀請訊息,都可以自己填入需要的資料:
屆時,使用者收到的邀請 Email 內容大致上會如下圖(此為 Outlook 收信介面):
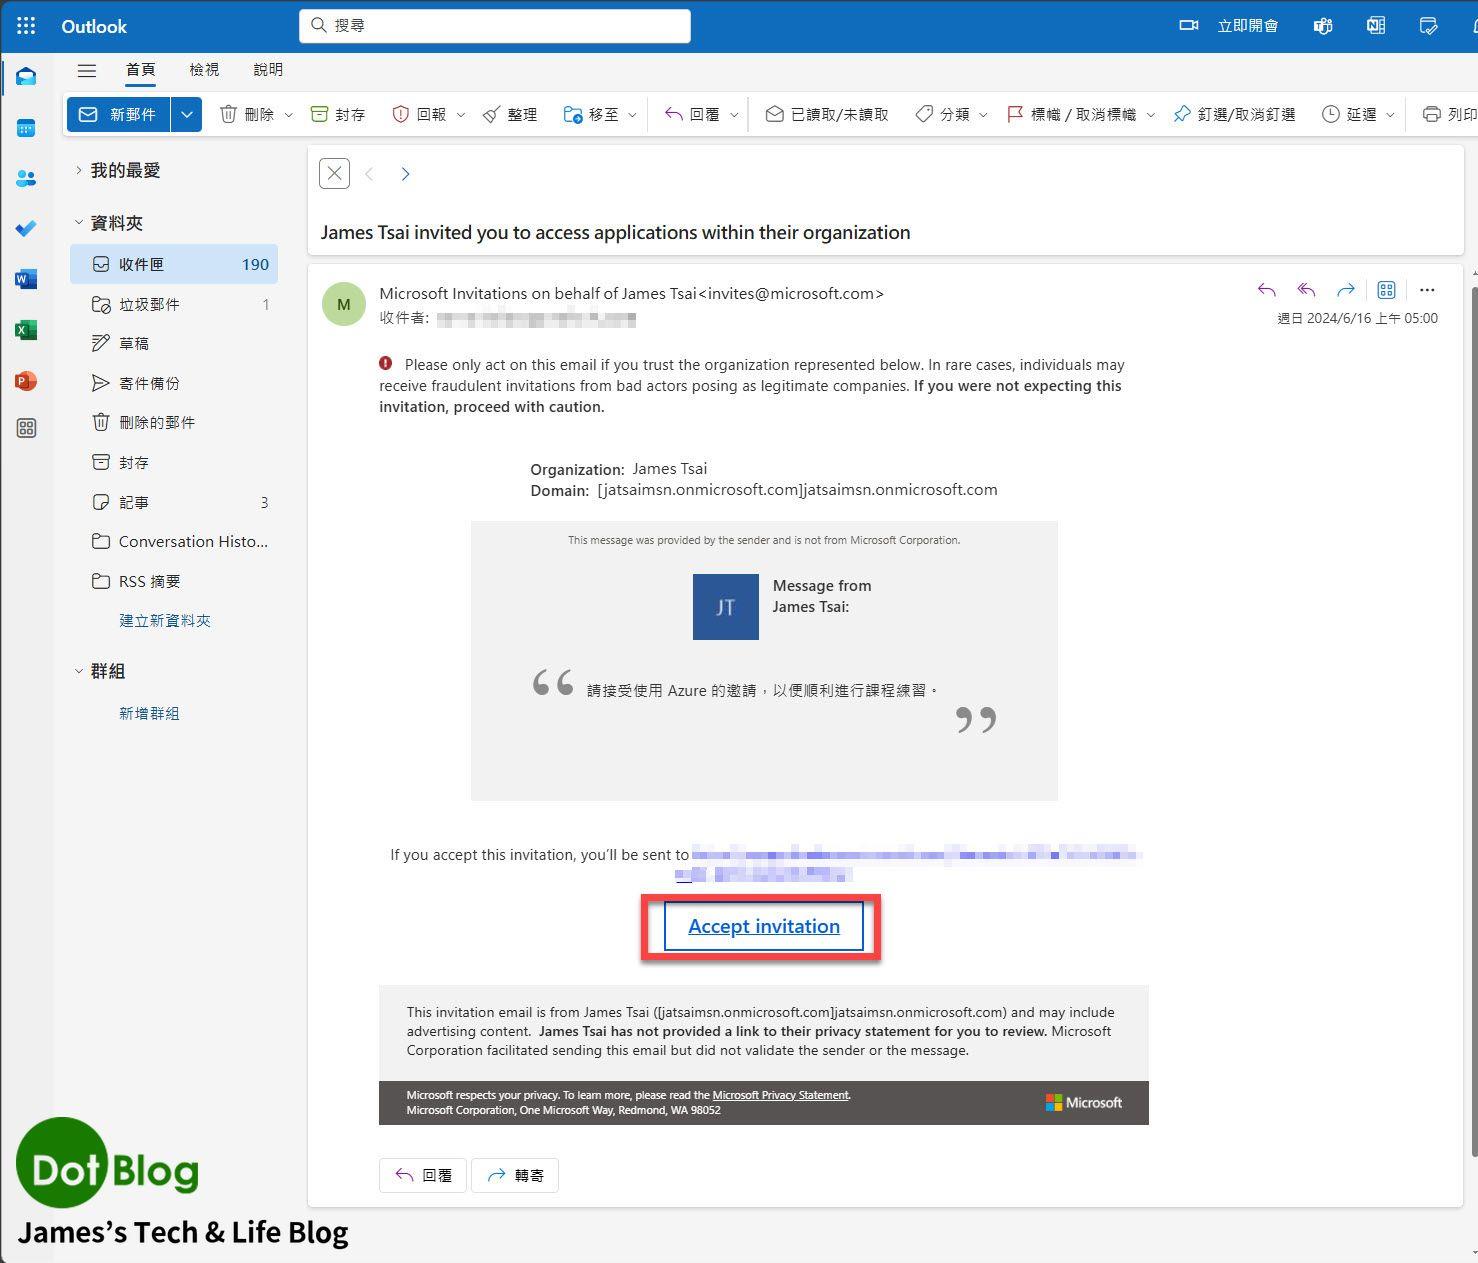
收到這封信的 Email 帳號點選 "Accept invitation" 後,就會需要透過瀏覽器登入 "Microsoft Account",完成後就會重新導向上述步驟填寫在 csv 當中的 url。
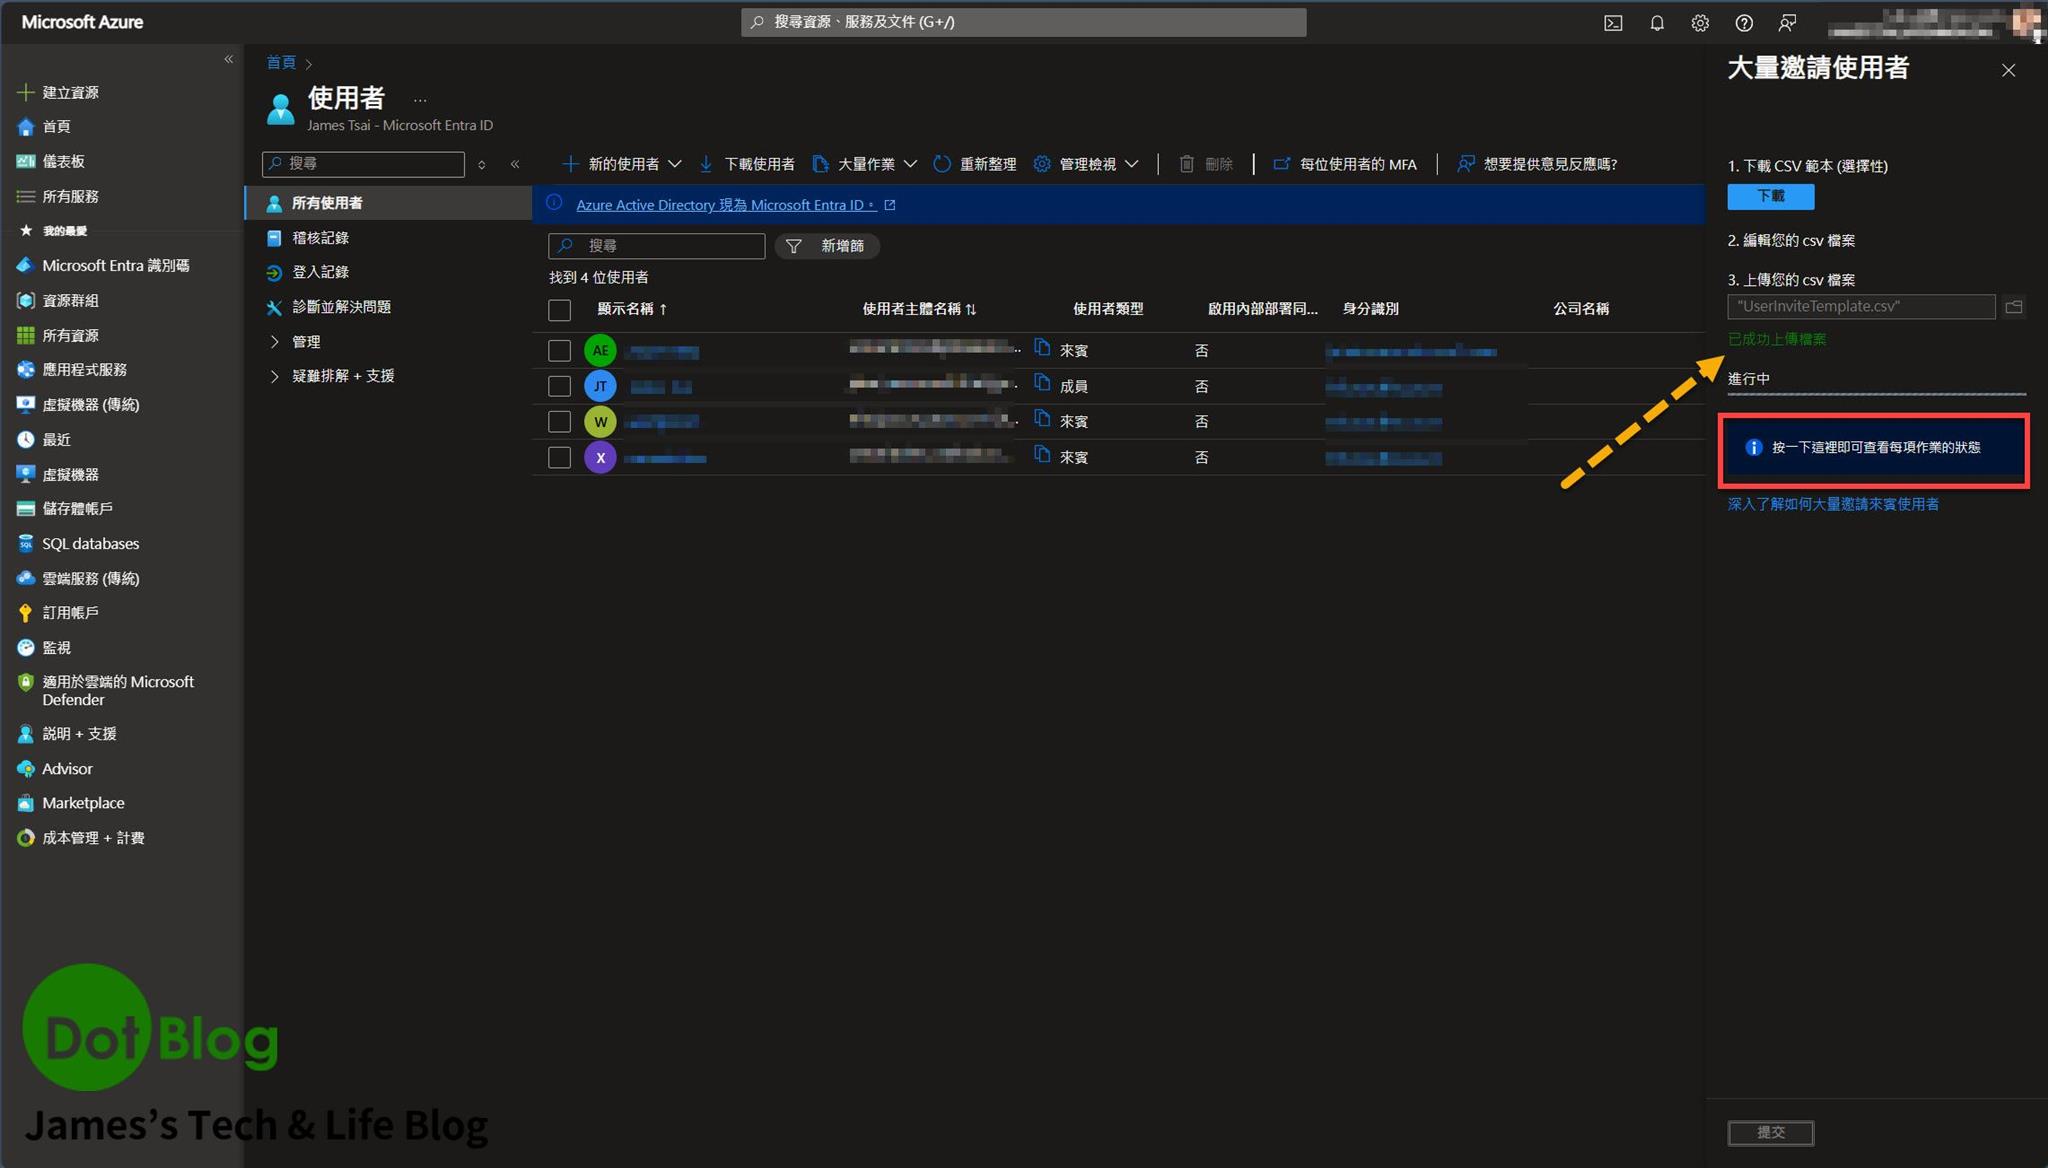
接著再回到 Azure Portal 當中,前面步驟的 "大量邀請使用者" 透過 "上傳您的 csv 檔案"。就是把編輯好的 csv 檔上傳,然後點選 "提交"。
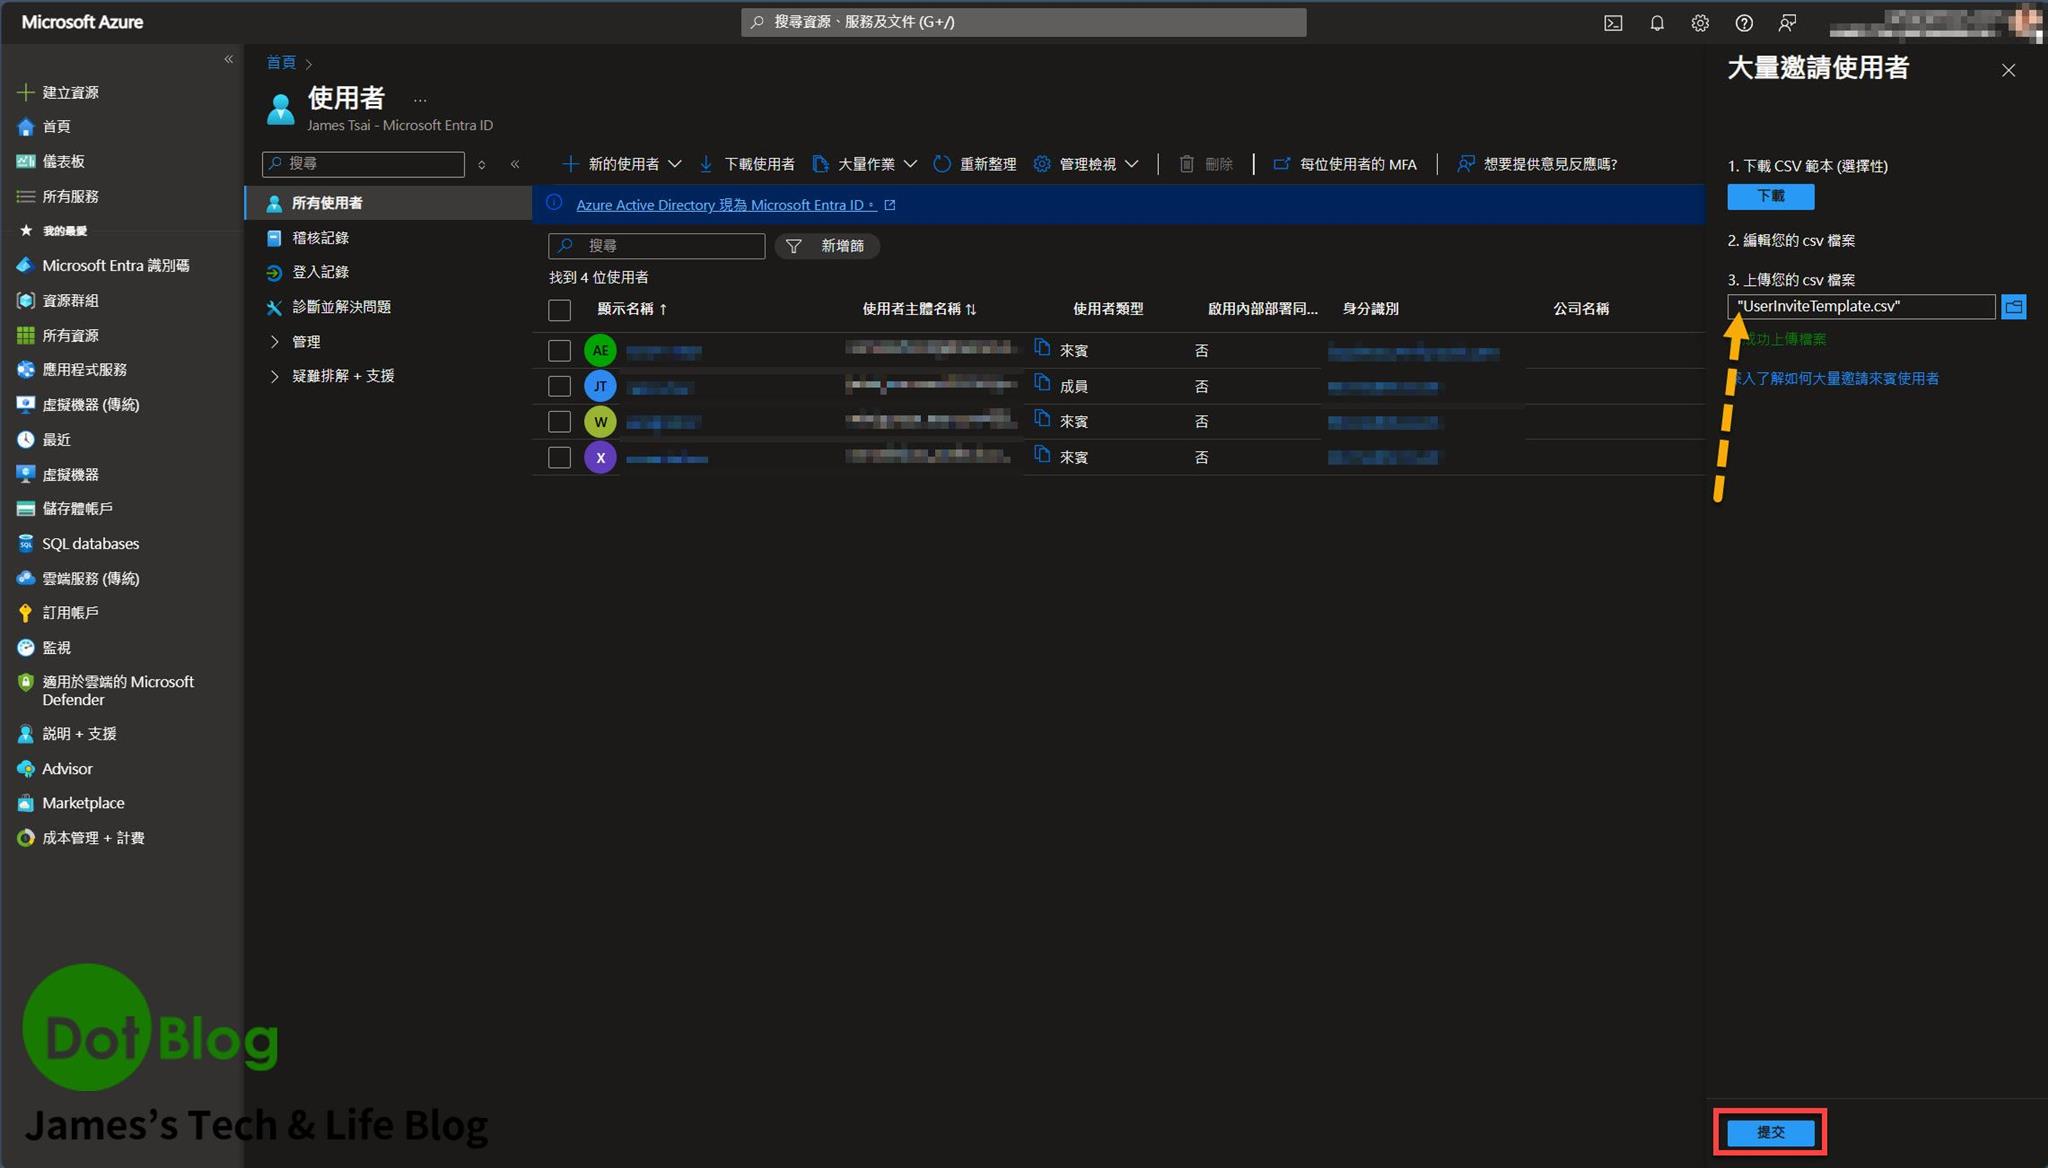
上傳完成後會顯示 "已成功上傳檔案",如果檔案格式沒問題,就會看到顯示 "進行中"。
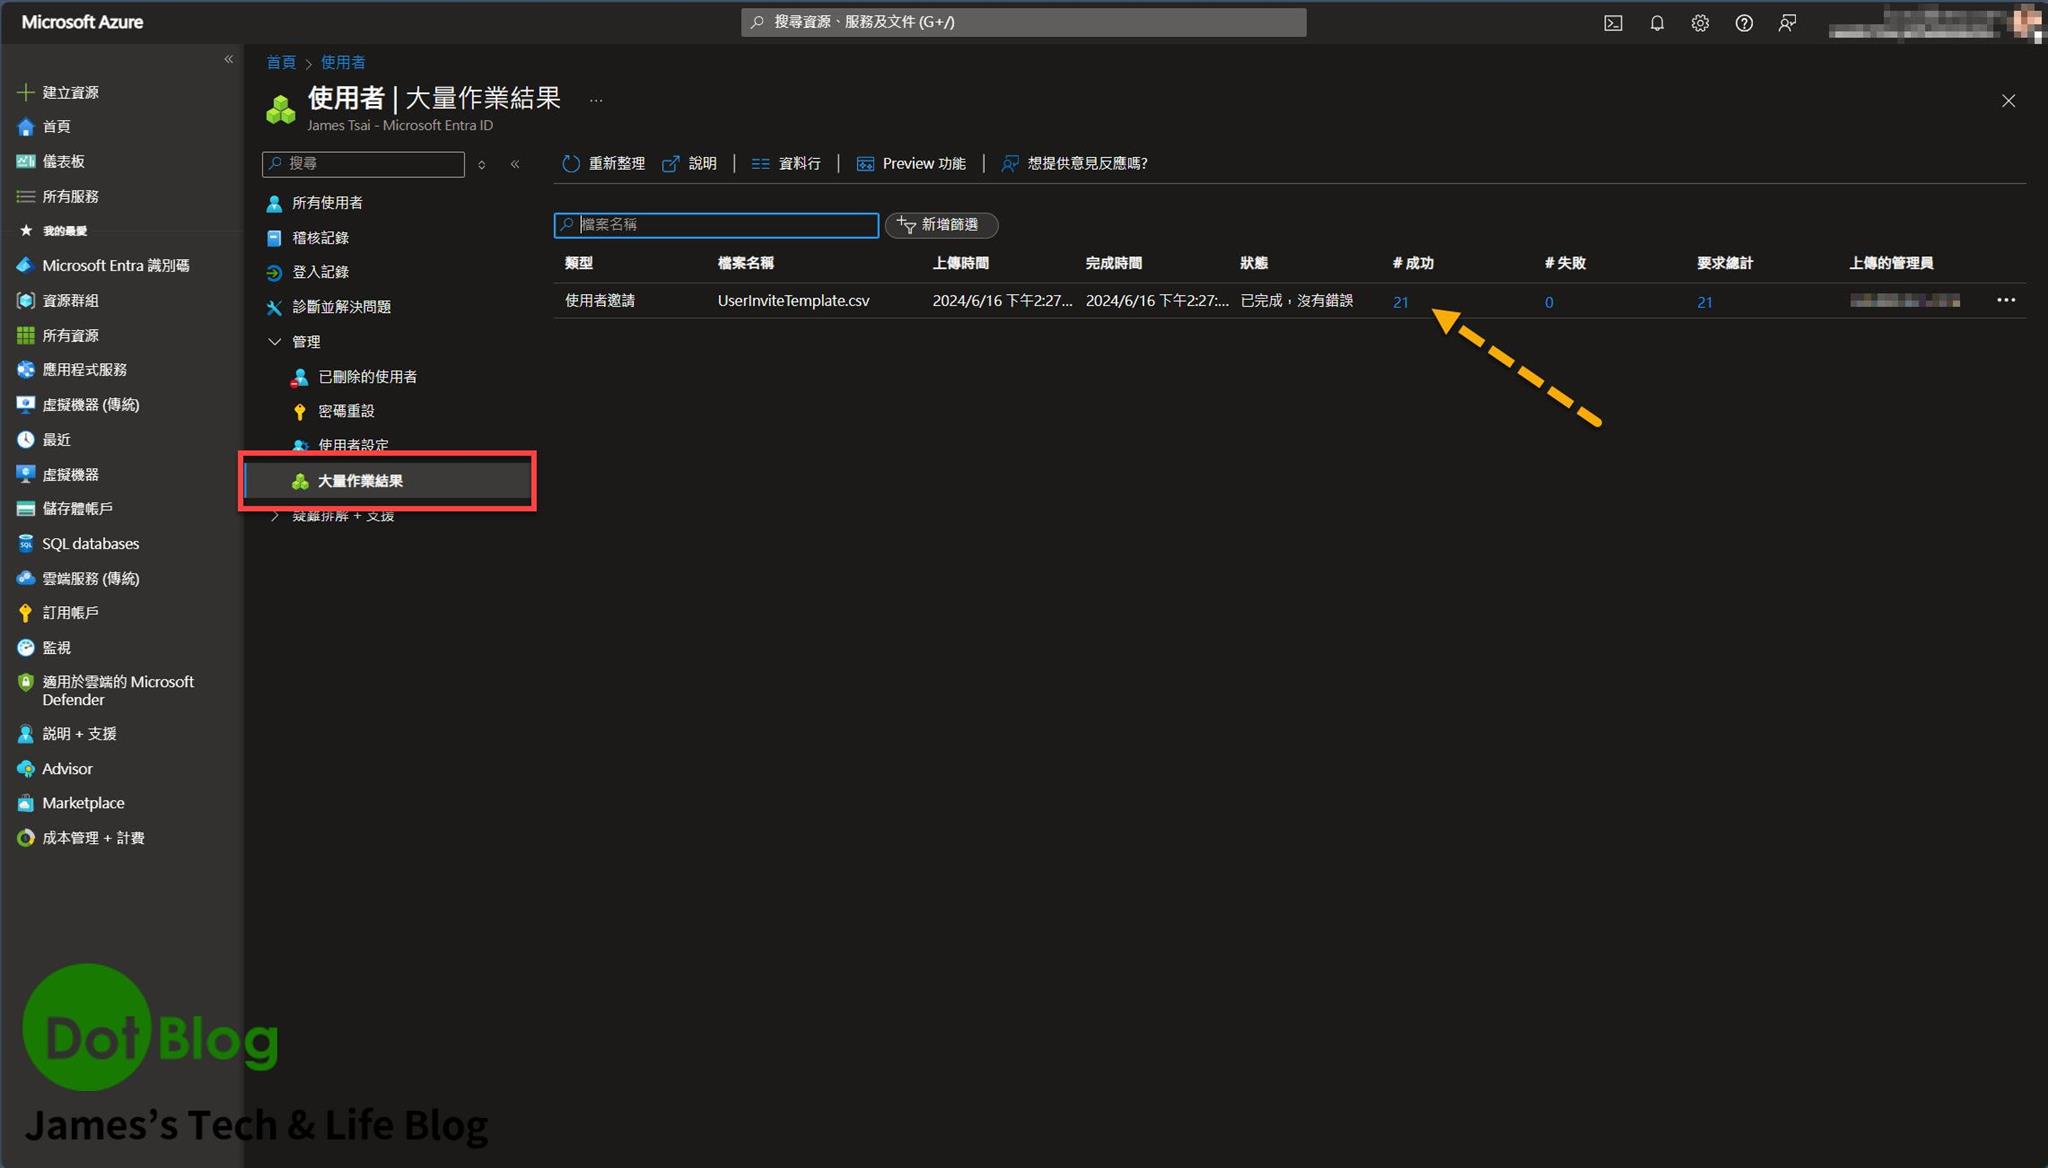
也可以在 "使用者" → "管理" → "大量作業結果" 查看匯入後的處理狀態:
最後可以在 "使用者" 當中看到成功加入的使用者們:
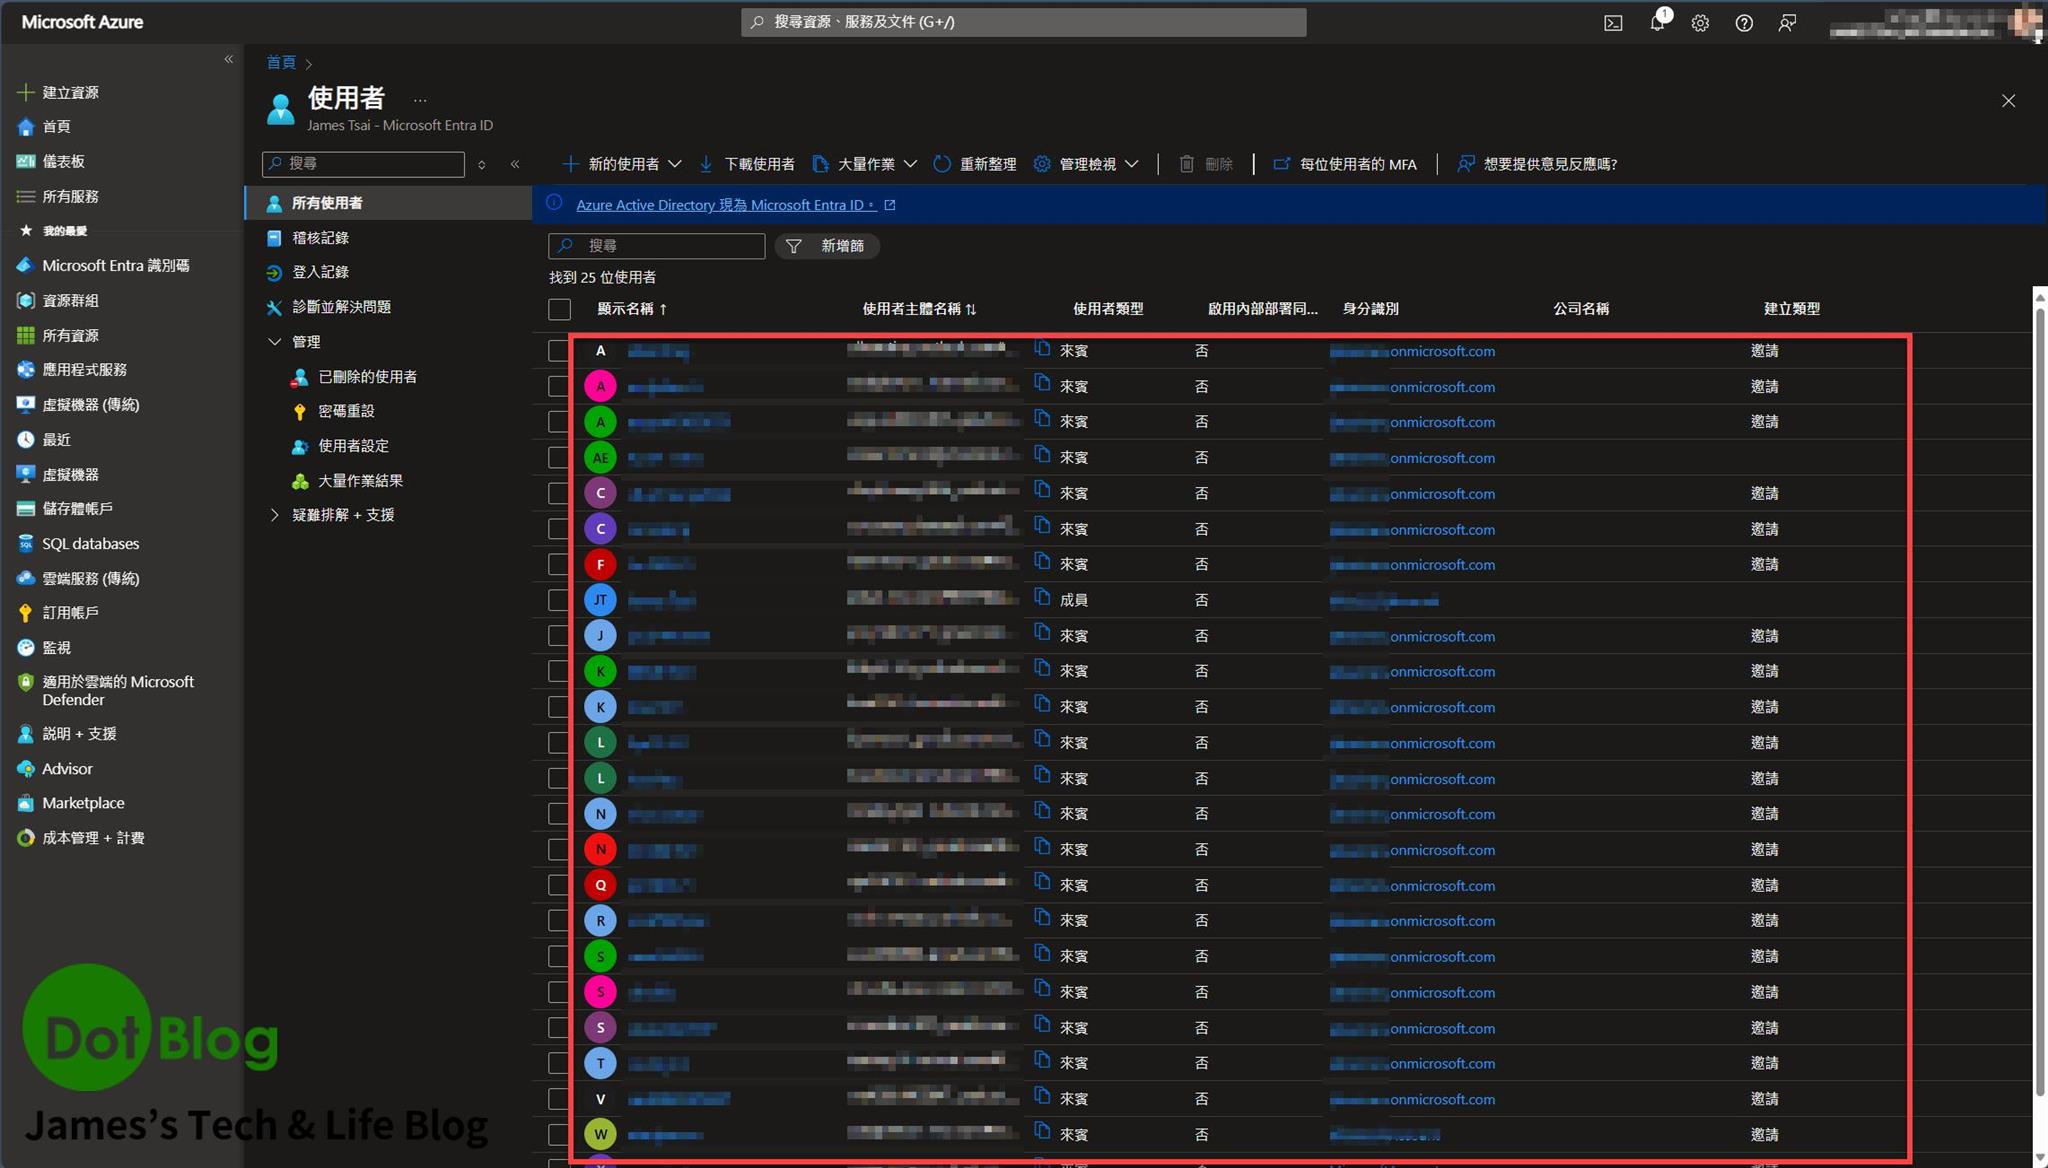
而透過此方式匯入進來的使用者們,雖然在 Azure 中相關的使用權限或角色則需要另外再設定。
但對於讓多個 Email 帳號能直接邀請進入 Azure 當中,個人是覺得挺方便的了。
I'm a Microsoft MVP - Developer Technologies (From 2015 ~).
I focus on the following topics: Xamarin Technology, Azure, Mobile DevOps, and Microsoft EM+S.
If you want to know more about them, welcome to my website:
https://jamestsai.tw
本部落格文章之圖片相關後製處理皆透過 Techsmith 公司 所贊助其授權使用之 "Snagit" 與 "Snagit Editor" 軟體製作。