在電腦的 Process 與 Process 之間要相互通訊(IPC, Inter-Process Communication),粗略的來分可以有兩種方式:
- Socket
- Pipe
以下列出對照:
| Pipe | Socket | |
|---|---|---|
| IPC | ✔ | ✔ |
| 跨電腦 | ✔ (需在 Windows 透過 SMB 服務) | ✔ |
| 效能 | ⭐⭐⭐ | ⭐ |
| 跨網路通訊 | ❌ | ✔ |
| 使用難易 | 易 | 難 |
但不知怎麼的…個人經歷的數段工作歷程中,遇到使用 Socket 的次數之高不在話下,而使用 Pipe 的次數卻寥寥可數。
這是一個滿有趣的現象就是😉
尤其在單一機器內的 CLI 程式與 GUI 程式的要互動通訊時,通常在架構上選擇 "Pipe" 會是比較恰當的。
若在 .NET 當中使用 Pipe 則可再細分:
- Anonymous Pipe
- Named Pipe
| 類型 | 類別 | 用途 |
|---|---|---|
| Anonymous Pipe | AnonymousPipeServerStream / AnonymousPipeClientStream | 只適用於 Parent/Child Process |
| Named Pipe | NamedPipeServerStream / NamedPipeClientStream | 最常用,可跨 Process、甚至跨電腦 (Windows 系統的 SMB) |
本篇要討論的則是應用場景中比較常見的 Named Pipe。
下面簡單示意 Named Pipe 的使用架構:
+--------------------+                          +--------------------+
|   Server Process   |         Named Pipe       |   Client Process   |
|                    | <----------------------> |                    |
|   NamedPipeServer  |       \\.\pipe\demo      |   NamedPipeClient  |
+--------------------+                          +--------------------+
所以這跟 Socket 通訊架構有什麼不同?當下的使用場景如果可以選擇使用 Pipe,有什麼理由要選擇 Socket ?
參不透🙃
所以使用的方式就是:
- Server 建立 Named Pipe。
- Client 連線到 Server 的 Named Pipe。
- 雙方 (Server、Client) 透過 Stream 或 Binary 來讀寫資料。
所以更進一步使用程式的解釋時:
Server 端的程式的運作流程上就是:
建立 Pipe → WaitForConnection()→ 接收資料 → 回傳資料。
Client 端的程式的運作流程上就是:
建立 Pipe → Connect() → 寫入資料 → 讀取回應。
根據上述,來一段 Server 端 NamedPipe 透過 Stream 的簡單示意程式:
class PipeServer
{
    static void Main()
    {
        using var server = new NamedPipeServerStream("demoPipe", PipeDirection.InOut);

        Console.WriteLine("Waiting for client...");
        server.WaitForConnection();

        using var reader = new StreamReader(server);
        using var writer = new StreamWriter(server) { AutoFlush = true };

        string message = reader.ReadLine();
        Console.WriteLine($"Client: {message}");

        writer.WriteLine("Hello from server");
    }
}
再來一段 Client 端 NamedPipe 透過 Stream 的簡單示意程式:
class PipeClient
{
    static void Main()
    {
        using var client = new NamedPipeClientStream(".", "demoPipe", PipeDirection.InOut);

        client.Connect();

        using var reader = new StreamReader(client);
        using var writer = new StreamWriter(client) { AutoFlush = true };

        writer.WriteLine("Hello from client");

        string response = reader.ReadLine();
        Console.WriteLine($"Server: {response}");
    }
}
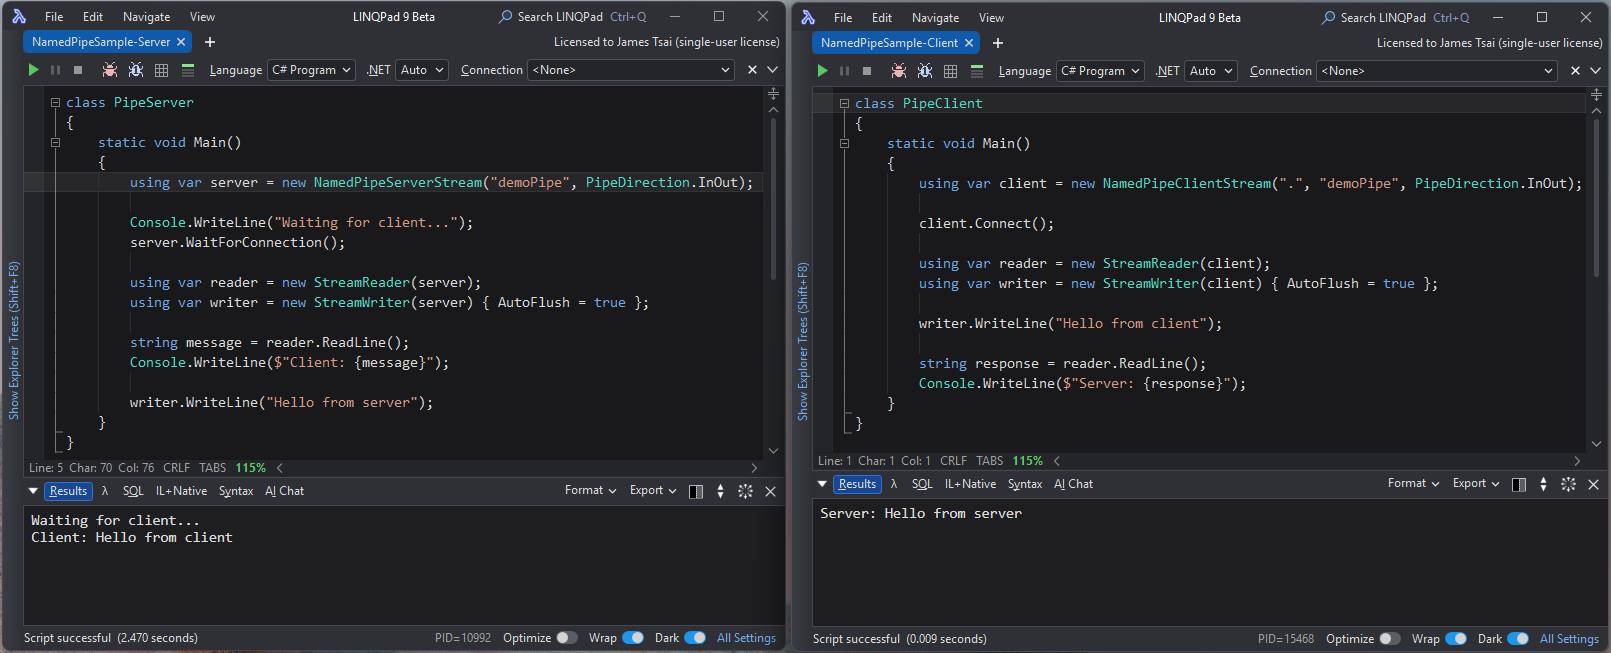
透過 LinqPad 做此簡單範例程式的展示 (下圖左邊為 Server 端;右邊為 Client 端):
- 當 Server 端執行起來後,顯示 "Waiting for Client…"。
- 當 Client 端執行起來後,Server 端發現有 Client 連上線後,顯示 Client 送來的訊息 "Hello from Client" (左邊),並且回應 "Hello from server" 給 Client。
- Client 端收到 Server 的回應,並顯示出 "Hello from server" (右邊)。
最終的結果就是這樣:
除了使用 Stream 來處理之外,也可以用 Binary 來處理。
下為使用 Binary 的 Server 端的簡單範例:
class PipeServer
{
	static void Main()
	{
		using var server = new NamedPipeServerStream("demoPipe", PipeDirection.InOut);

		Console.WriteLine("Waiting for client...");
		server.WaitForConnection();

		using var reader = new BinaryReader(server, Encoding.UTF8, leaveOpen: true);
		using var writer = new BinaryWriter(server, Encoding.UTF8, leaveOpen: true);

		// 讀取長度
		int length = reader.ReadInt32();

		// 讀取資料
		byte[] data = reader.ReadBytes(length);

		string message = Encoding.UTF8.GetString(data);

		Console.WriteLine($"Client: {message}");

		// 回應
		string response = "Hello from server";
		byte[] responseBytes = Encoding.UTF8.GetBytes(response);

		writer.Write(responseBytes.Length);
		writer.Write(responseBytes);
		writer.Flush();
	}
}
下為使用 Binary 的 Client 端的簡單範例:
class PipeClient
{
	static void Main()
	{
		using var client = new NamedPipeClientStream(".", "demoPipe", PipeDirection.InOut);

		client.Connect();

		using var reader = new BinaryReader(client, Encoding.UTF8, leaveOpen: true);
		using var writer = new BinaryWriter(client, Encoding.UTF8, leaveOpen: true);

		string message = "Hello from client";
		byte[] bytes = Encoding.UTF8.GetBytes(message);

		// 傳送長度
		writer.Write(bytes.Length);

		// 傳送資料
		writer.Write(bytes);
		writer.Flush();

		// 讀回應
		int length = reader.ReadInt32();
		byte[] responseBytes = reader.ReadBytes(length);

		string response = Encoding.UTF8.GetString(responseBytes);

		Console.WriteLine($"Server: {response}");
	}
}
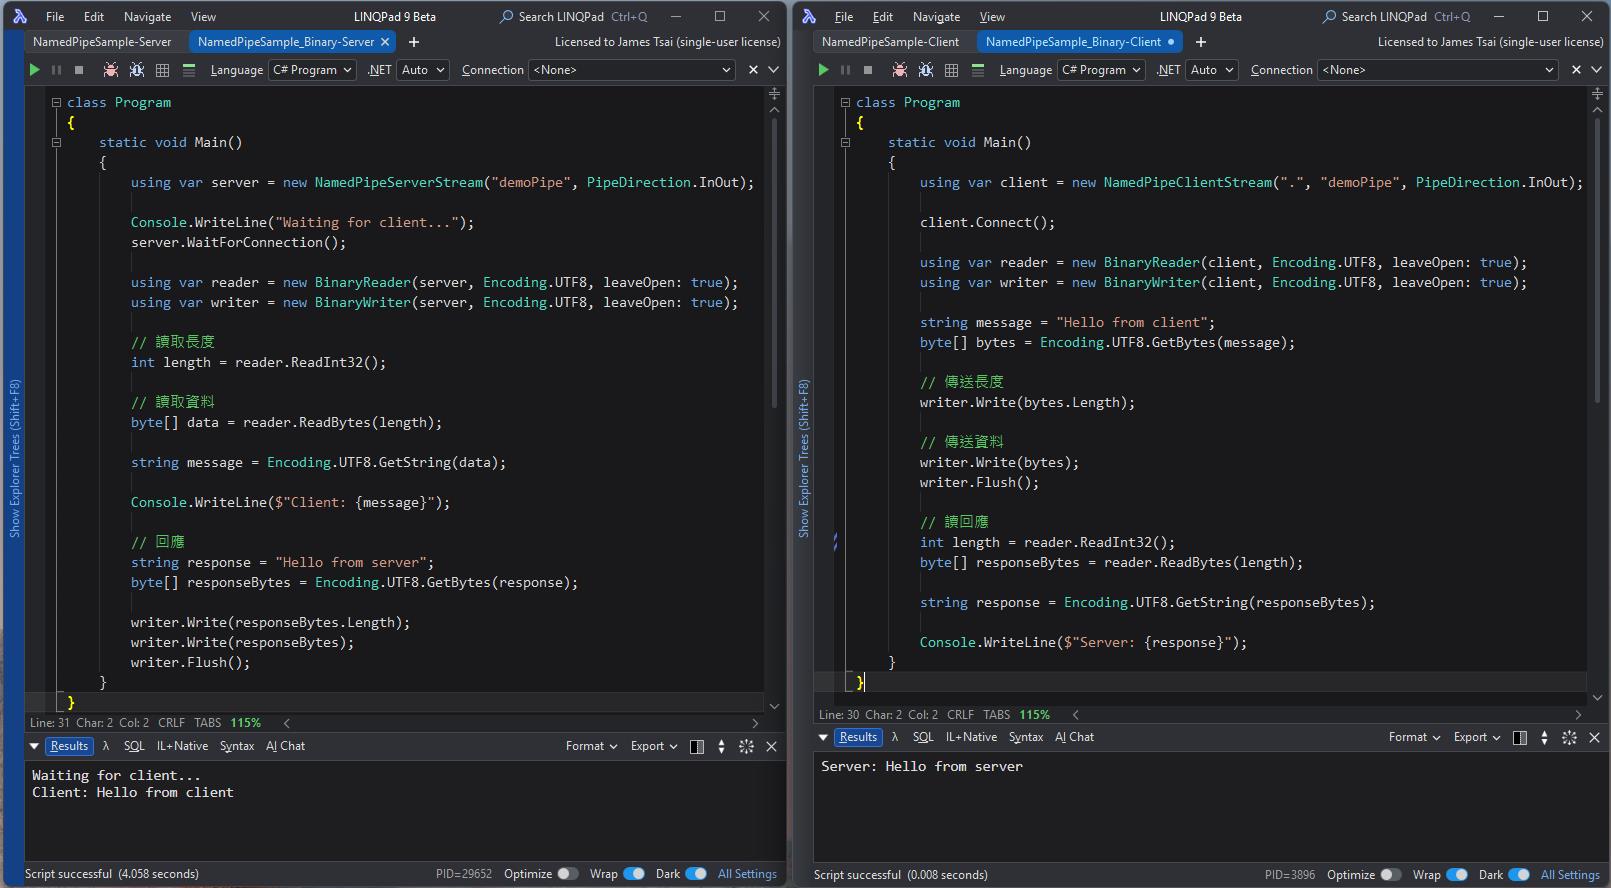
透過 LinqPad 做此簡單範例程式的展示 (下圖左邊為 Server 端;右邊為 Client 端):
- 當 Server 端執行起來後,顯示 "Waiting for Client…"。
- 當 Client 端執行起來後,Server 端發現有 Client 連上線後,顯示 Client 送來的訊息 "Hello from Client" (左邊),並且回應 "Hello from server" 給 Client。
- Client 端收到 Server 的回應,並顯示出 "Hello from server" (右邊)。
最終的結果就是這樣:
所以最後再補充一下透過 Stream 跟 Binary 的使用對照:
| 項目 | StreamReader / StreamWriter | BinaryReader / BinaryWriter |
|---|---|---|
| 資料型態 | Text | Binary |
| 編碼 | 內建 UTF-8 / encoding | 不處理字串編碼(除非自己做) |
| 讀寫方式 | ReadLine() ReadToEnd() | ReadInt32() ReadBytes() |
| 協定 | 通常 line-based text | 通常自訂 binary protocol |
| 效能 | ⭐⭐⭐ | ⭐⭐⭐⭐ |
| 可讀性 | 可直接看到文字 | 不可讀 |
| IPC / Network | 偶爾 | 常用 |
| Debug | 容易 | 較難 |
最後的結論:
1. 使用 NamedPipe 作為 Process 與 Process 之間的通訊,除了可以省去很多網路層的通訊處理問題,也是比較能展現高效能的作法。
2. 至於是使用 Stream 或 Binary 來進一步處理,則看傳輸資料的需求而定。
I'm a Microsoft MVP - Developer Technologies (From 2015 ~).
I focus on the following topics: Xamarin Technology, Azure, Mobile DevOps, and Microsoft EM+S.
If you want to know more about them, welcome to my website:
https://jamestsai.tw
本部落格文章之圖片相關後製處理皆透過 Techsmith 公司 所贊助其授權使用之 "Snagit" 與 "Snagit Editor" 軟體製作。