前言
在gulp中執行powershell指令,變更IIS website實體路徑的實作過程,提供大家參考。若有觀念錯誤或者建議請各位先進不吝指教。
本系列文章大概內容如下(暫定,會修改):
Using gulp to implement .Net web application continuous integration
1.Gulp 基礎教學
2.流程簡介、代入參數與修改AssemblyInfo
3.透過 Gulp 進行 NuGet Package Restore
4.透過 Gulp:gulp-msbuild 進行 Build project
5.透過 Gulp:gulp-nunit-runner 進行 Unit Test
6.Gulp CI Deploy (1) - 透過Gulp : Robocopy 進行 Deploy
7.Gulp CI Deploy (2) - 使用 MSDeploy (WebDeploy) 進行 Deploy
8.Gulp CI IIS Management - 使用 PowerShell 變更實體路徑
8-1 流程說明
8-2 透過Gulp 執行變更實體路徑指令
9.最終篇: Team City 設定 與 Build Scripts 撰寫
本系列文章使用的環境如下:
1.Visual Studio 2015 Community Update 3
2.Visual Studio Core
3.TeamCity
4.Nunit 3.2.1.0
5.NuGet 3.4.4.1321
介紹
流程說明
在進行 Deploy 的過程中,應該會有許多人覺得為什麼需要另開一個實體資料夾,放置新的版本程式碼,而不適直接佈署到目前的實體資料夾。 在實作過程中,有經驗部門主管曾經提醒在 Deploy 過程中,容易導致線上使用者在這端期間中顯示錯誤訊息。雖然我曾經想過能貼出維護公告,再進行停機,但過去維護公家機關內部系統的經驗,臨時的維護公告(如:hotfix)常常沒辦法知會所有使用者,導致效果不彰;又何況是一個對外的系統,一些簡易錯誤的修正版本更新可能就造成使用者,認為系統不穩定的負面印象。 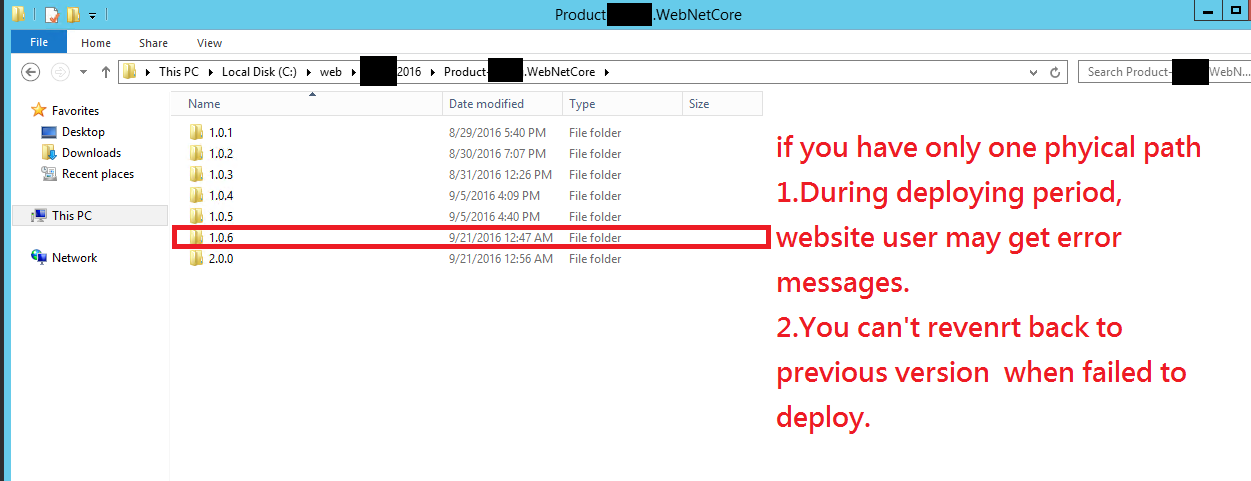
另外,自己也曾經多次遭遇到不可預期的更新版本失敗事件,認為若能有退版機制,將會是多一層防護,而不至於造成無法恢復的錯誤事件發生。 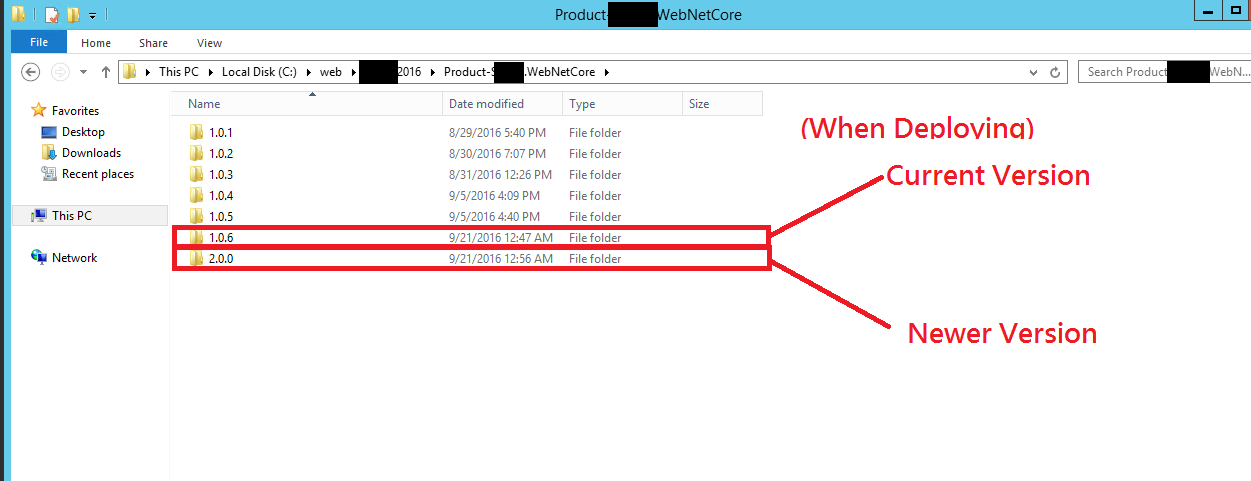
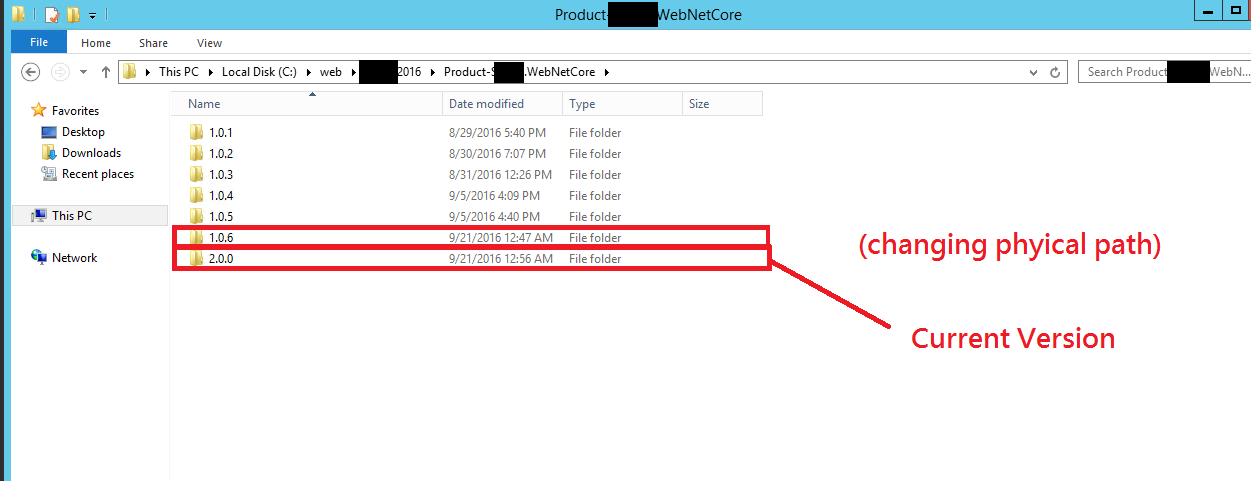
故在這次 CI 實作過程中,個人以先進行佈署,確認沒有錯誤訊息或測試失敗後,再使用指令方式變更 IIS 內 Website 的實體路徑,雖然多了一個執行步驟,但可以避免很多不必要的麻煩。
透過Gulp 執行變更實體路徑指令
(關於 Powershell 使用 Invoke-Command 部分在此篇先不再贅述,有興趣的朋友可以自行 google關鍵字進行查詢)
我們使用指令如下:
$password=ConvertTo-SecureString -String "Password" -AsPlainText -Force;
$Cred = New-Object System.Management.Automation.PsCredential("UserAccount",$password);
Invoke-Command -ComputerName ' + ServerUrlorIP + ' -Credential $Cred { Import-Module "WebAdministration"; dir "IIS:\"; Set-ItemProperty "IIS:\Sites\\'+ SiteName +'" -Name physicalPath -Value c:\\WebProjectPath\\"' + args.buildVersion + '};
主要幾個參數說明:
UserAccount、Password : 請自行更改為網站伺服器帳號密碼
ServerUrlorIP : 網站伺服器的 url 或 IP
SiteName : IIS 內要佈署網站的名稱
WebProjectPath : 佈署網站的實體路徑
args.buildVersion : 透過 gulp 指令取得佈署版本號碼,藉此辨別版本,可依需求變更
我們修改 gulpfile.js 如下:
var gulp = require('gulp'),
    args = require('yargs').argv;

gulp.task('updateSitePhysicalPathWebDeploy', function() {
    var siteName = "AftProject";
    var destServer = "Url_or_IP";
    var spawn = require("child_process").spawn,child;
        console.log("command: " + '$password=ConvertTo-SecureString -String "Password" -AsPlainText -Force;$Cred = New-Object System.Management.Automation.PsCredential("UserAccount",$password);Invoke-Command -ComputerName '+destServer+' -Credential $Cred { Import-Module "WebAdministration"; dir "IIS:\"; Set-ItemProperty "IIS:\Sites\\'+ siteName +'" -Name physicalPath -Value c:\\web\\AftProject2016\\"'  +  siteName +'\\' + args.buildVersion + '";}');
        child = spawn("powershell.exe",['$password=ConvertTo-SecureString -String "Password" -AsPlainText -Force;$Cred = New-Object System.Management.Automation.PsCredential("UserAccount",$password);Invoke-Command -ComputerName '+destServer+' -Credential $Cred { Import-Module "WebAdministration"; dir "IIS:\"; Set-ItemProperty "IIS:\Sites\\'+ siteName +'" -Name physicalPath -Value c:\\web\\AftProject2016\\"'  +  siteName +'\\' + args.buildVersion + '";}']);
        child.stdout.on("data",function(data){
            console.log("Powershell Data: " + data);
        });
        child.stderr.on("data",function(data){
            console.log("Powershell Errors: " + data);
        });
        child.on("exit",function(){
            console.log("Powershell Script finished");
        });
        child.stdin.end(); //end input
});
執行結果:
Step 1. 未執行指令前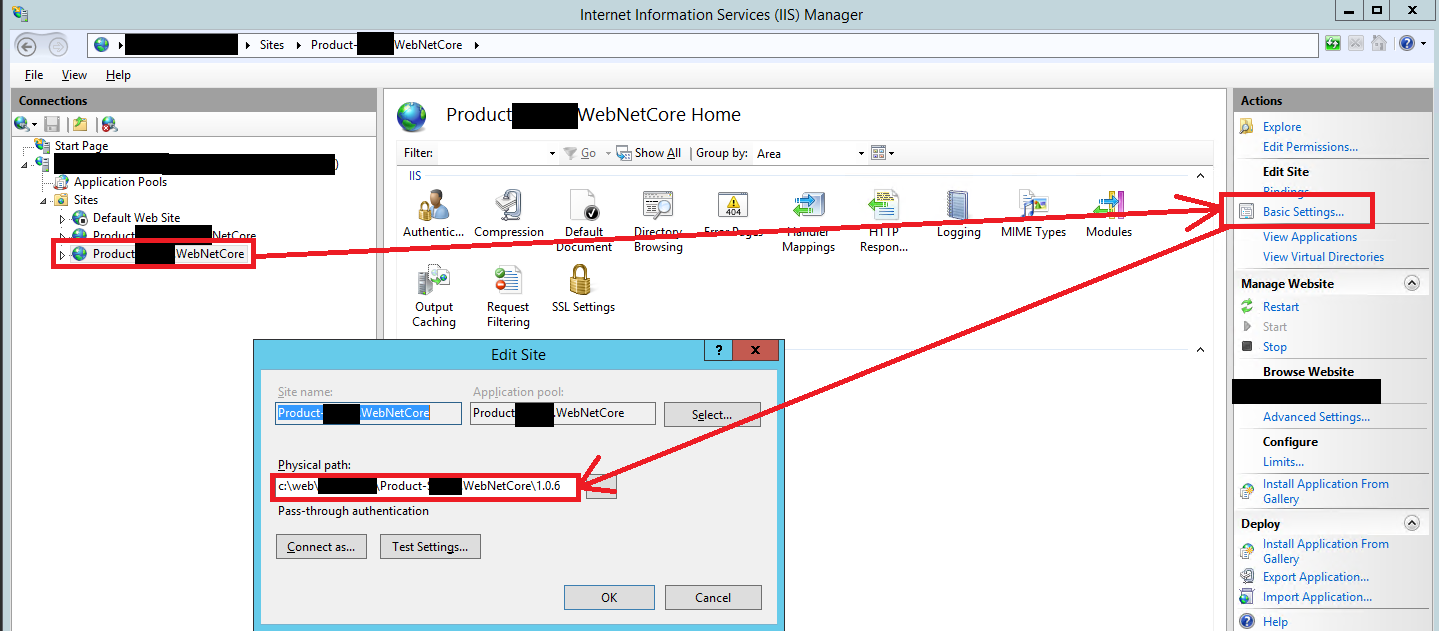
Step 2.執行下列指令:
gulp updateSitePhysicalPathWebDeploy --build-version 1.0.7

Step 3.執行指令後,右鍵點選 WebSite,選擇 Refresh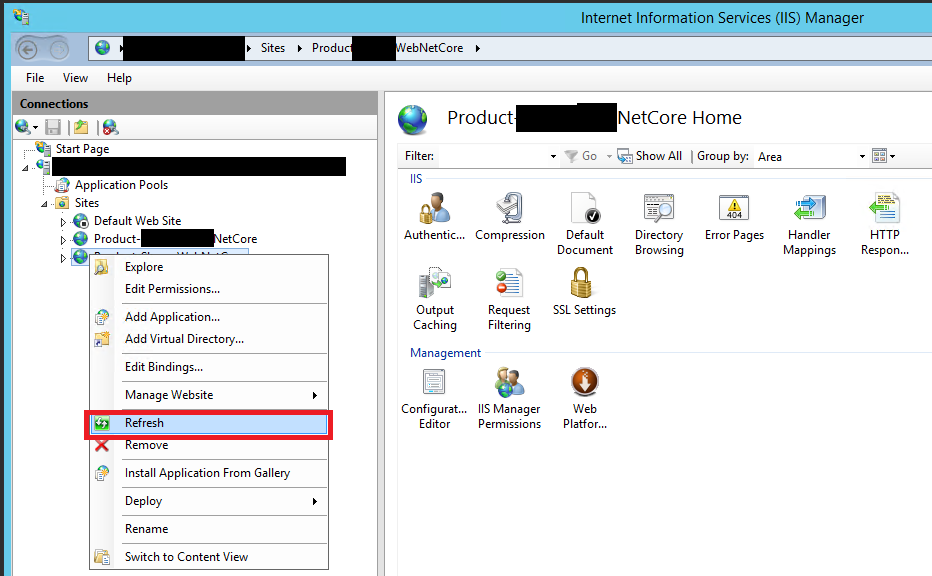
Step 4. 實體路徑已經變更,完成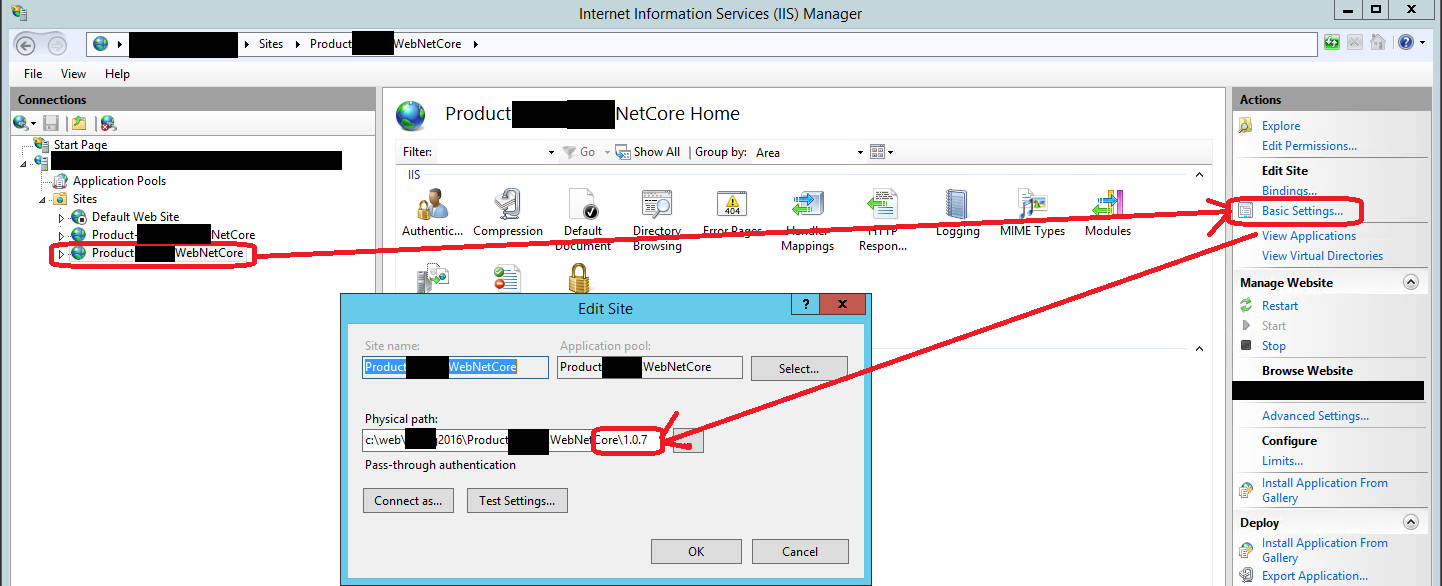
上一篇:[Gulp][.Net Web Application][CI]Gulp CI Deploy(2)-使用 MSDeploy(WebDeploy)進行 Deploy
下一篇:[Gulp][.Net Web Application][CI]最終篇: Team City 設定 與 Build Scripts 撰寫
參考資料
1.Using Gulp to Build and Deploy .NET Apps on Windows
2.MSBuild - MSDN - Microsoft
3.Command Line Reference - NuGet Docs
4.NUnit-Console Command Line Options
5.gulp API docs
本篇文章有部分內容參考相關網站資料,若有不妥請告知,我將盡快移除。