如果在 前篇 沒啥意外,應該要順利的能透過 Visual Studio 發佈經過簽署的 iOS 應用程式到 App Store Connect 當中。
不出意外的話…馬上就會出意外
,這是通則。
如果無法順利直接透過 Visual Studio 發佈經過簽署的 iOS 應用程式到 App Store Connect 當中的話,那該怎辦?
其實也別擔心,只要確定 Visual Studio 有產出經過簽署的 iOS 應用程式(*.ipa),那就可以透過 Xcode 或是 Transporter 來發佈到 App Store 當中。
溫馨提醒:
要操作本篇文章內容時,請先在 Apple 的 AppStore Connect 服務中建立好 App 的設定,請參考 此篇。
本篇來介紹介紹 Transporter:
首先 Transporter 是 Apple 自己發行的 macOS App,所以請從 macOS 的 App Store 當中下載:
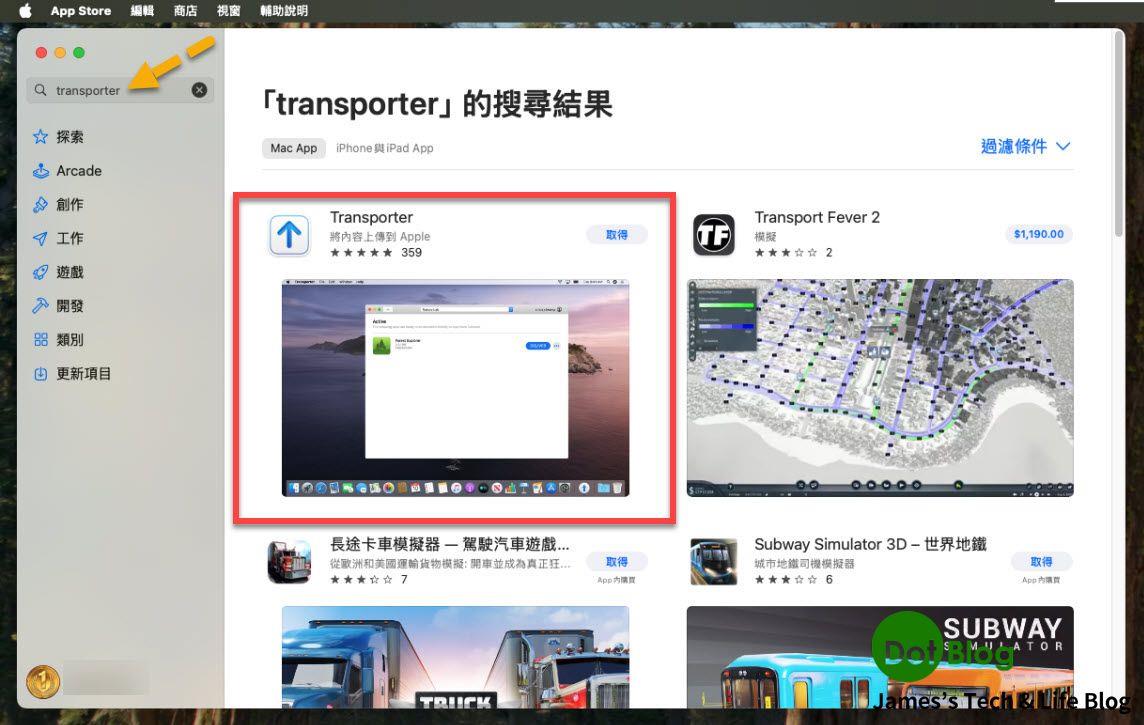
請再三確認安裝的是 Apple 所發行的 Transporter。
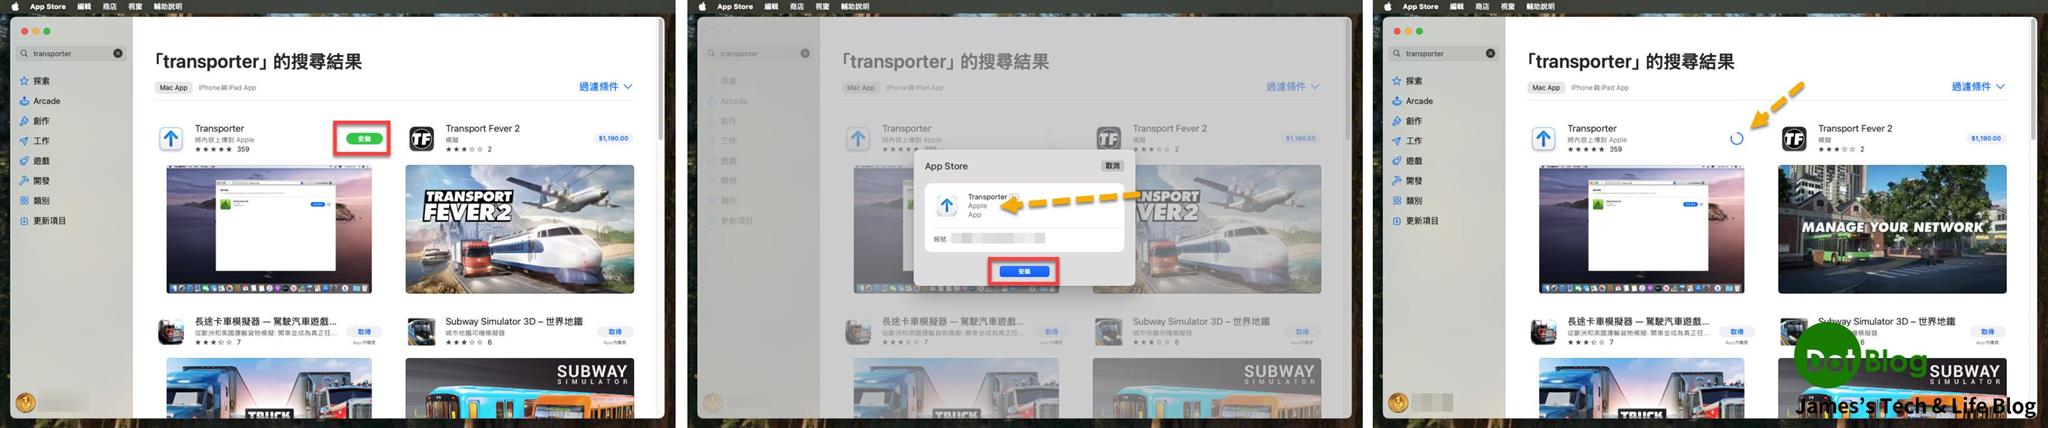
點選 "安裝" → 確定是 Apple 的 Transporter → 安裝中:
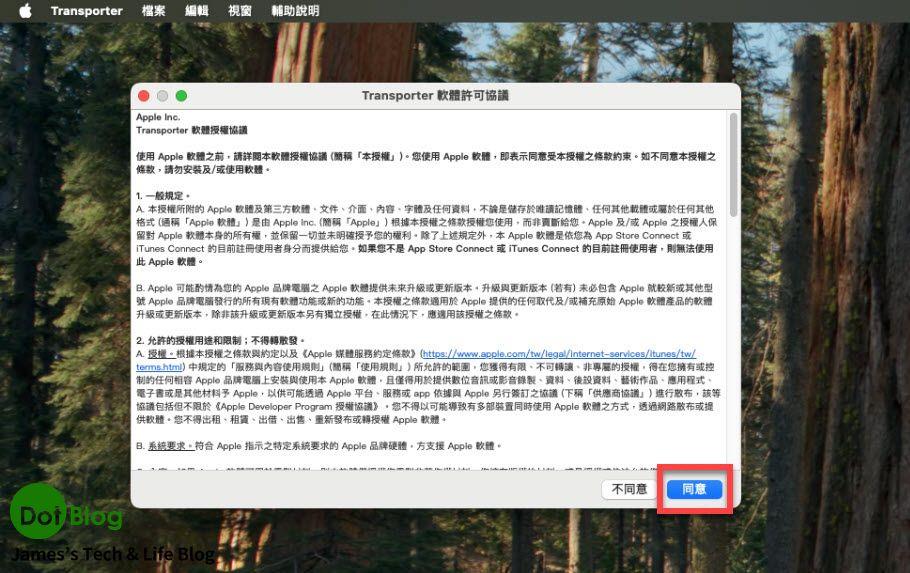
第一次啟動 Transporter 會有授權條款需 "同意":
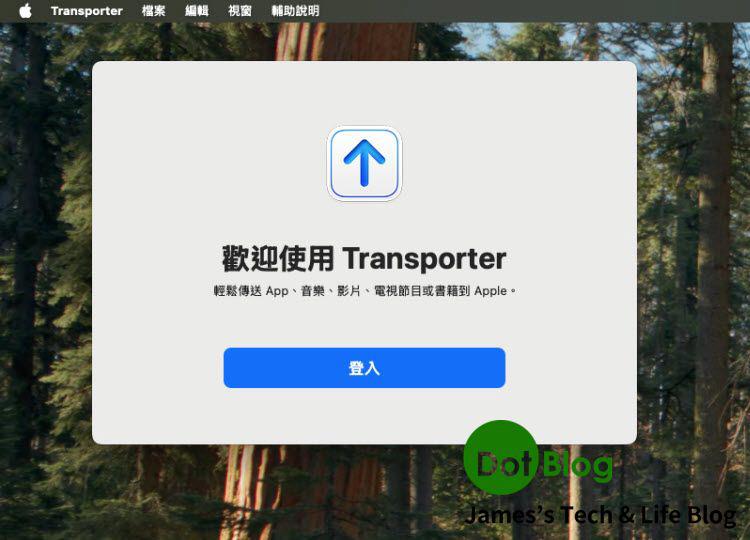
點選 "登入" → 輸入 Apple Developer Account 的 "帳號" 與 "密碼" → 點選 "登入":

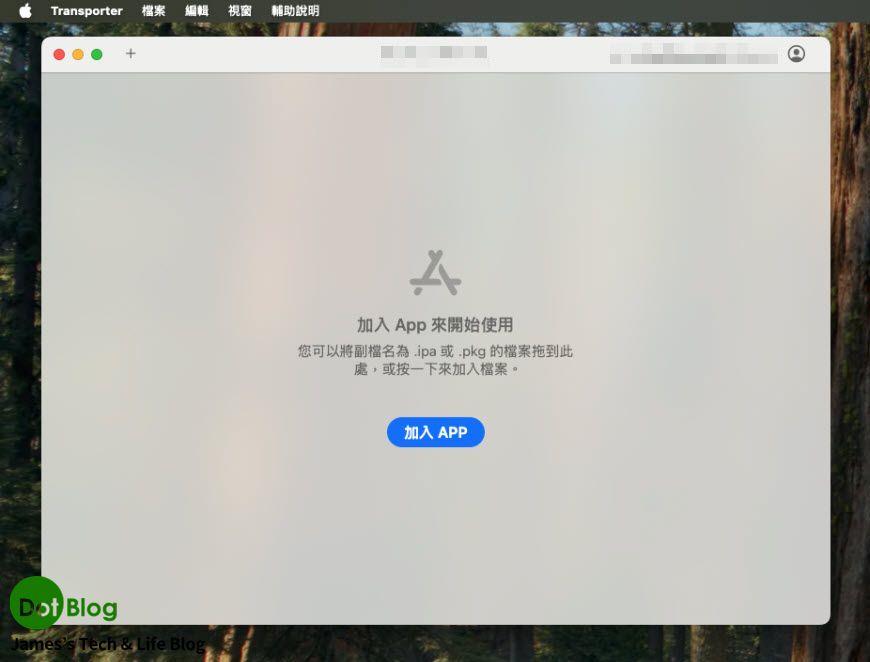
Transporter 的本體現身:
Transporter 不只可以用來將 iOS 應用程式發佈到 App Store Connect 當中,任何要經由 Apple 的數位通路所發行的媒體應用皆可利用 Transporter 進行發佈。
有興趣的可以參考這裡:
https://support.apple.com/zh-tw/guide/transporter-app/welcome/mac
本篇僅討論 iOS 應用程式(*.ipa)的部分。
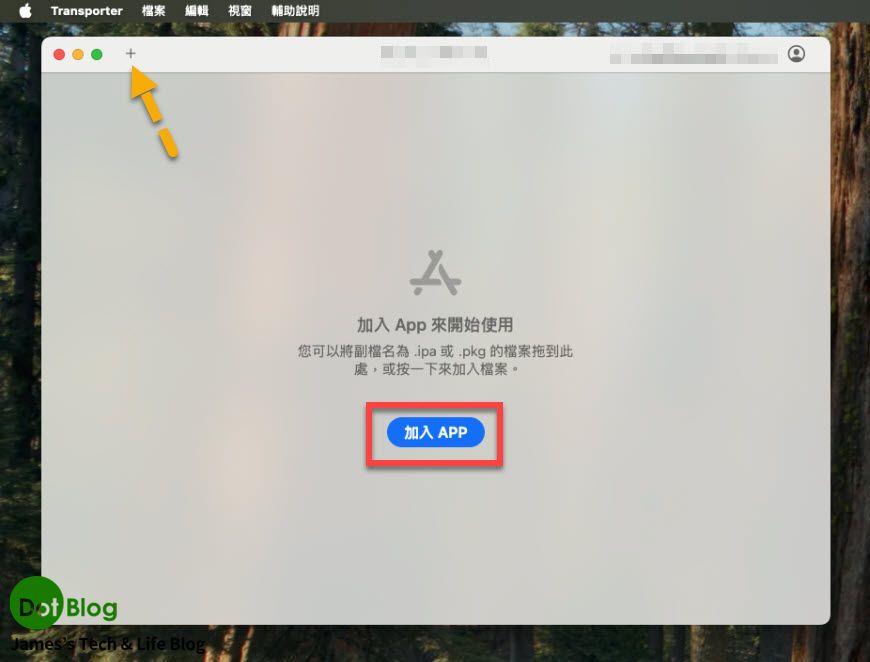
在該 Transporter 視窗的左上方有個 "+" 或是點選 "加入 App" 按鈕:
選取處理好的 *.ipa 後,Transporter 會進行基本的檔案封裝驗證,等待處理完成顯示 "傳送" 就可點選:
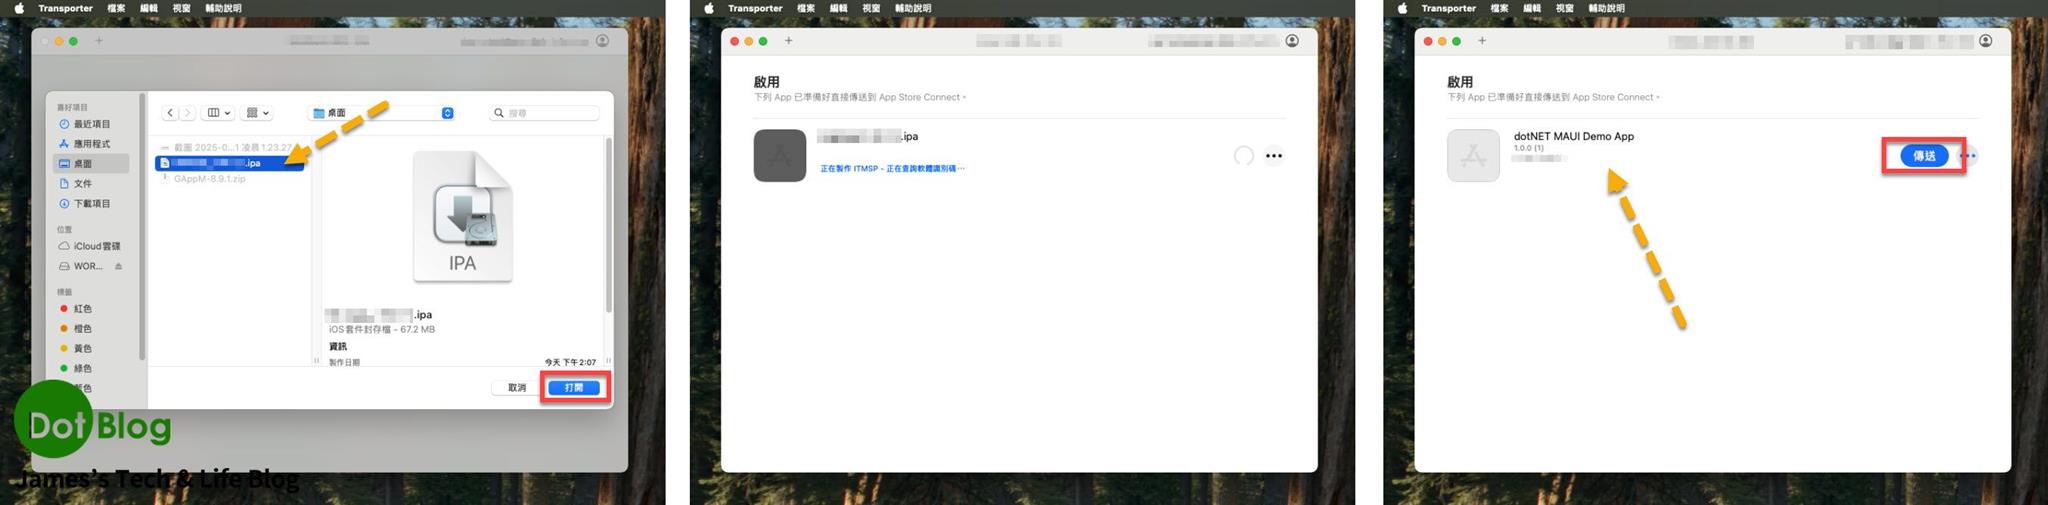
按完傳送後就等待回應處理結果:
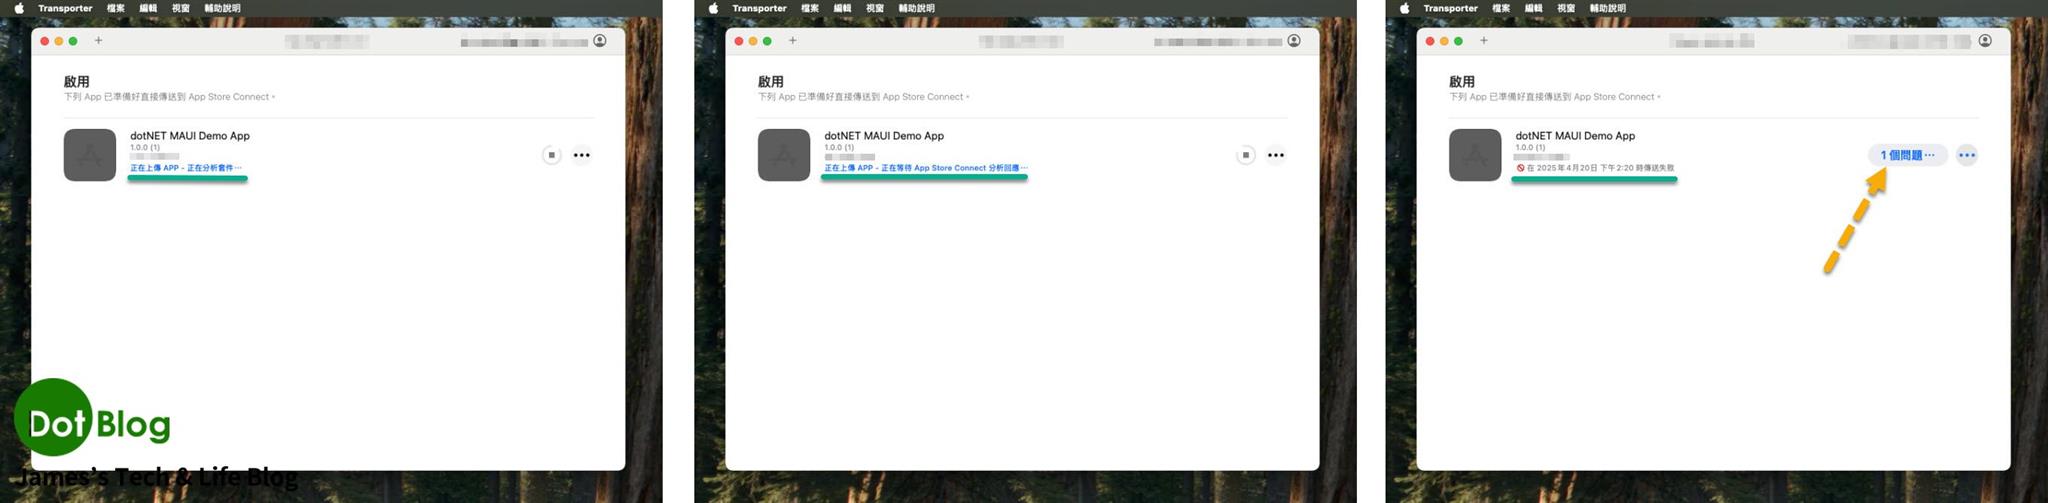
若顯示有問題待處理,就查看一下問題並且排除該問題,再重新封裝該 *.ipa 後重新使用 Transporter 進行 "傳送",終究會出現 "正在處理 App" 的顯示:
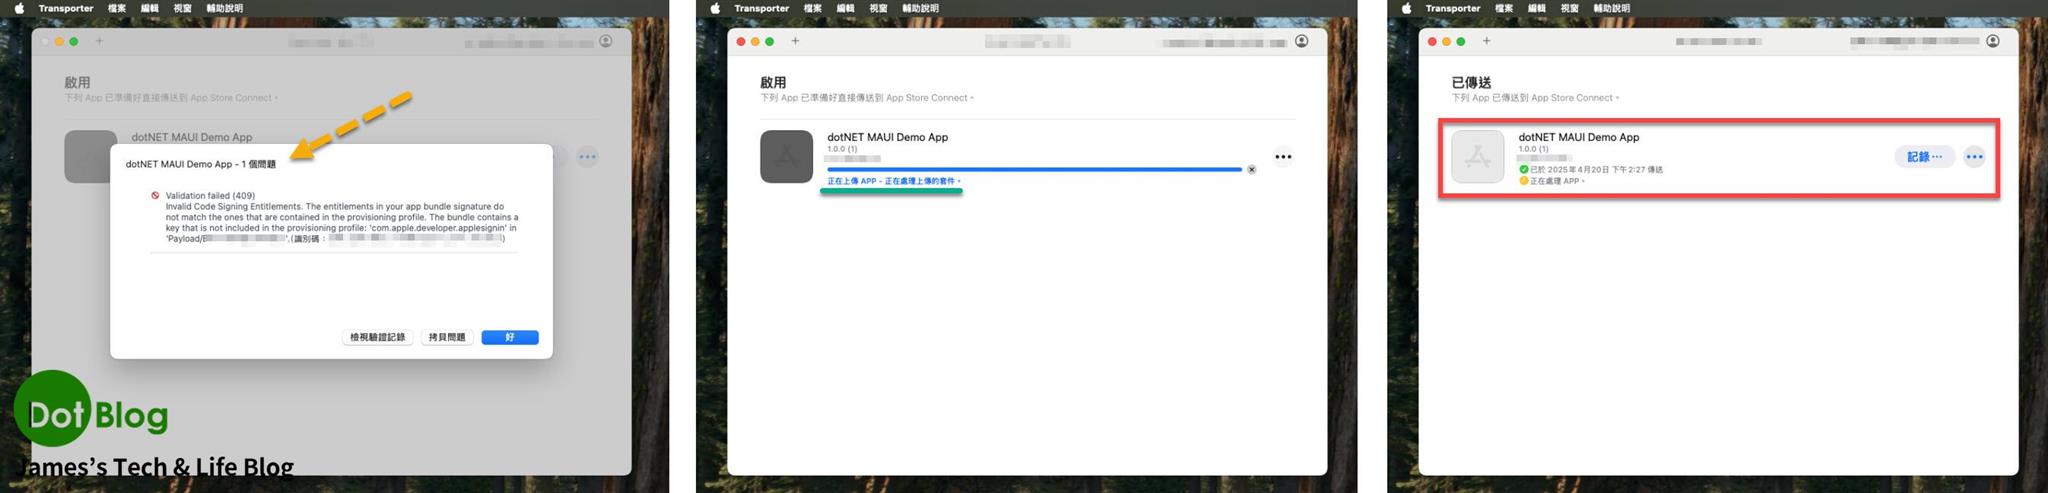
這就代表成功上傳到 App Store Connect 的 TestFlight。
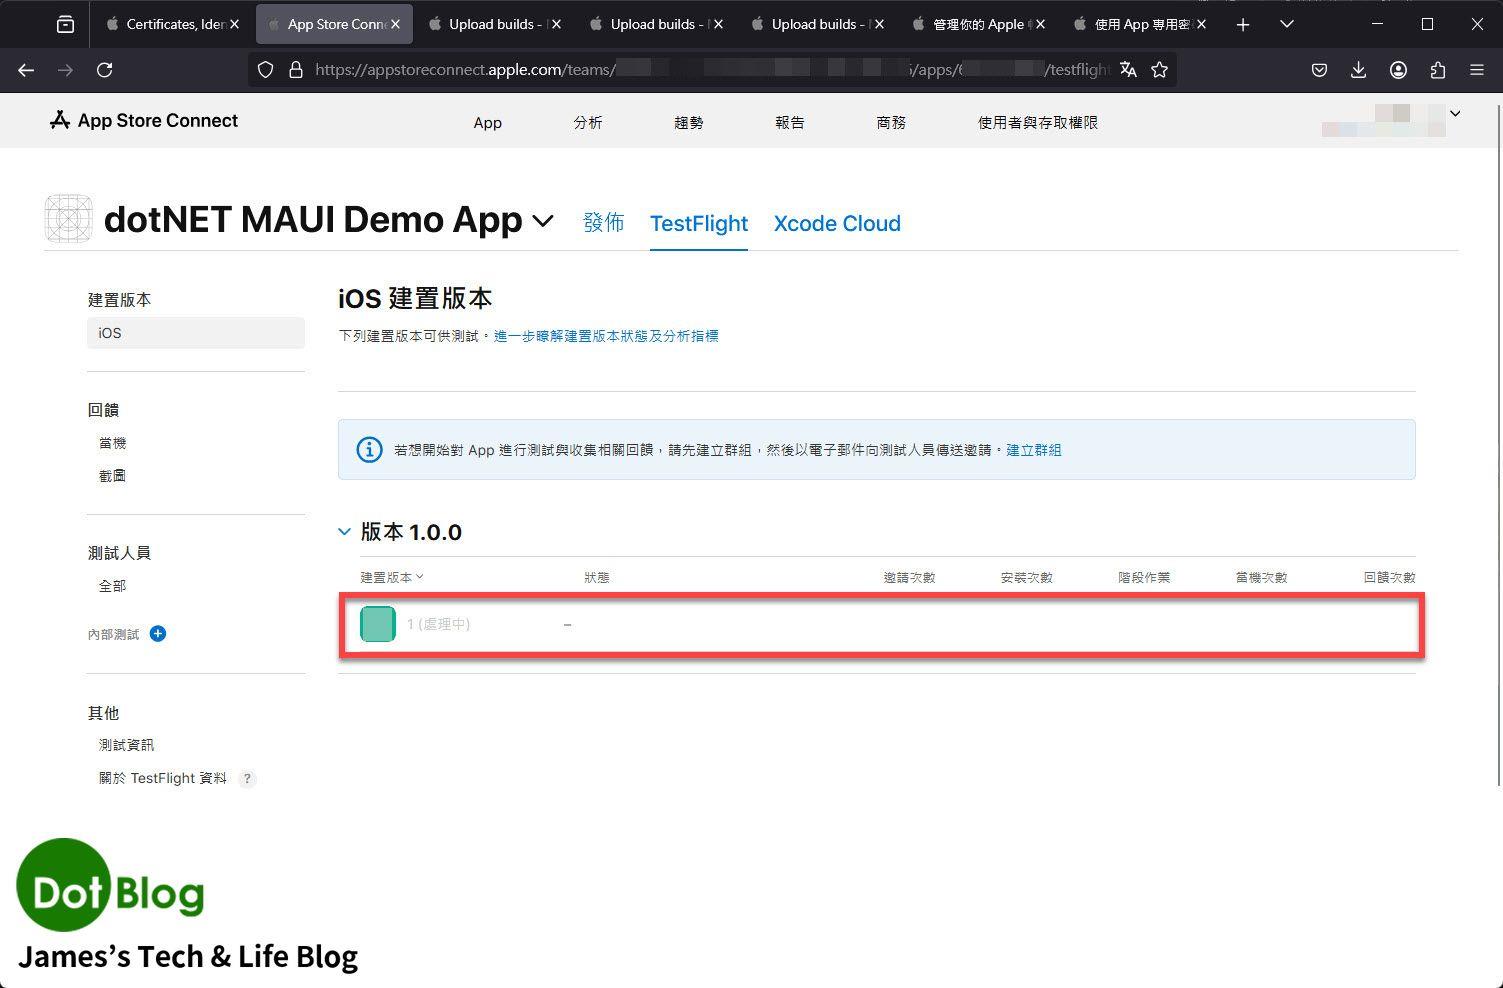
再透過網頁瀏覽器進到 Apple 的 App Store Connect 中查看 TestFlight:

若遲遲沒有出現請自行按瀏覽器的重新整理或者是耐心等候,終究會顯示該上傳 *.ipa:
至此 Transporter 完成任務。
剩下的就跟 Transporter 無關了~~~
I'm a Microsoft MVP - Developer Technologies (From 2015 ~).
I focus on the following topics: Xamarin Technology, Azure, Mobile DevOps, and Microsoft EM+S.
If you want to know more about them, welcome to my website:
https://jamestsai.tw
本部落格文章之圖片相關後製處理皆透過 Techsmith 公司 所贊助其授權使用之 "Snagit" 與 "Snagit Editor" 軟體製作。