若要將開發 iOS 的 App 要佈署到實際的 iOS 設備(iPhone/iPod/iPad) 來測試,是需要經過 "Apple Developer 網站" 的四道關卡設定,依序是:
- Certificates: 憑證
- Identifiers: 簽署識別
- Devices: 註冊設備
- Profiles: 佈建設定
以上都設定完成後,若在 Visual Studio 2019 的環境使用 Xamarin 佈署 App 到實際的 iOS 設備上,其實就跟原生 Xcode 佈署 App 到實際的 iOS 設備體驗差不多了。
就來看看本篇的介紹吧~~~
本文假設的前提使用的 "Apple ID" 也已經是個 "Apple Developer Account",如果尚未成為 "Apple Developer Account" 的 "Apple ID" 是 無法 完成本文的相關設定的。
第一關: 建立 Certificate (憑證)。
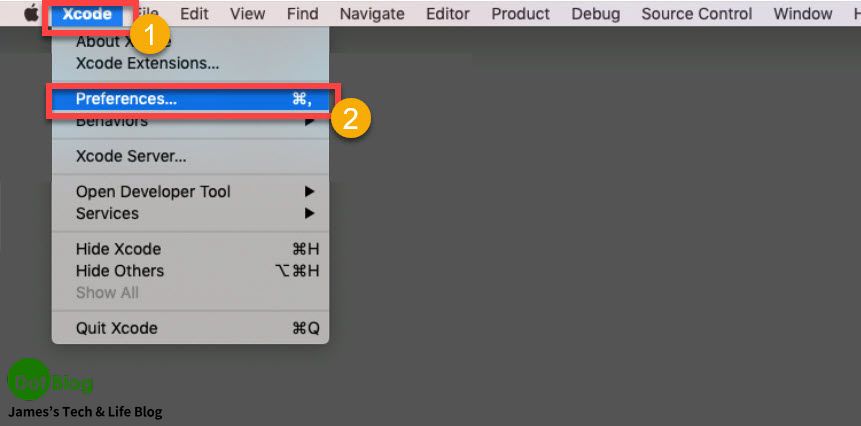
在 Mac 環境中打開 "Xcode":
在 Xcode 的選單列當中,點選 "Preferences..."
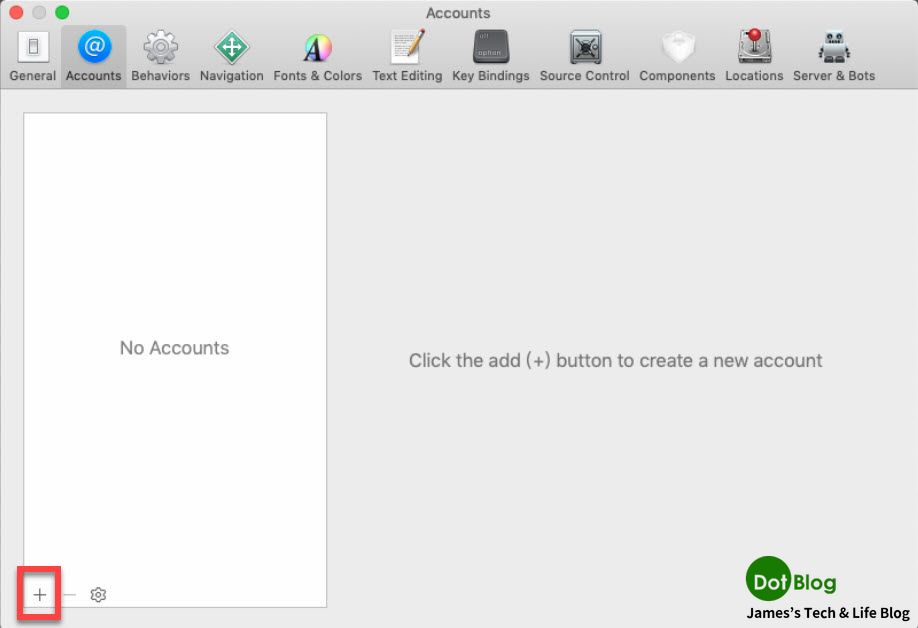
在 "Preferences" 中點選 "Accounts",並且點選左下角的 "+":
"Accounts" 會彈出要新增的帳號種類,在此選擇 "Apple ID" 後點選 "Continue"。

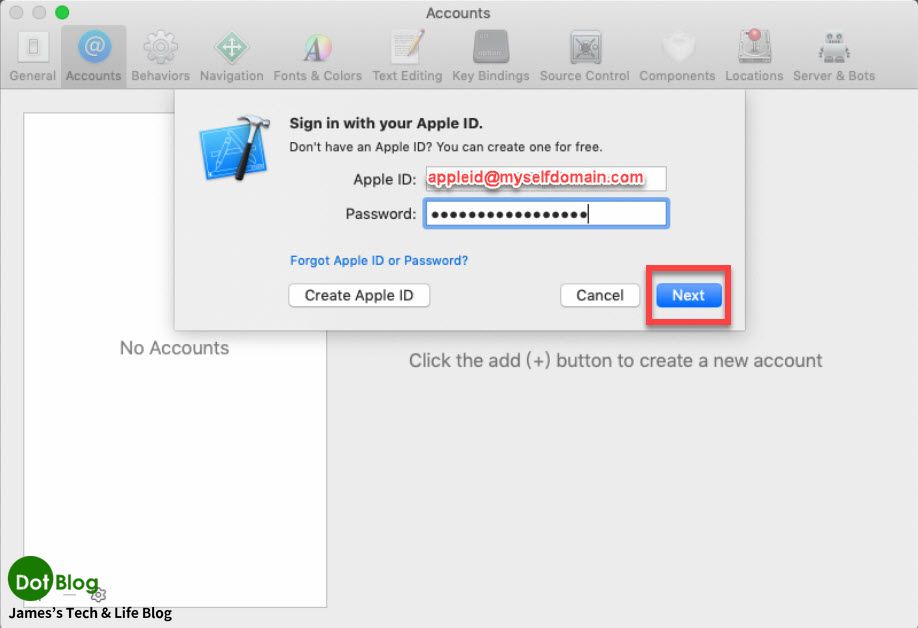
接著請輸入帳號:
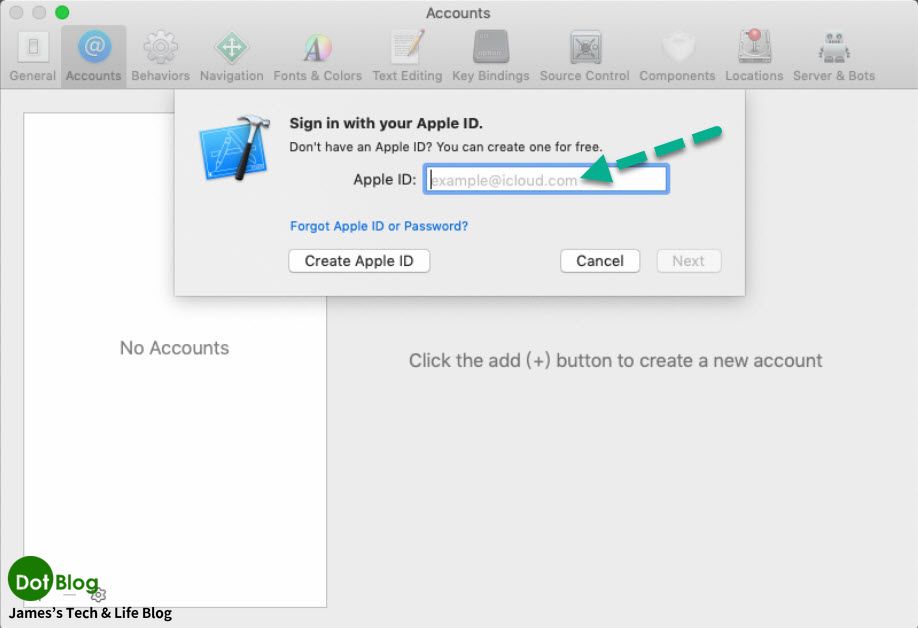
輸入密碼:

點選 "Next":
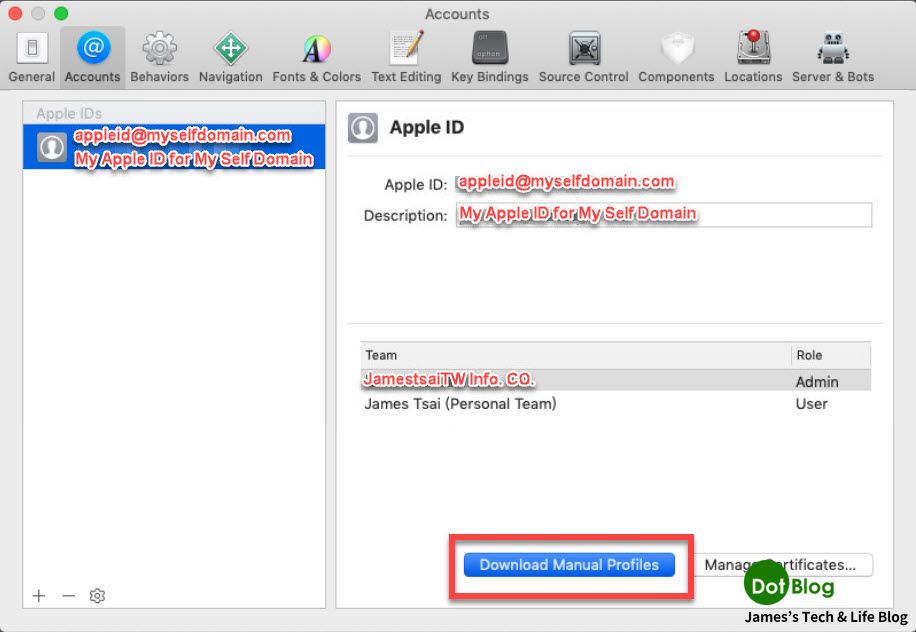
如果此 "Apple ID" 已經是隸屬於某家公司或組織的開發者 "Apple Developer Account" 的話,則會呈現如下畫面:
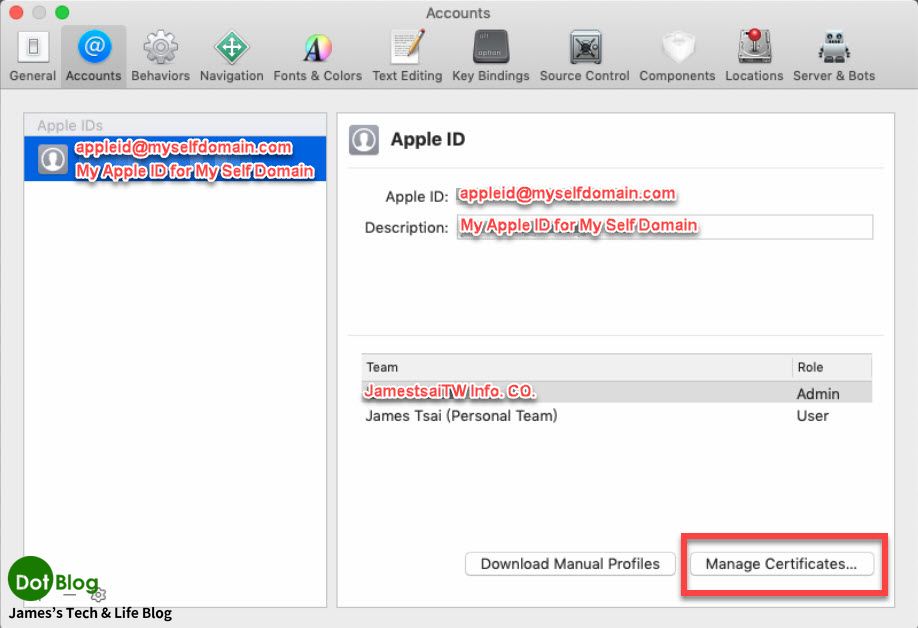
點選上圖的 "Manage Certificates..." 後,畫面就會列出屬於這家公司或組織的 "Certificates"。
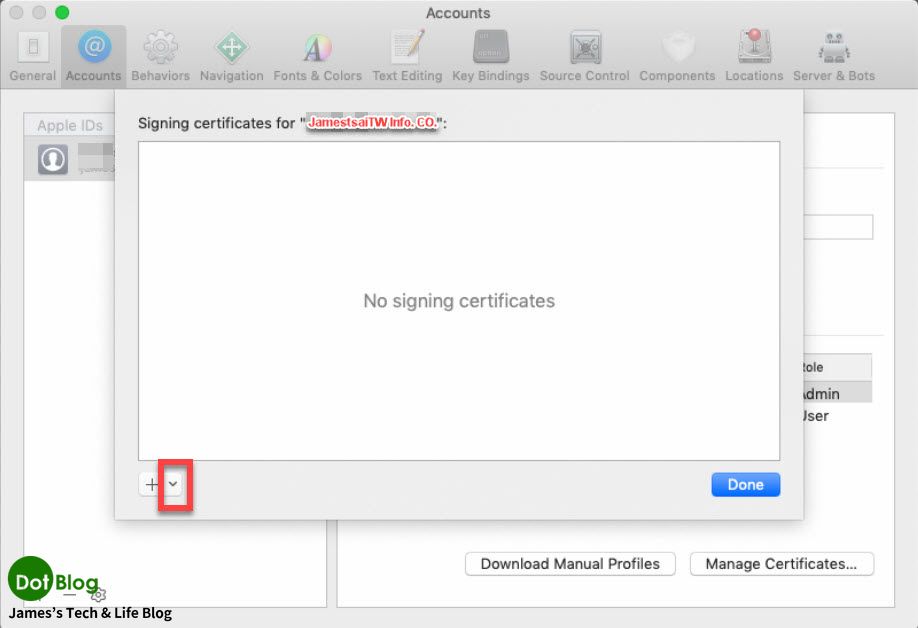
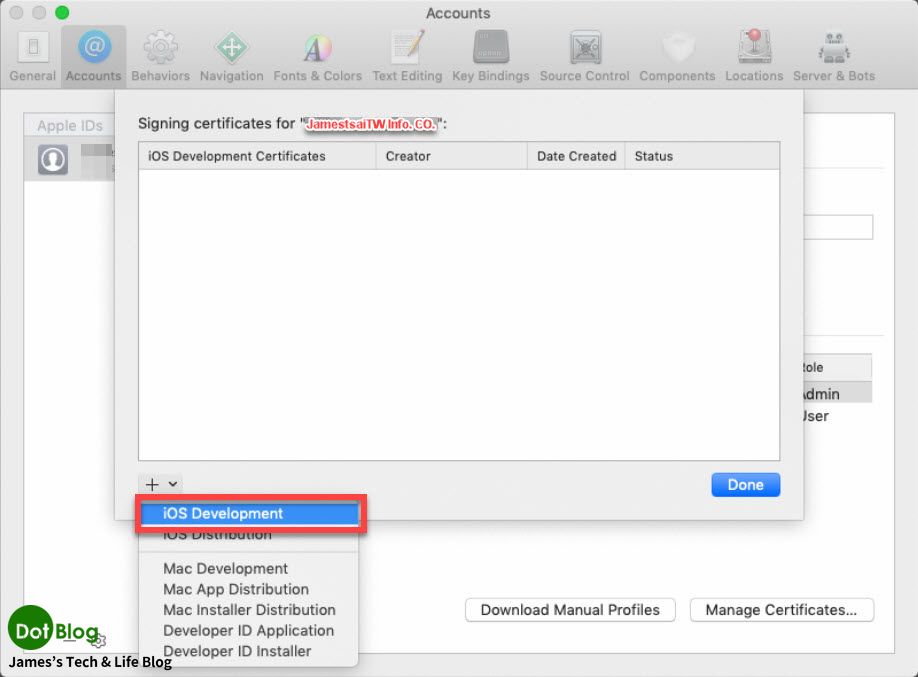
而如果該公司或組織尚未添增過任何 Certificates (憑證),就會如下圖列表呈現 "No Signing Certificates",此時可點選左下角的 "+" 旁邊的 "v"。
就會出現選擇 "iOS Development、iOS Distribution...等" 的選項。
(印象中在 2019 年 Q4 之後在設定上改成只剩下 Apple Development、Apple Distribution、Mac Installer Distribution 三種選項了,若是本文要建立的選項會是選擇 Apple Development 的選項)
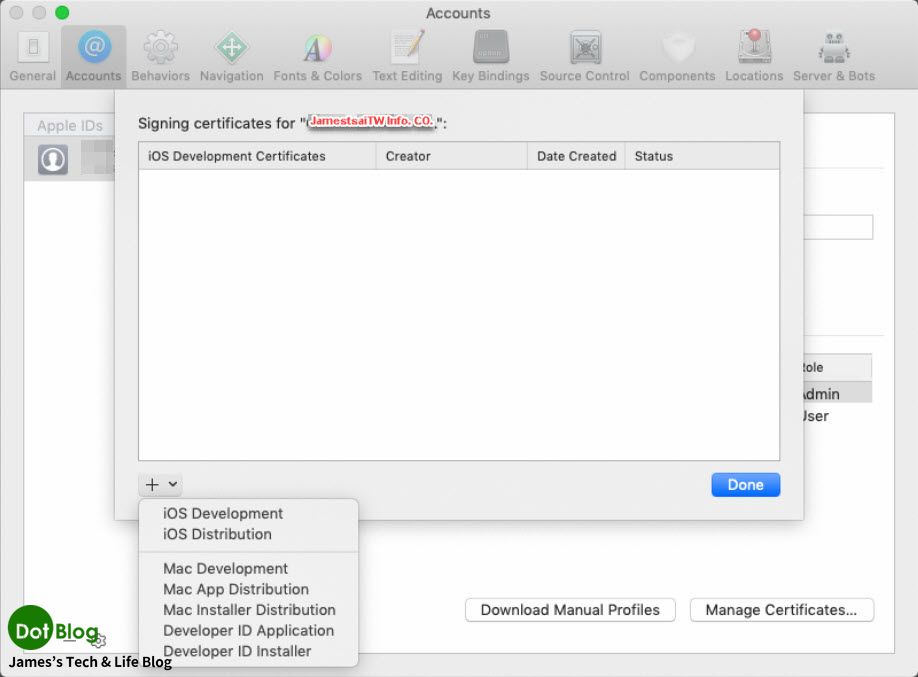
在此選擇 "iOS Development"。
(若是要用來發佈 App 到 App Store Connect 或是 Enterprise 內部使用的,就要選擇 Distribution)
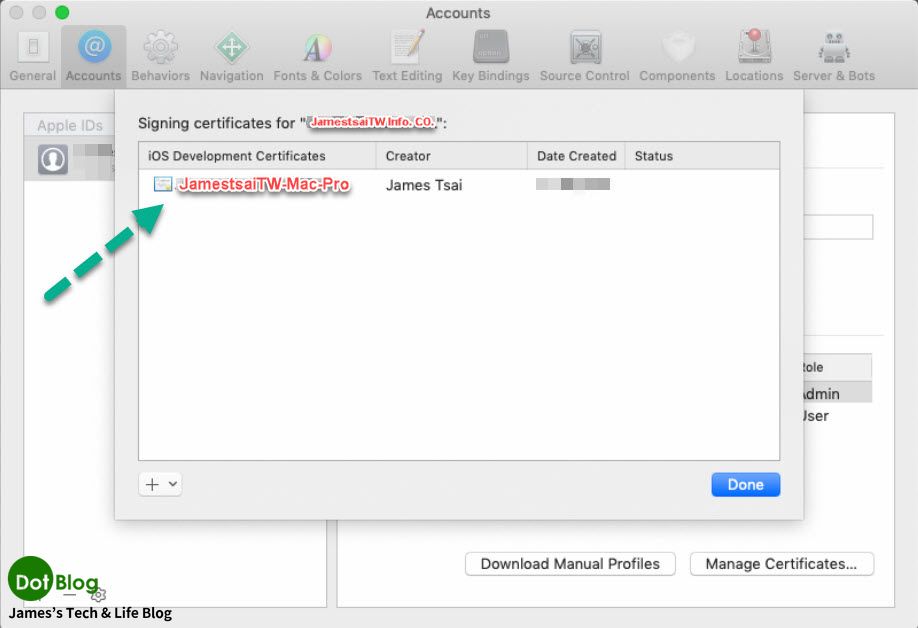
選擇了以後,Xcode 會抓取此電腦的設定並且自動產出 "Certificate" 上傳到 "Apple Developer 網站",完成後就會列出 "Certificate" 在此畫面中:
可以進到 "Apple Developer 網站" 進到 "Certificates, Identifiers & Profiles" 的頁面,並在 "Certificates" 當中確認剛剛建立的 "iOS Development 憑證"。
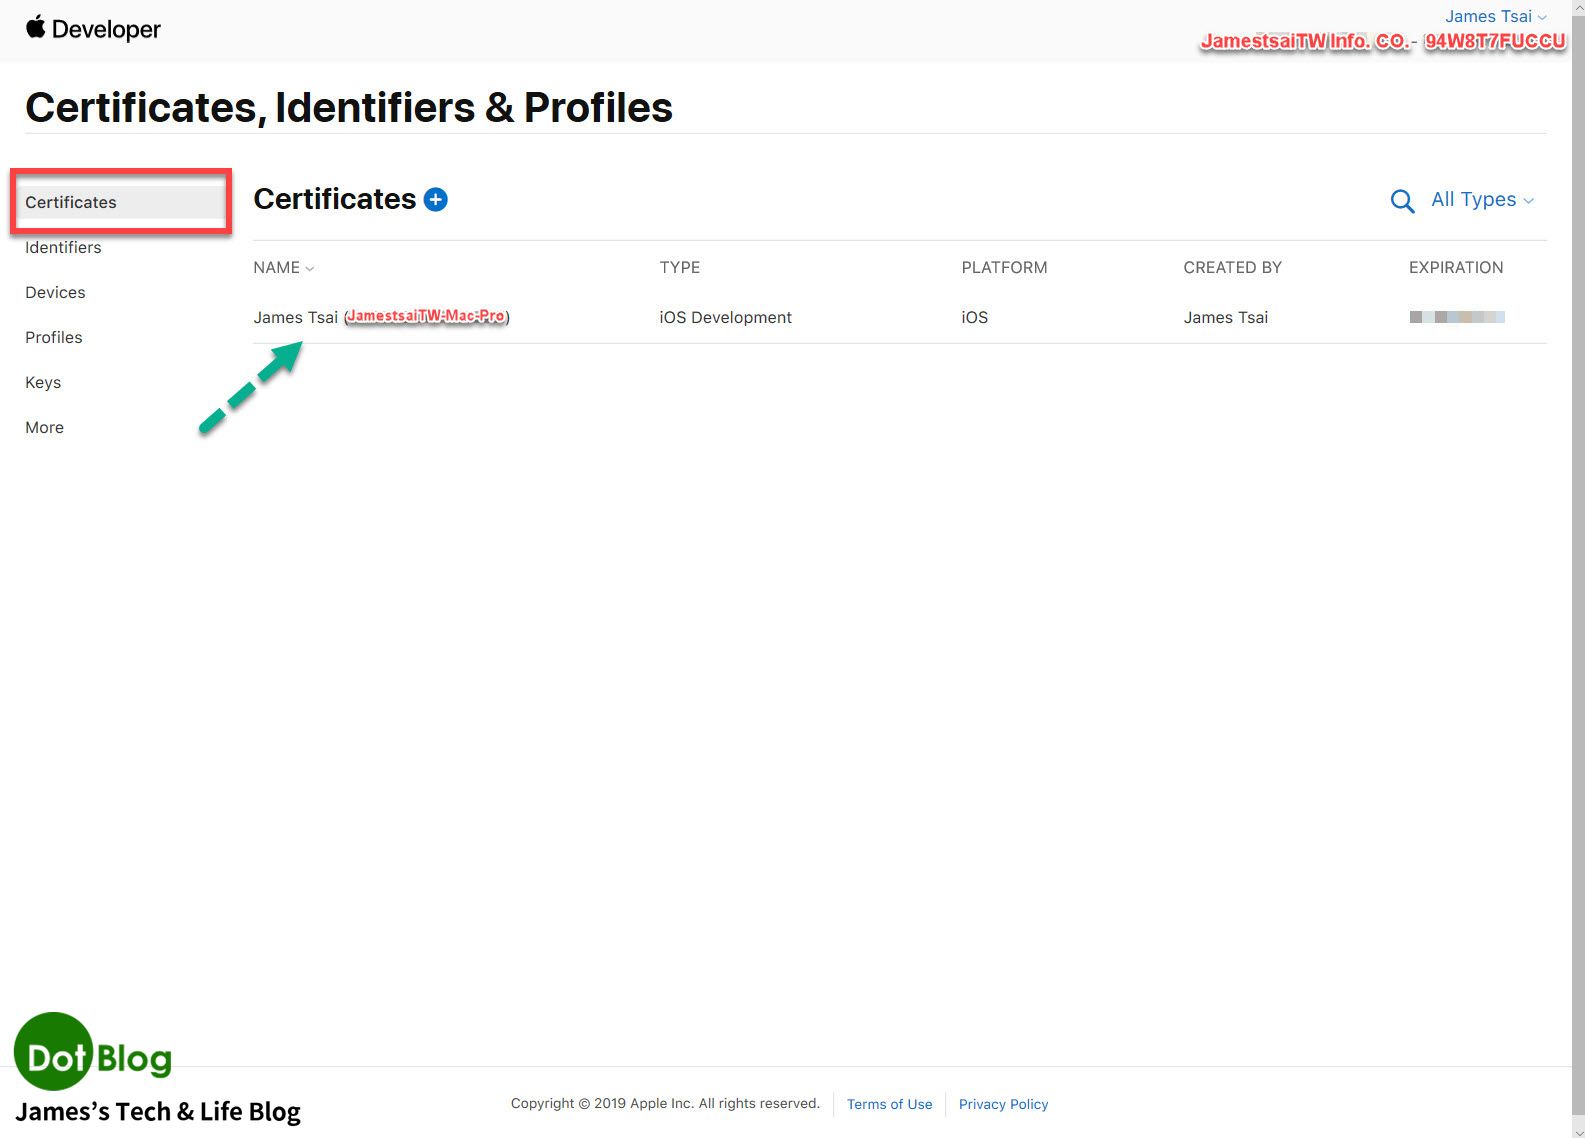
(不過 Apple Developer 網站的介面有改變,請自行斟酌閱讀)
一個隸屬於某公司或組織 "Apple Developer Account" 的 "Apple ID",只能在 "Apple Developer 網站" 中產生兩張 Development 用的 "Certificate"。
若公司或組織裡面針對 iOS Development 環境發 Certificate (憑證),只要用一台 Mac 機器發一張給 "Apple Developer 網站" 認證即可。此後可再透過交換密鑰的方式,然團隊中其他台 Mac 機器也能使用此憑證針對 iOS App 編譯 *.ipa 並作加密處理。
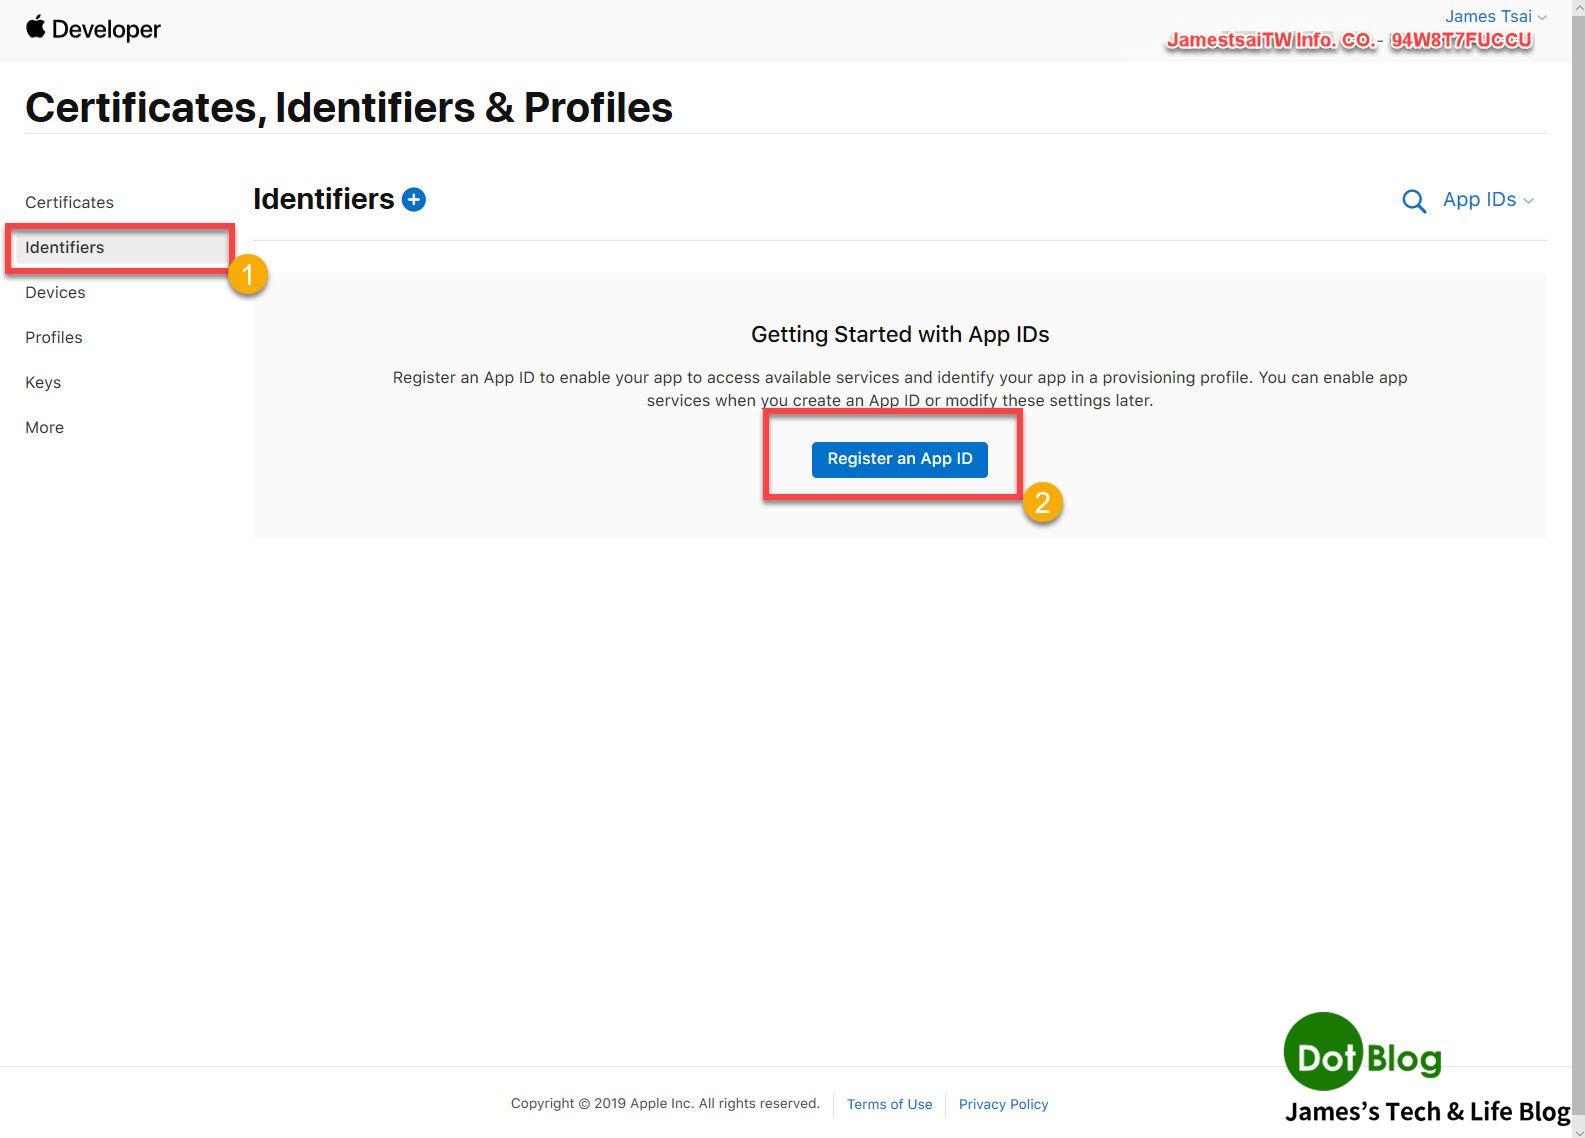
第二關: 建立 Identifier (簽署識別)。
請繼續在 "Apple Developer 網站" 的 "Certificates, Identifiers & Profiles" 中點選 "Identifiers" (簽署識別),並且點選 "Register an App ID"。
接著點選 "App IDs" 後,點選 "Continue"。

在此 "Register an App ID" 的頁面,請先點選 Platform 的選項 "iOS, tvOS, watchOS" (迷之音: 那 iPadOS 呢?)。
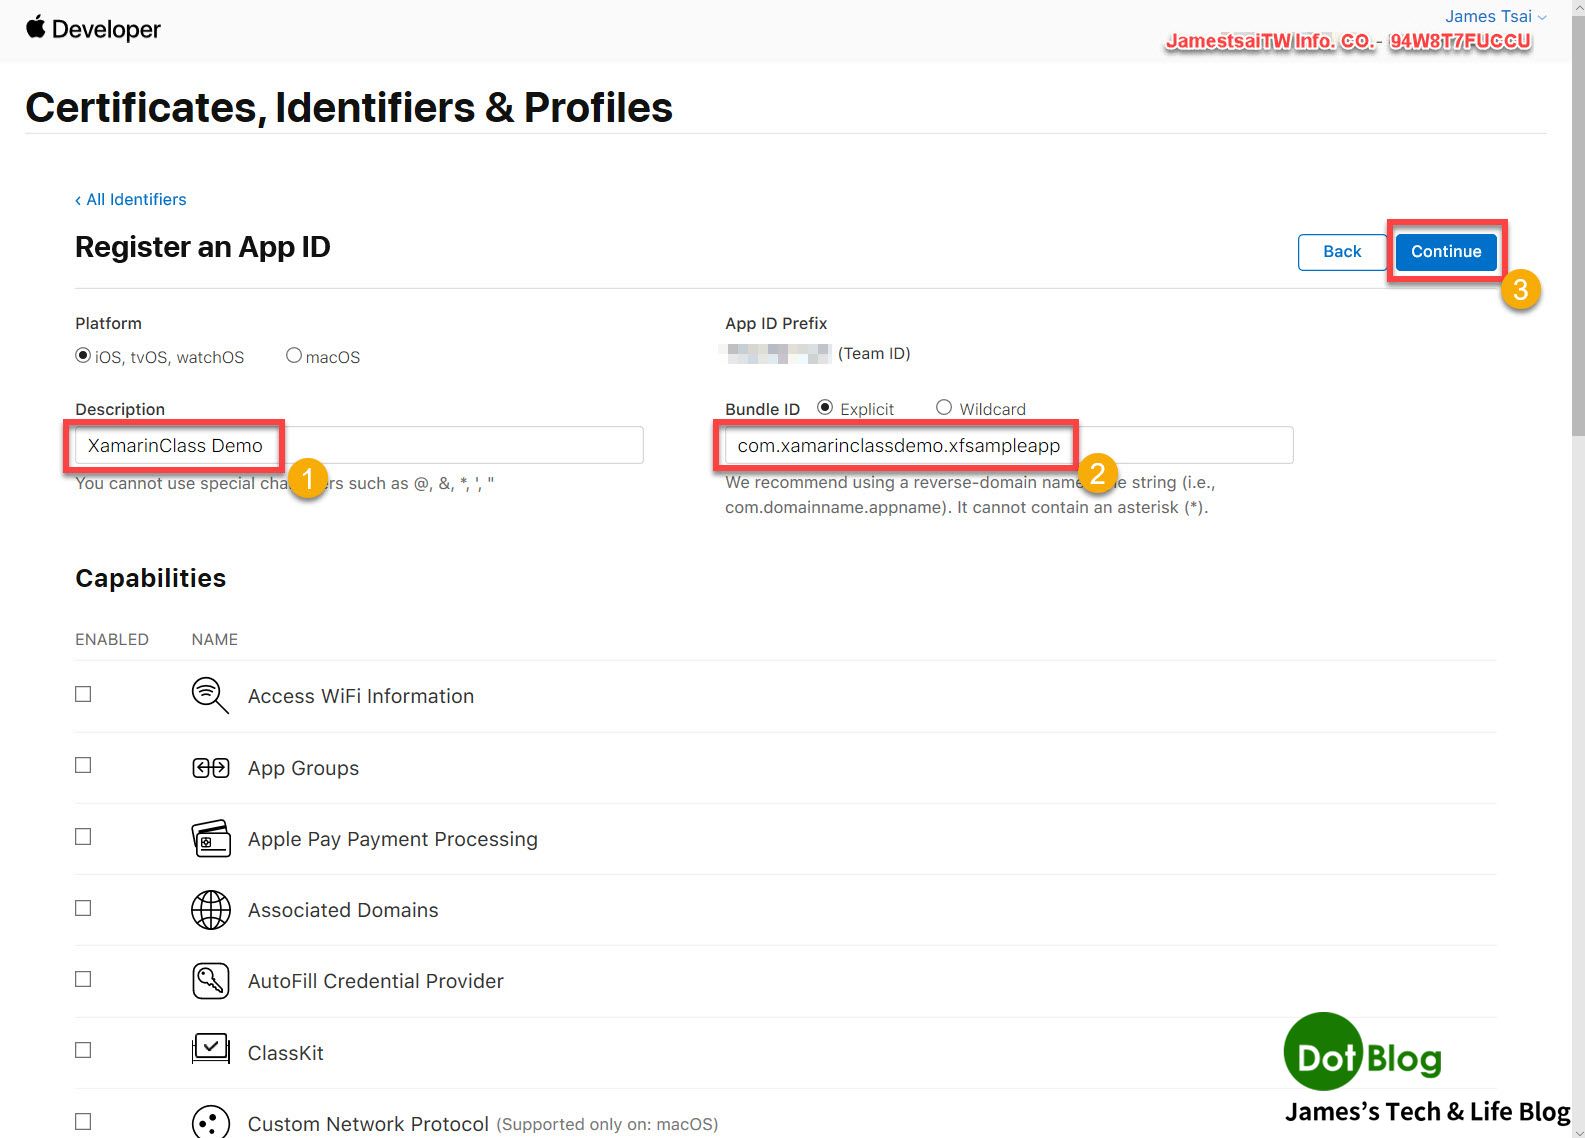
接著填寫 "Description" 跟 "Bundle ID"。
(PS 那個 "App ID Prefix" 是在有一天的某一刻會很重要,有看到就稍微注意一下唷,鳩咪^_<)
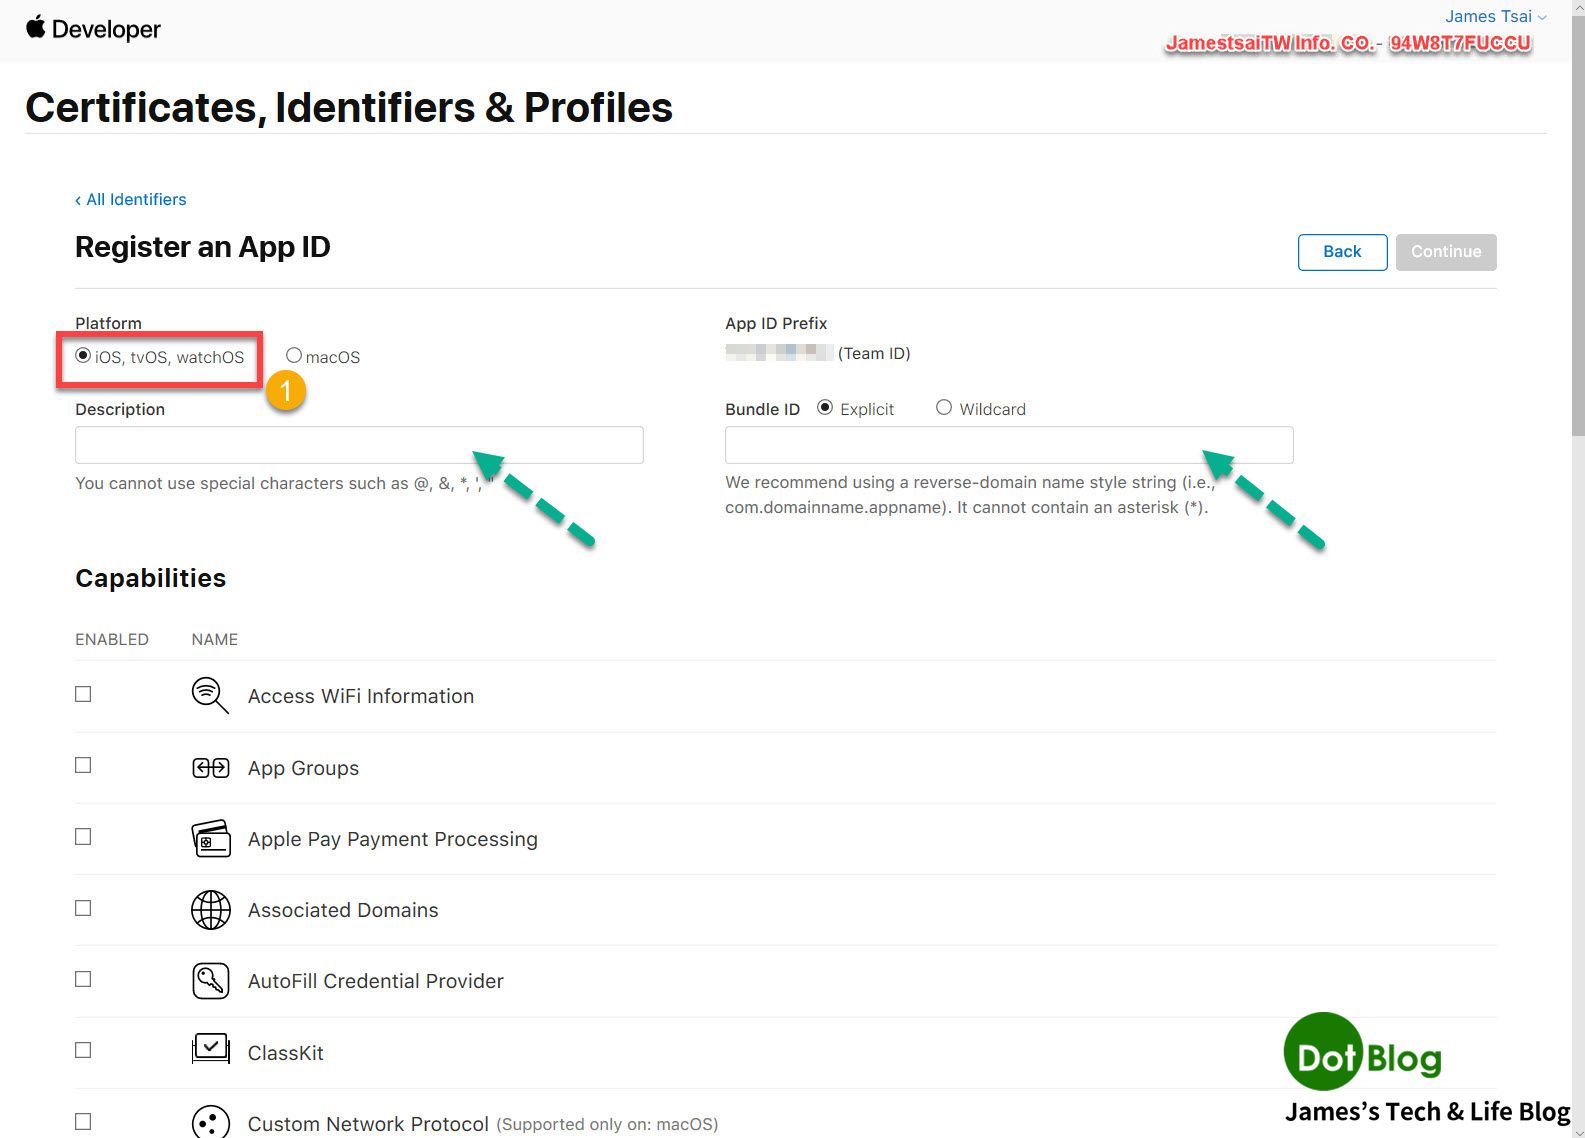
填寫完成後,點選 "Continue"。
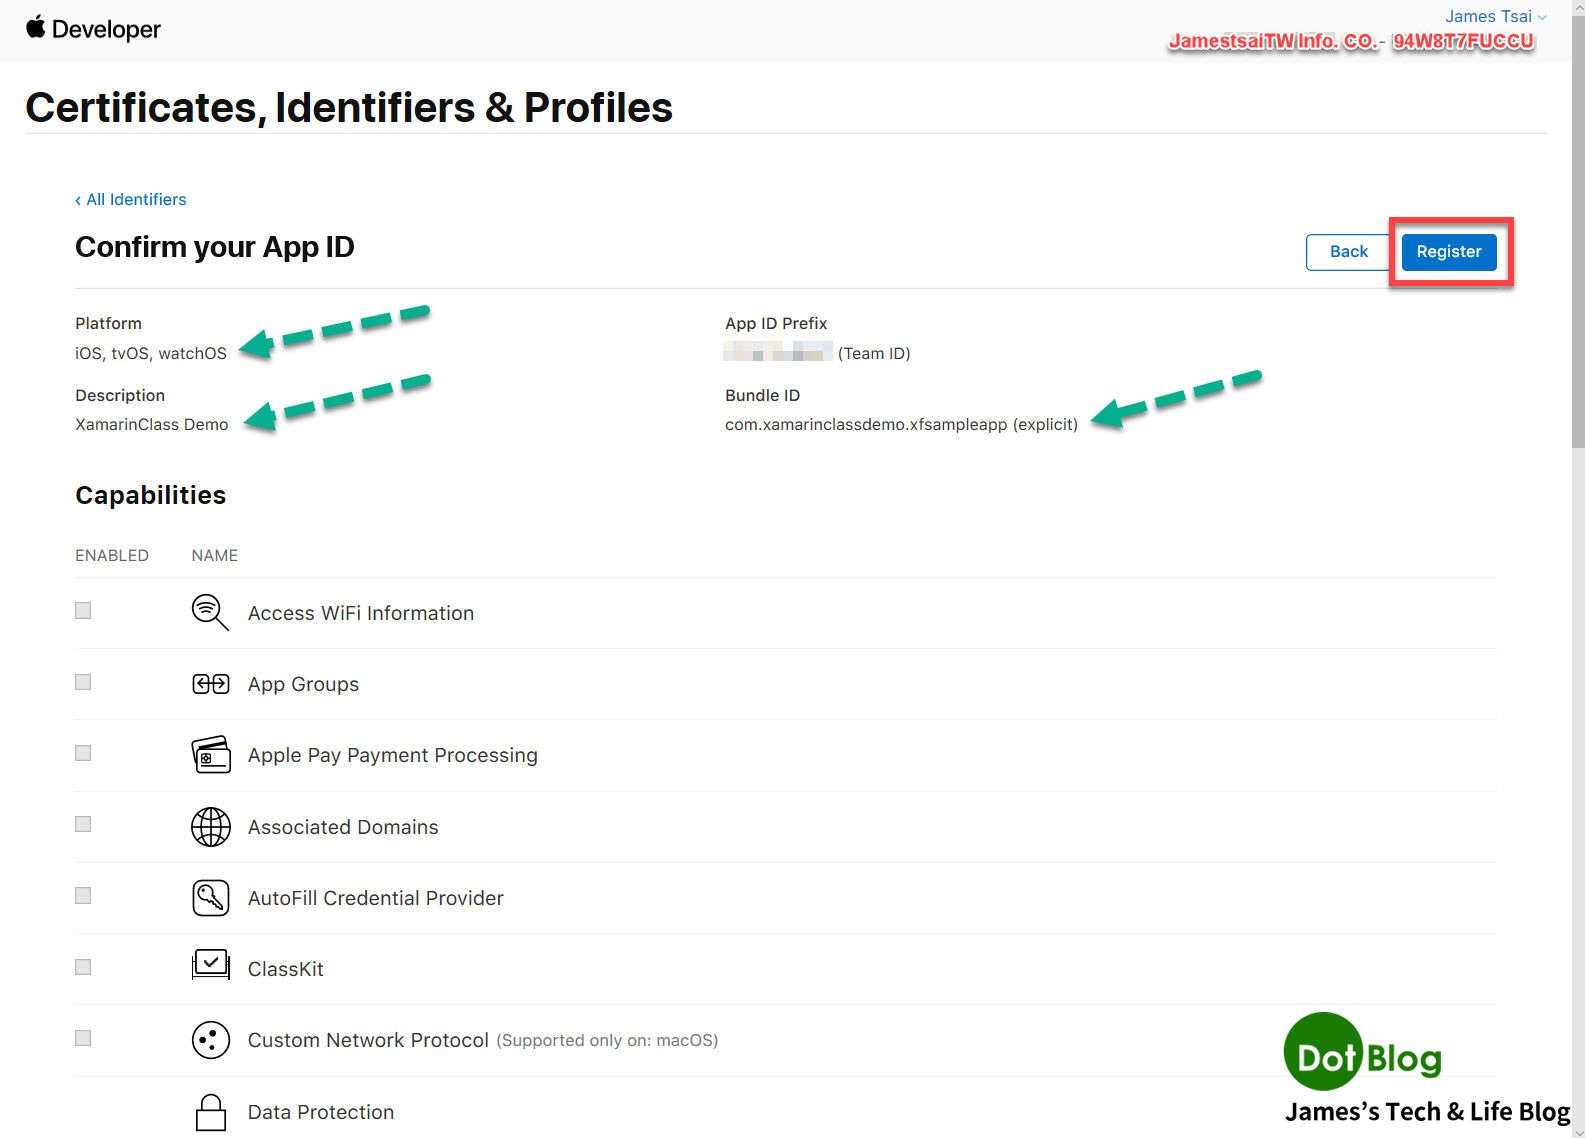
在 "Confirm your App ID" 頁面中再確認一次相關的設定,沒問題後點選 "Register"。
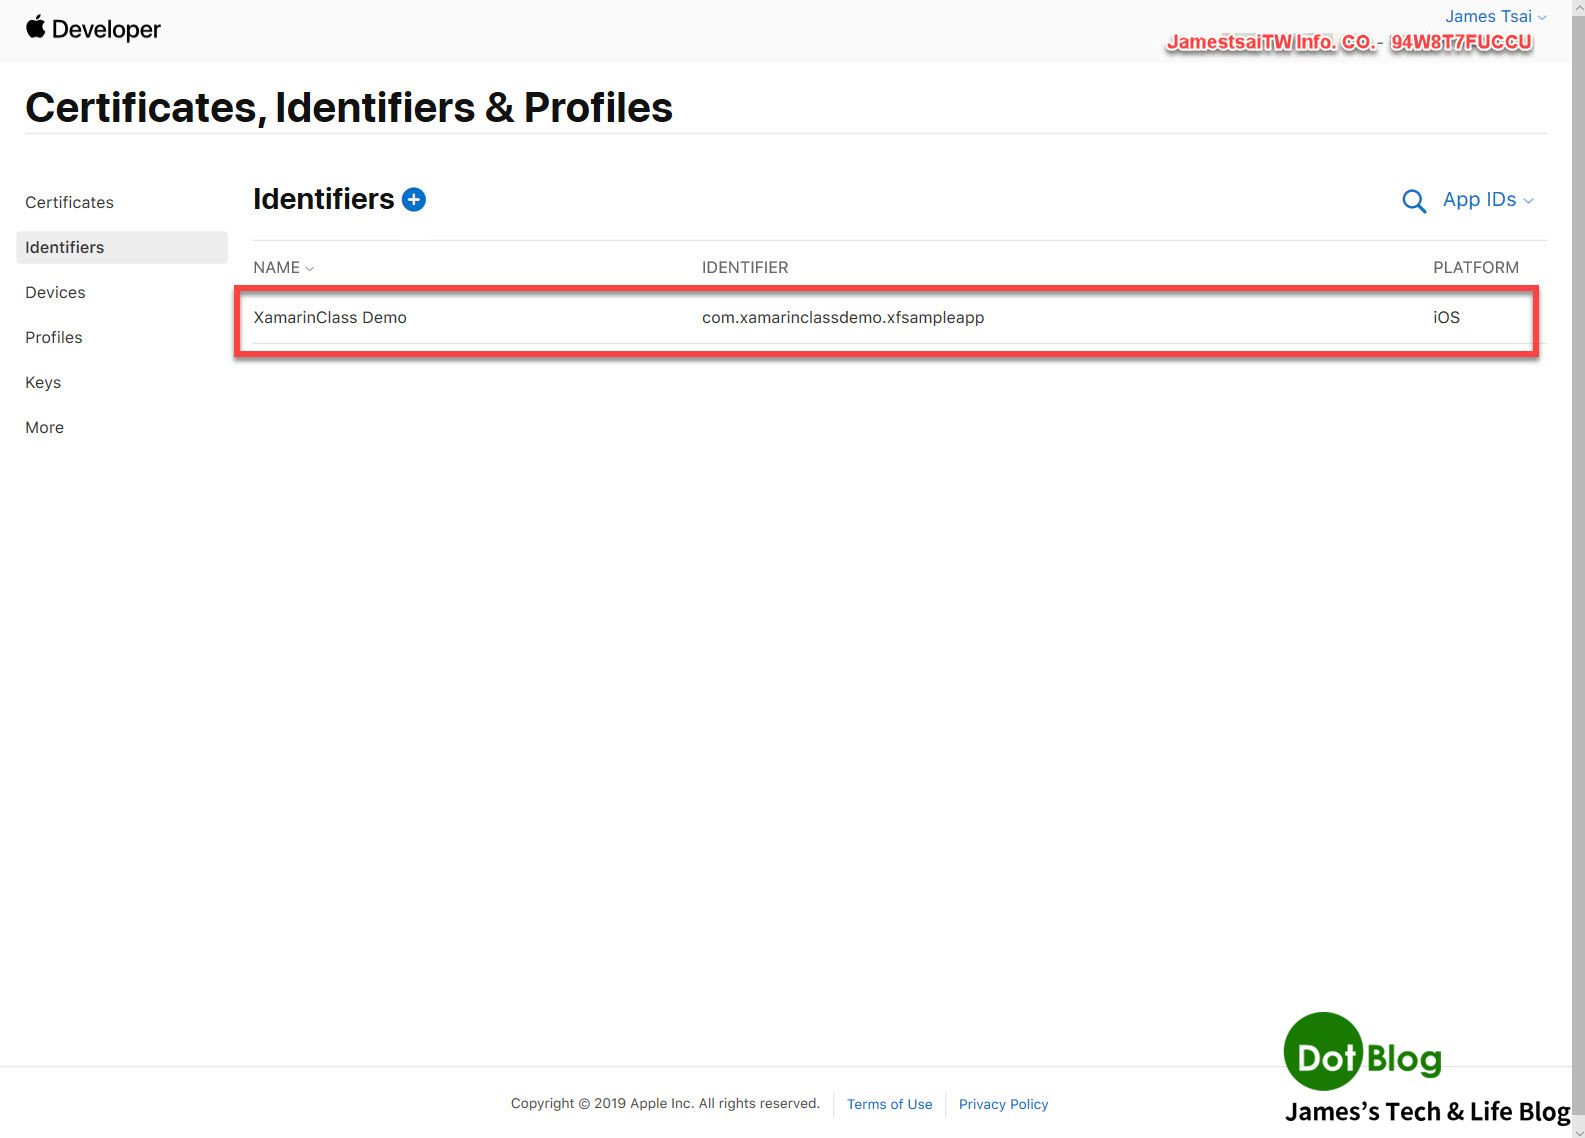
完成設定後就會在 "Identifiers" 當中看到剛剛設定的 "Identifier"。
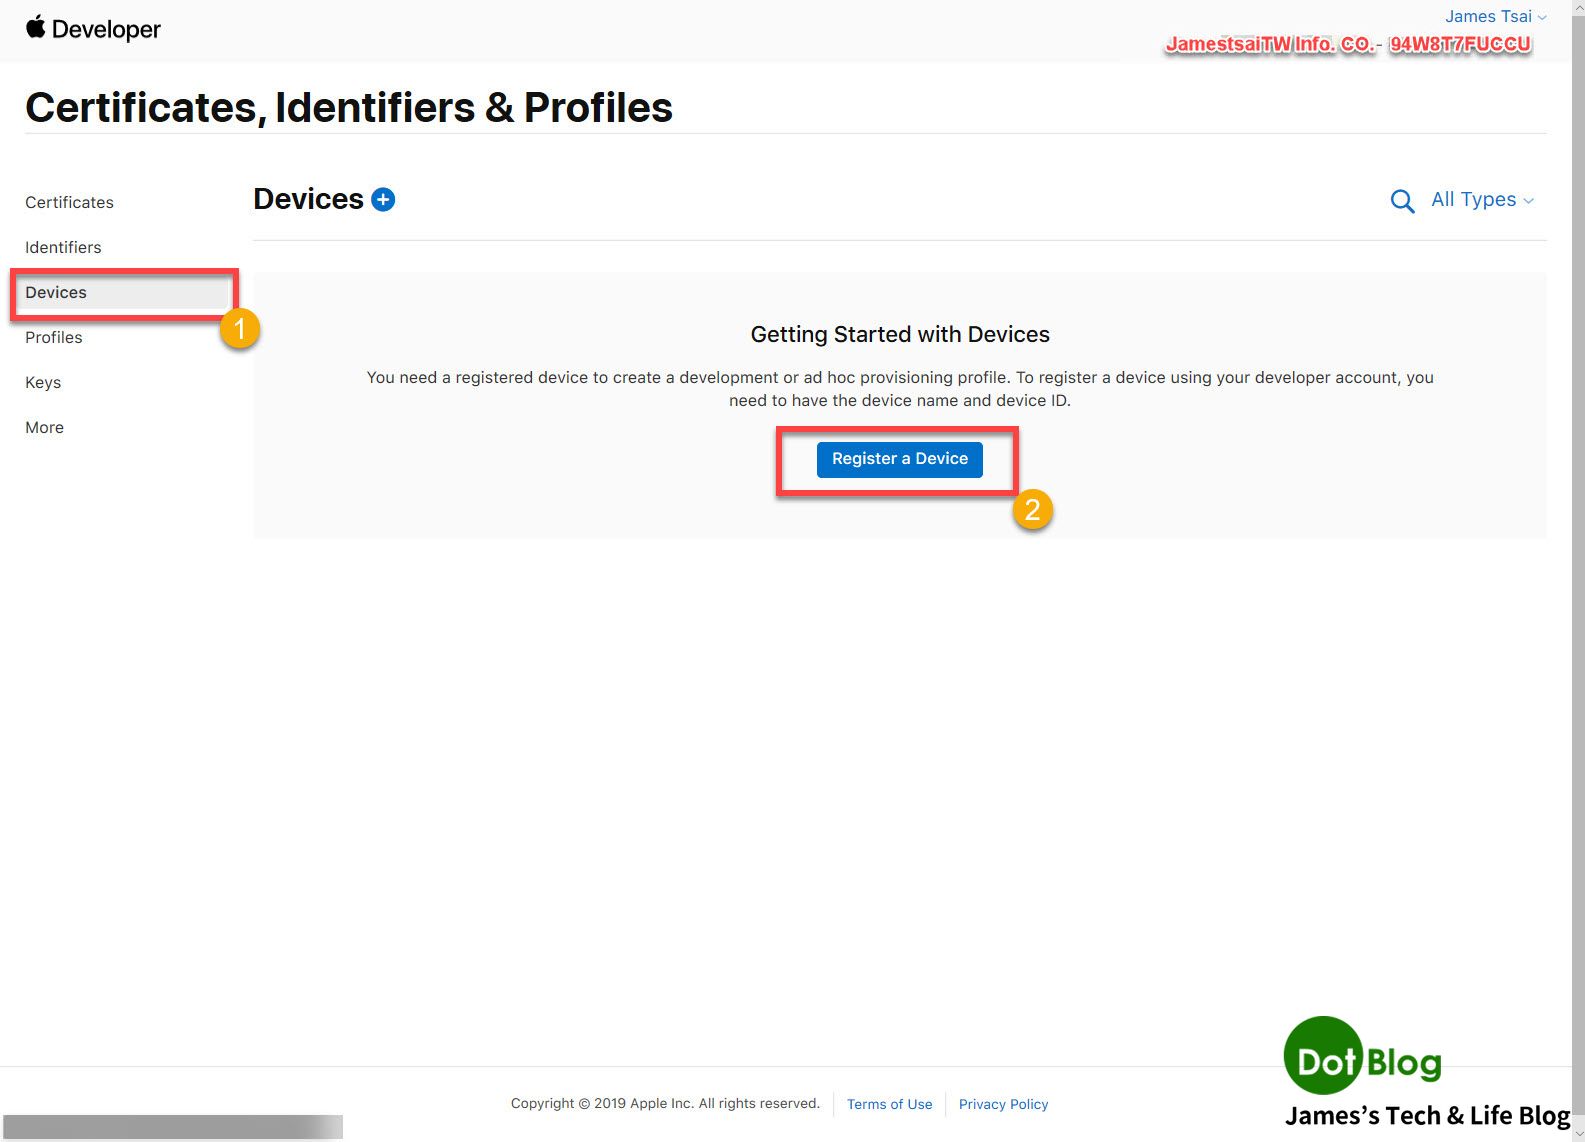
第三關: 註冊 Devices (設備)
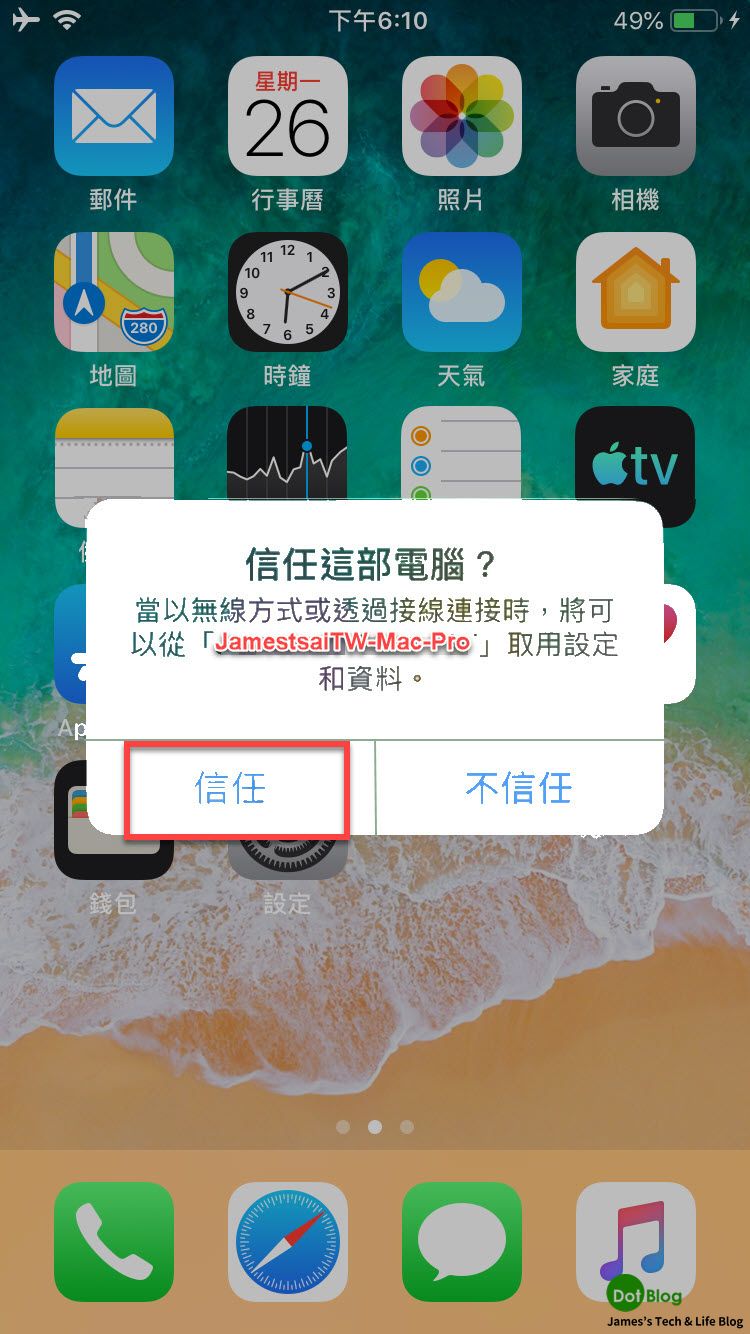
接著請在 Mac 機器上,用 USB 線接上要用來測試與佈署 iOS App 的 iPhone/iPod/iPad 設備,第一次接上時 iPhone/iPod/iPad 設備會跳出詢問訊息,請點選 "信任" (點選 "不信任" 後面就不用繼續設定了...)。
在本文接下來就用還能再戰一年的 iPhone 6s 來作為介紹展示。
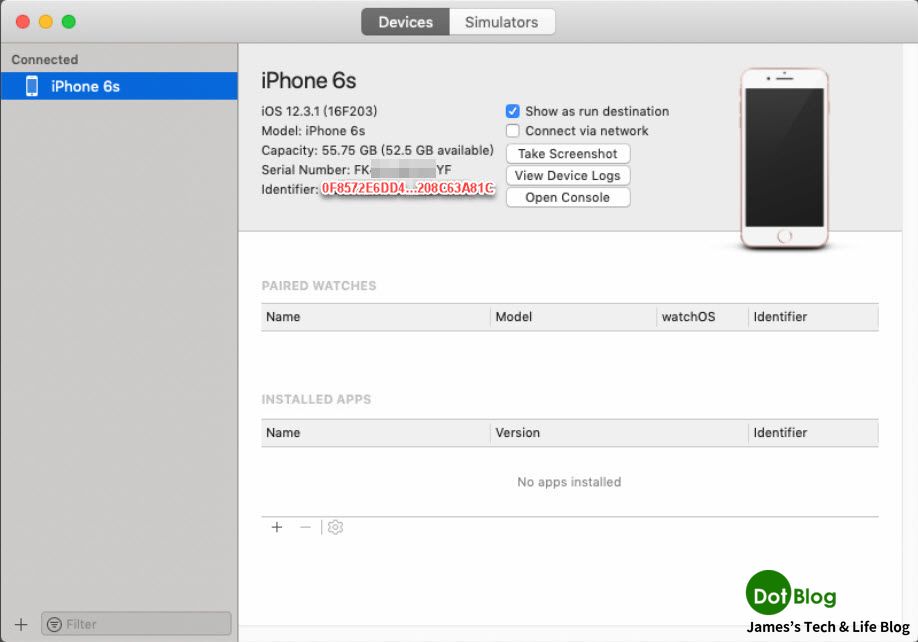
接著回到 Mac 再次在 Xcode 的選單列中點選 "Window" -> "Devices and Simulators"。

Xcode 第一次設定這設備時會接入 iOS SDK 的 debugger,需要稍微花一些時間等待此同步動作。
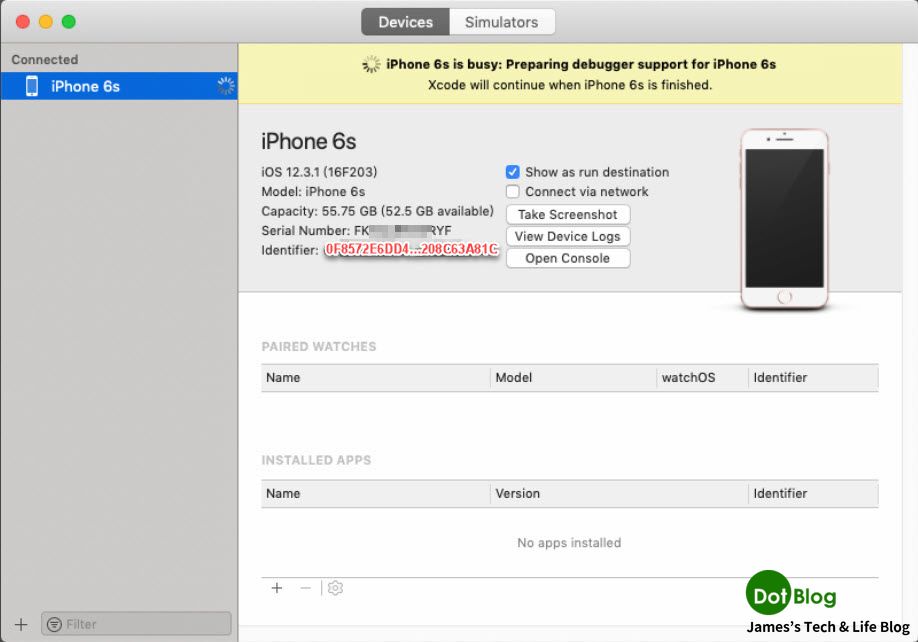
等同步完成後,即可點擊畫面中的 Identifier 後面的 uuid 並且可直接複製此 uuid (點了以後直接 "Command + C",不用特別去圈選 uuid)。
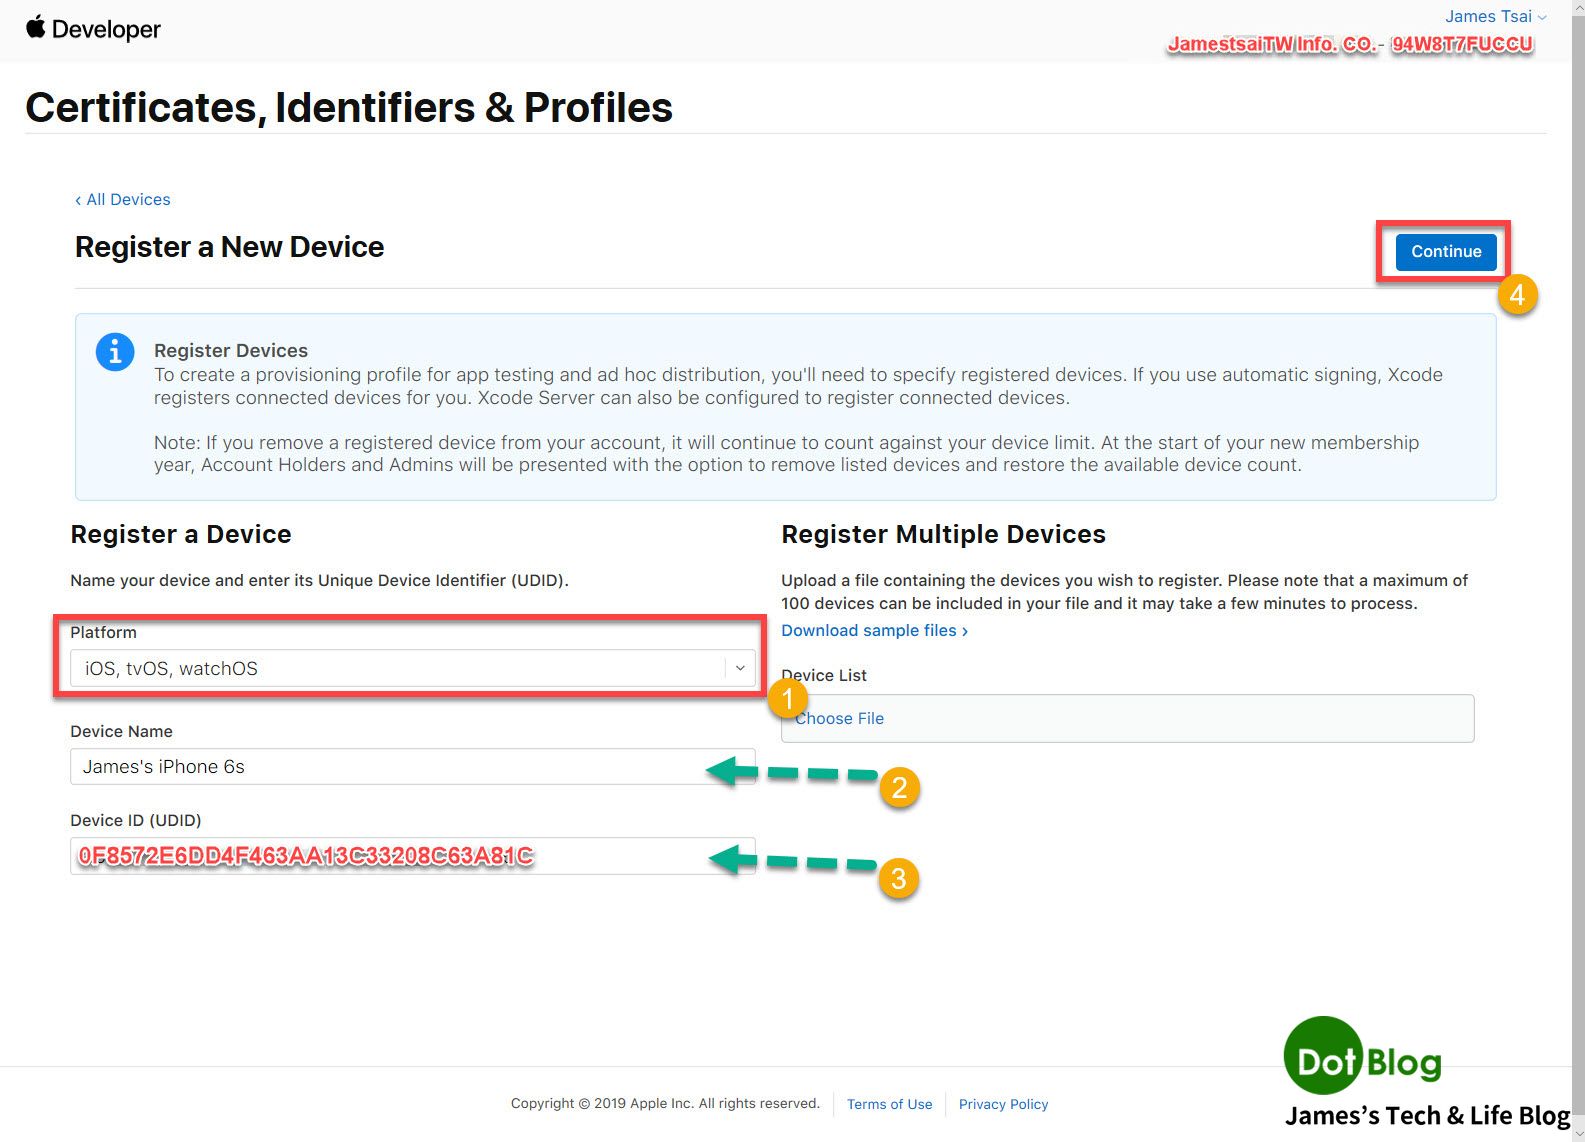
再次回到 "Apple Developer 網站" 的 “Certificates, Identifiers & Profiles” 中點選 "Devices",並在此畫面點選 "Register a Device"。
在 "Register a New Device" 的頁面中,填寫的資訊有:
"Platform" : 請選擇 "iOS, tvOS, watchOS"。
"Device Name" : 請填上能在公司或組織中識別這個設備的一個別名。
"Device ID" : 填入前面在 Xcode 接上 iPhone 時的步驟所複製的 uuid。
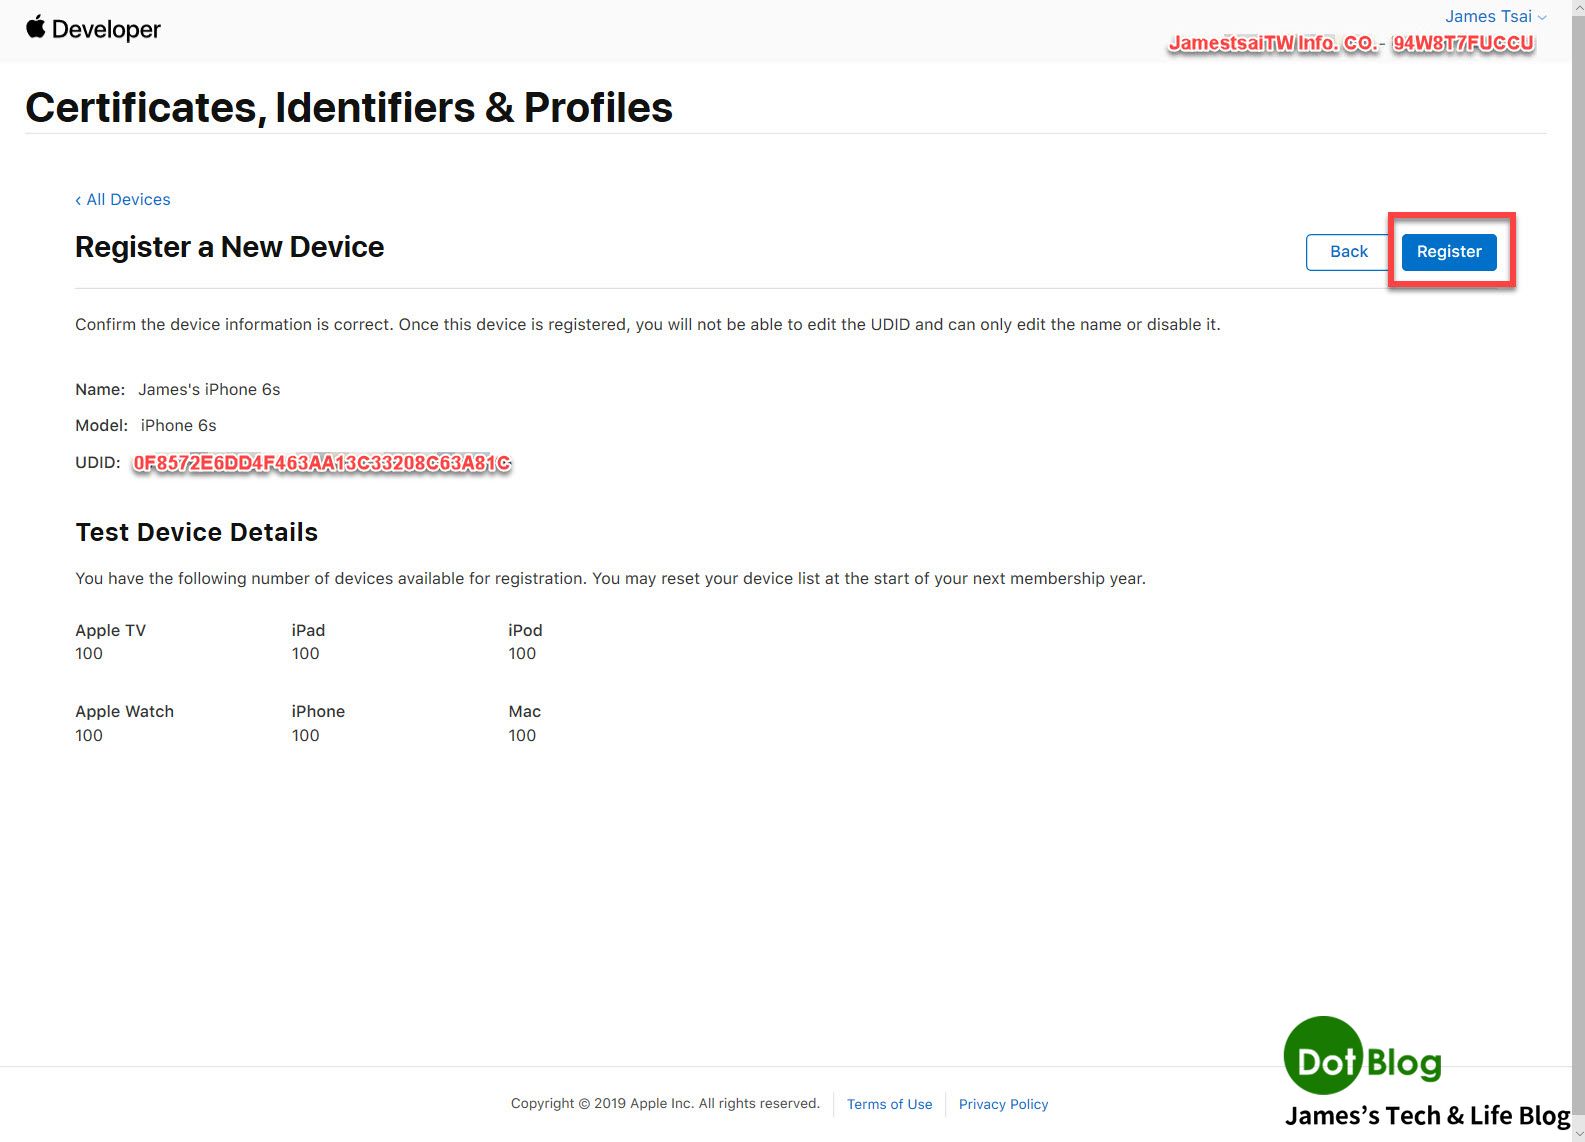
再次確認註冊設備的資訊,並在此畫面中也會顯示目前剩下可用的設備註冊數量,沒問題的話就點選 "Register"。
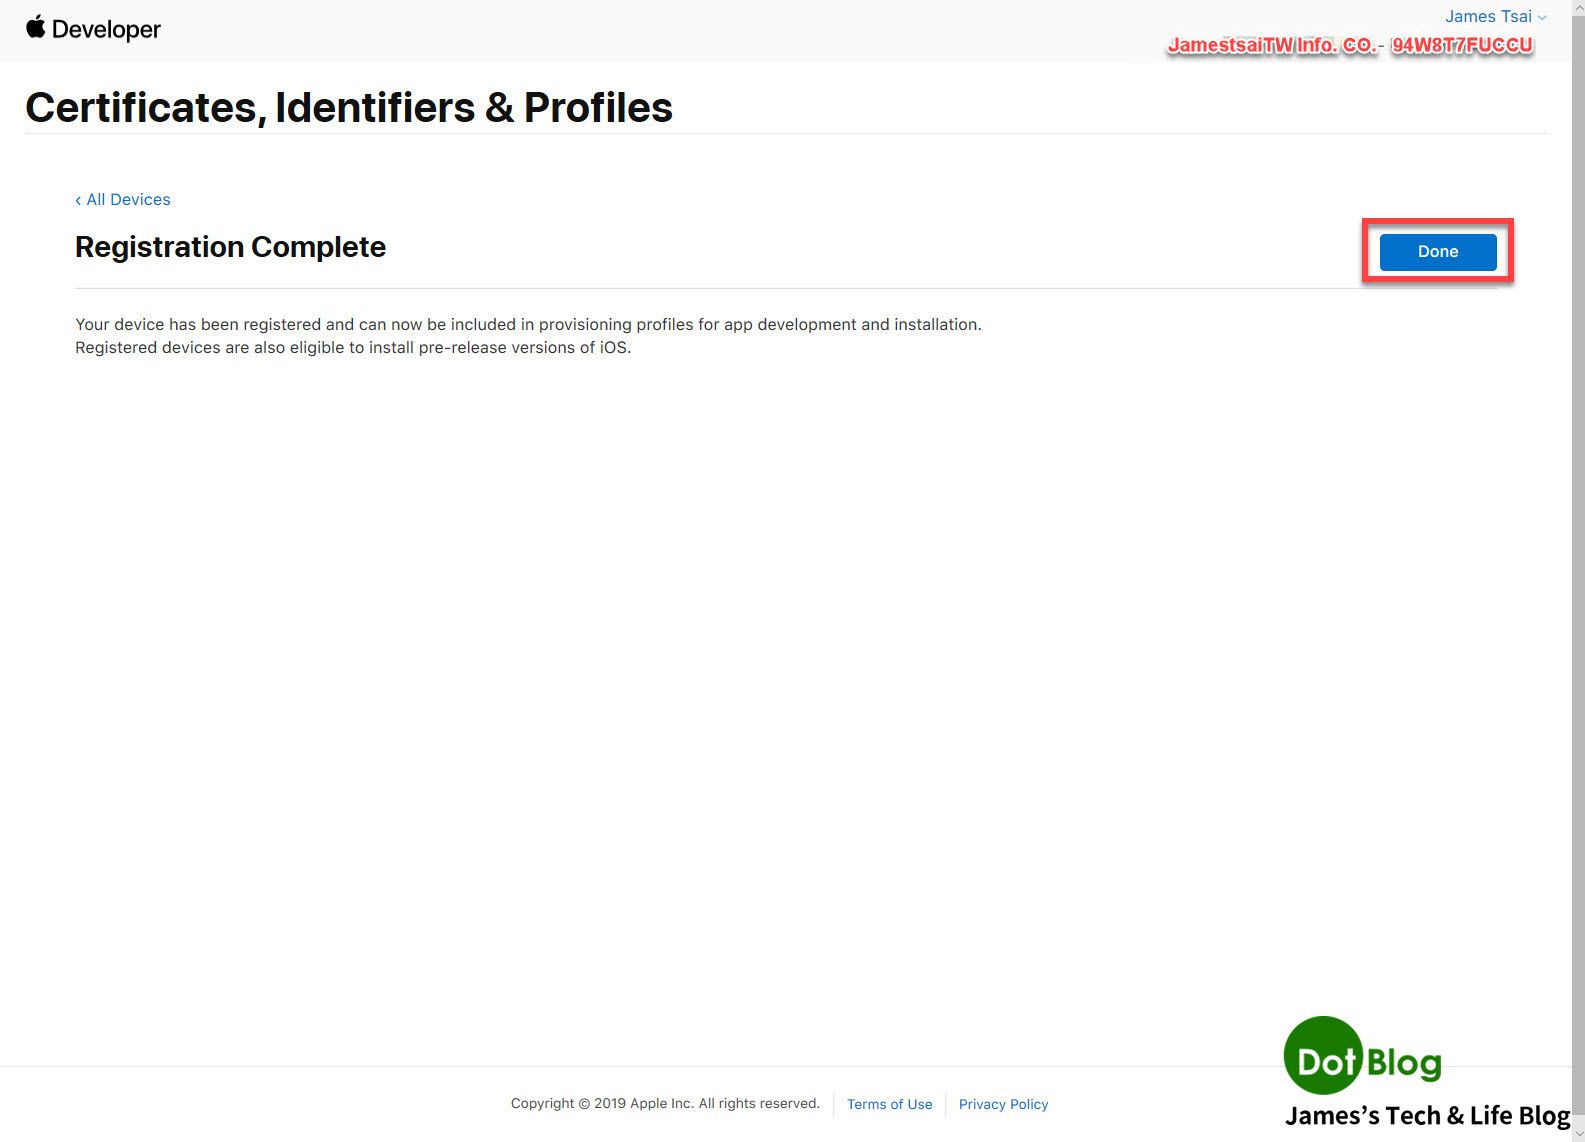
註冊完成,點選 "Done"。
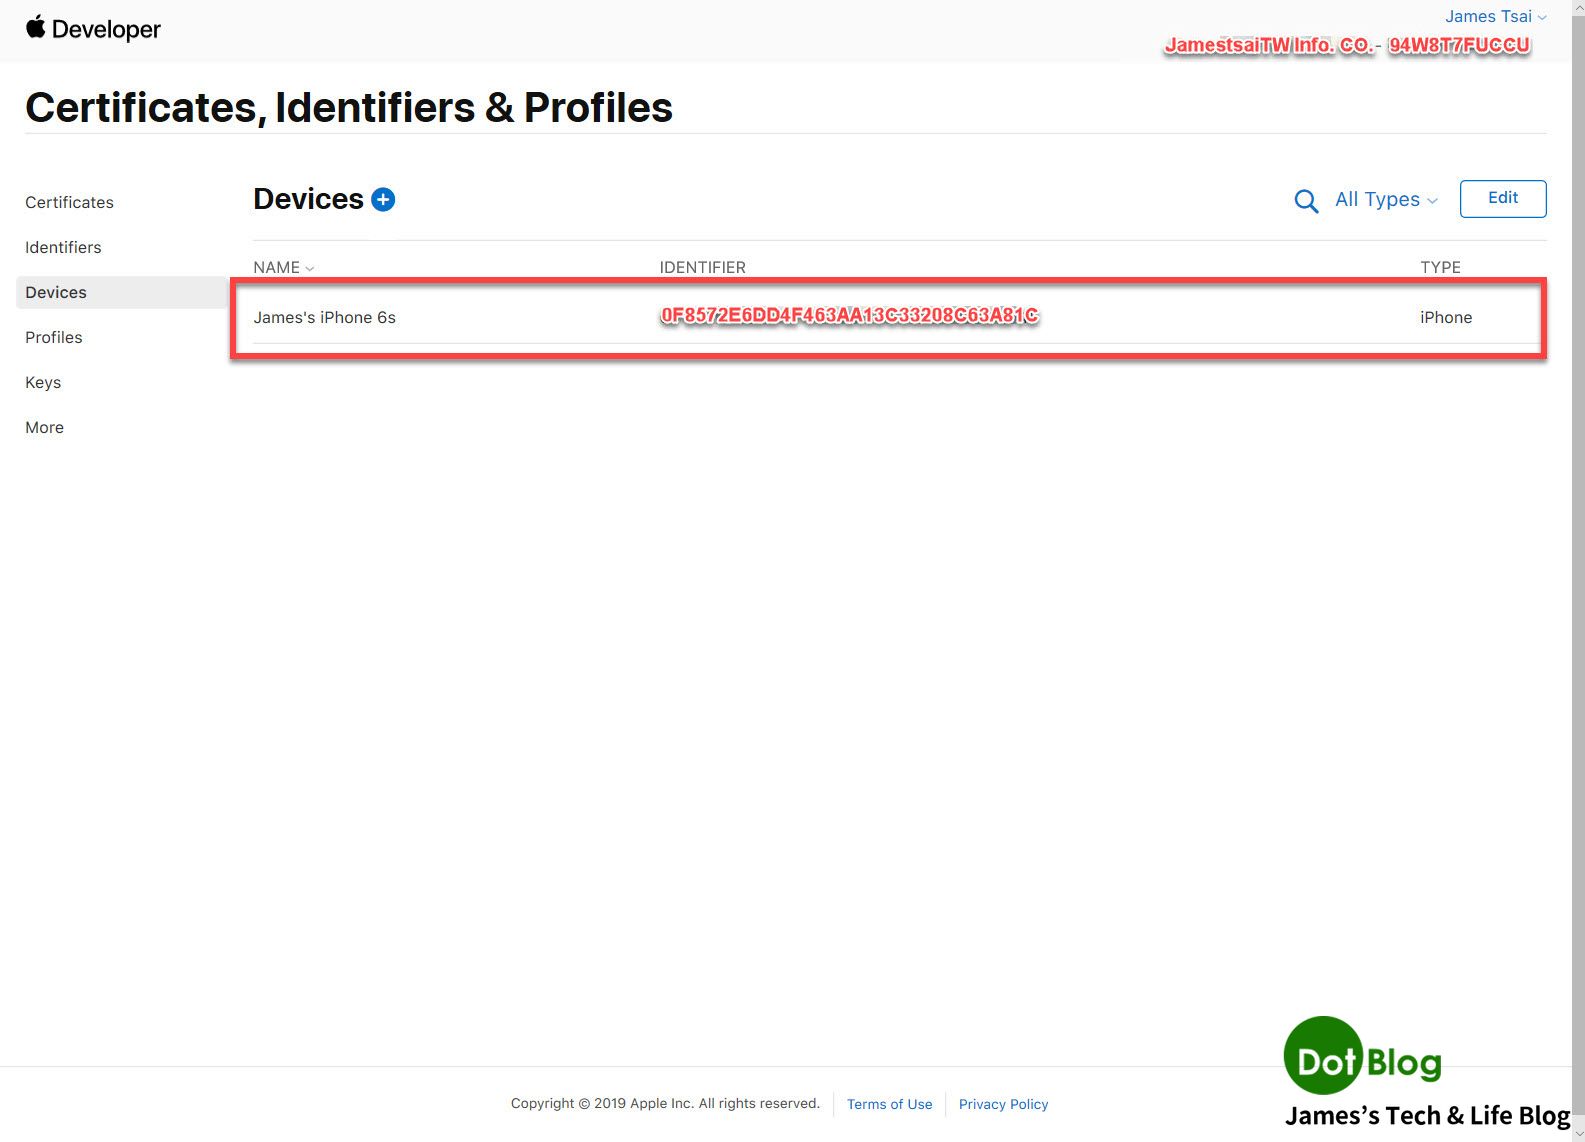
回到此 "Devices" 的畫面列表中就會出現剛剛註冊的設備資訊。
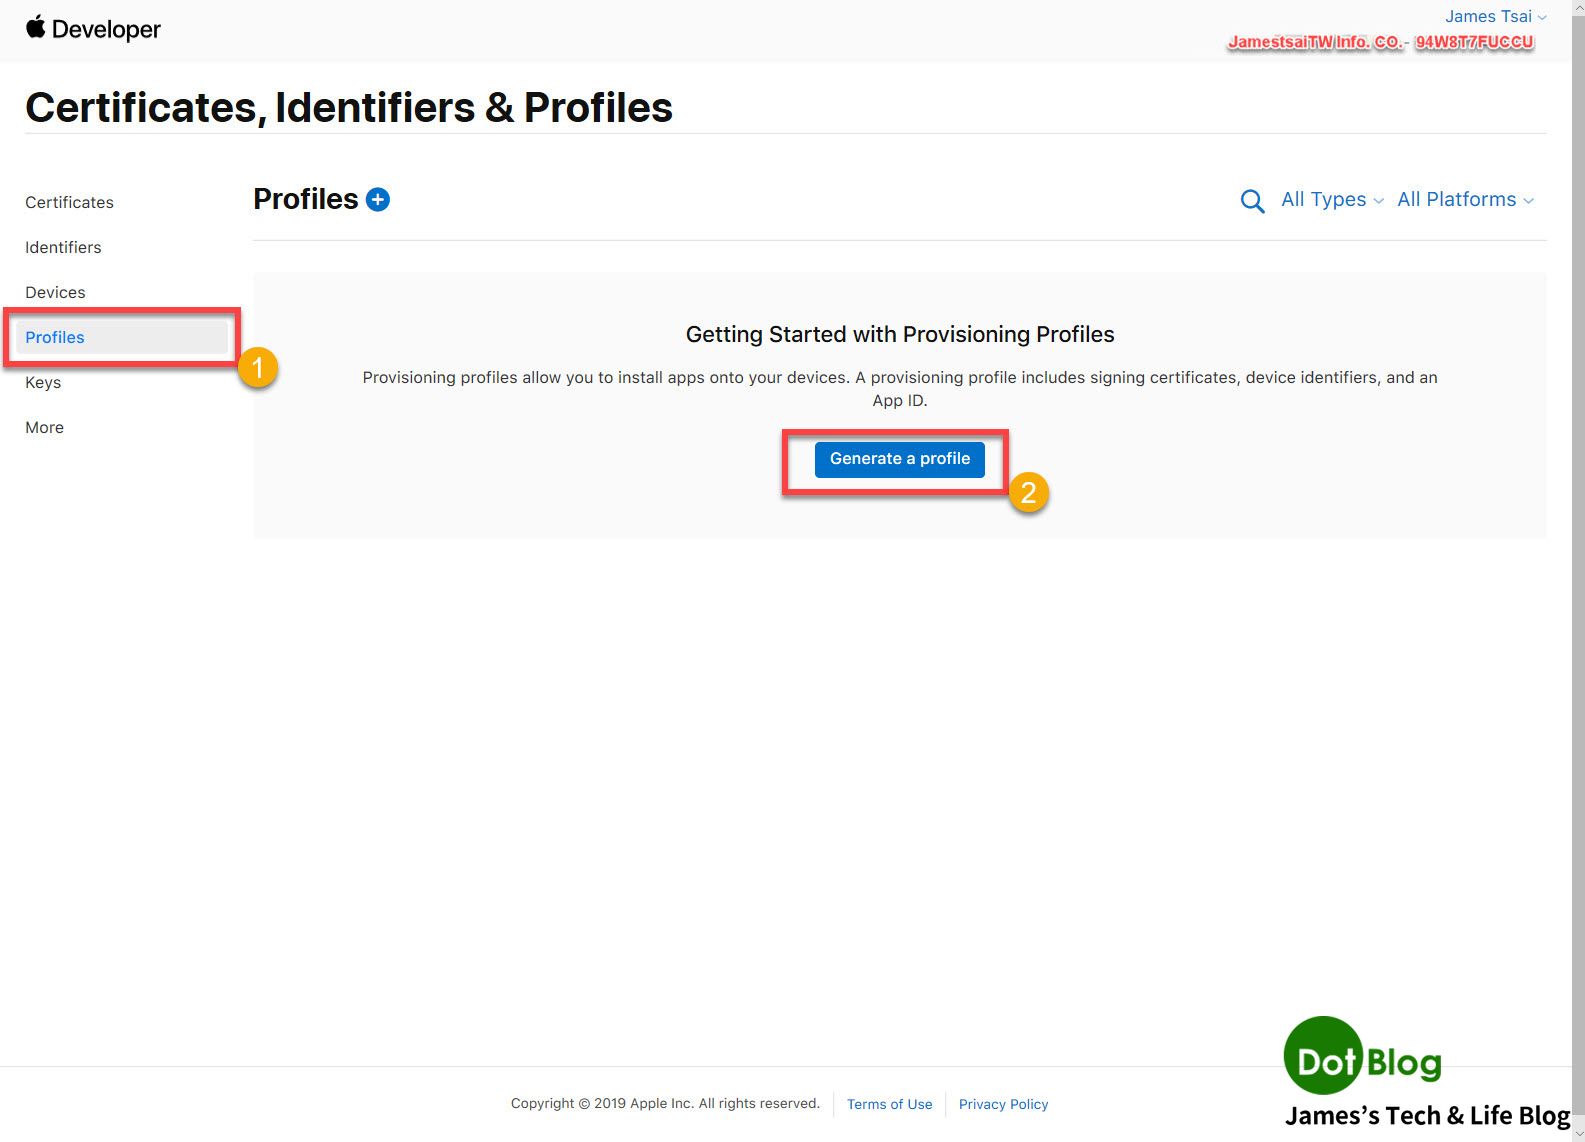
第四關: Profiles (佈建設定)
繼續在 “Apple Developer 網站” 中的 "Certificates, Identifiers & Profiles" 點選 "Profiles"。
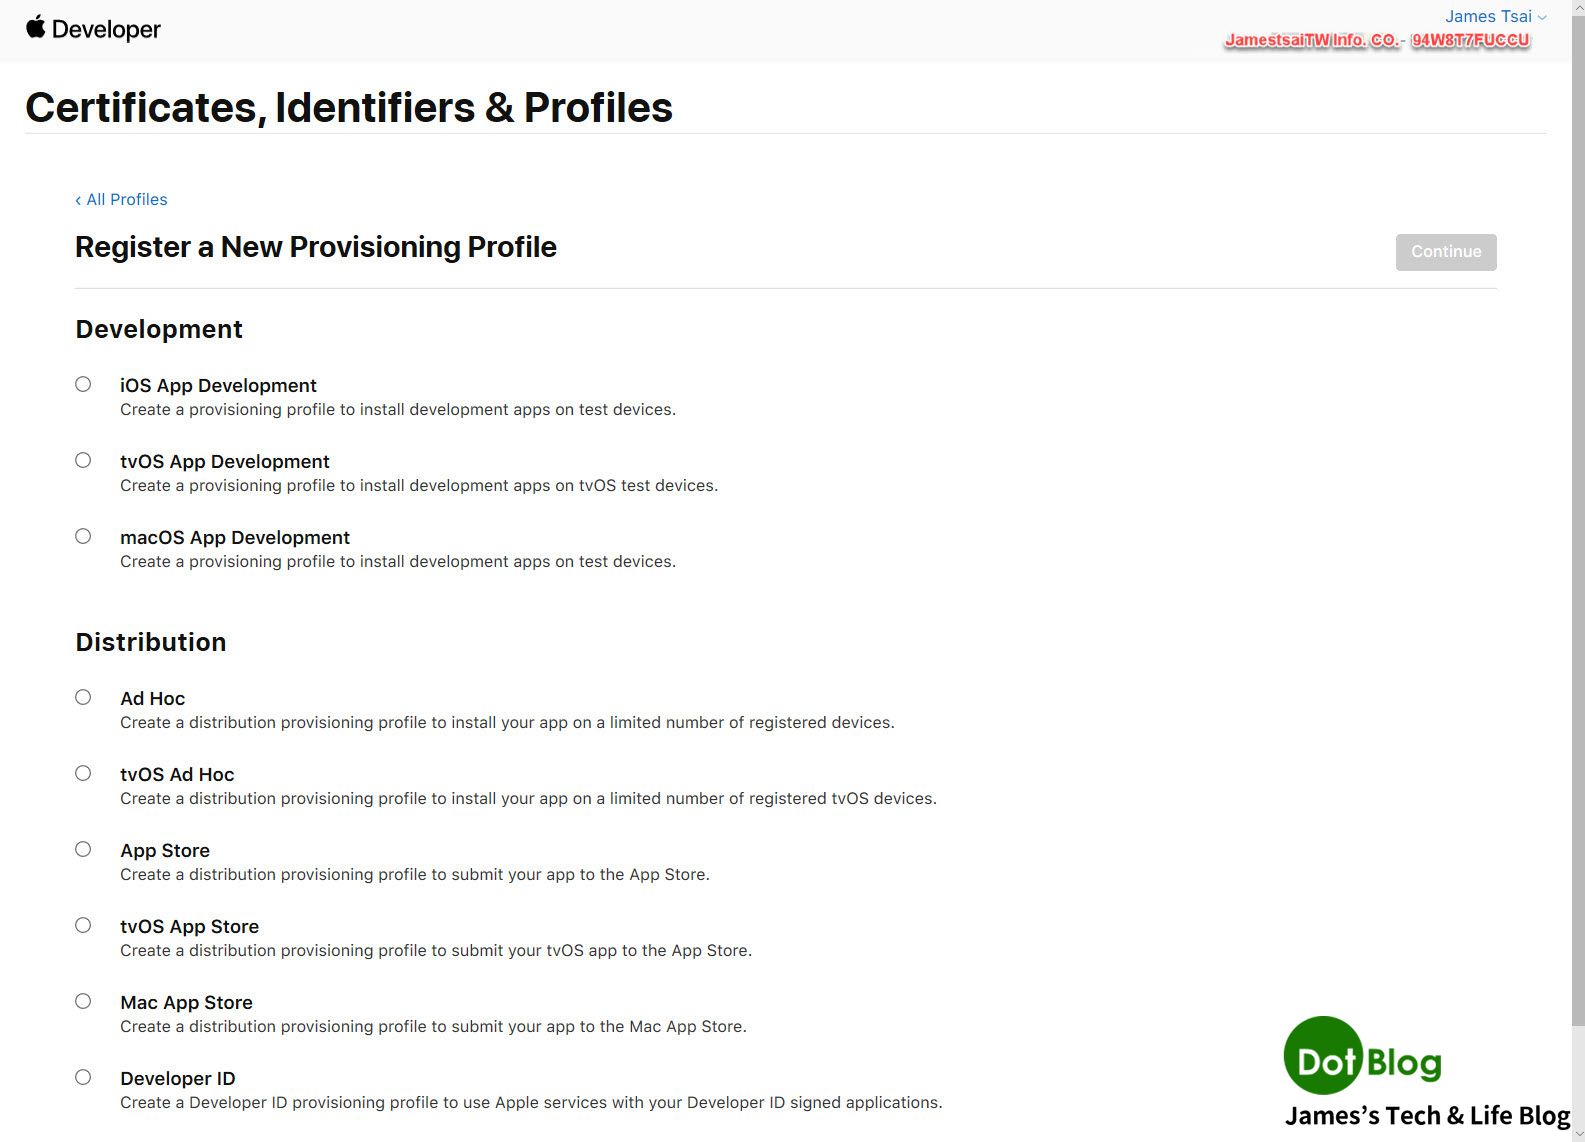
進到 "Register a New Provisioning Profile" 的畫面。
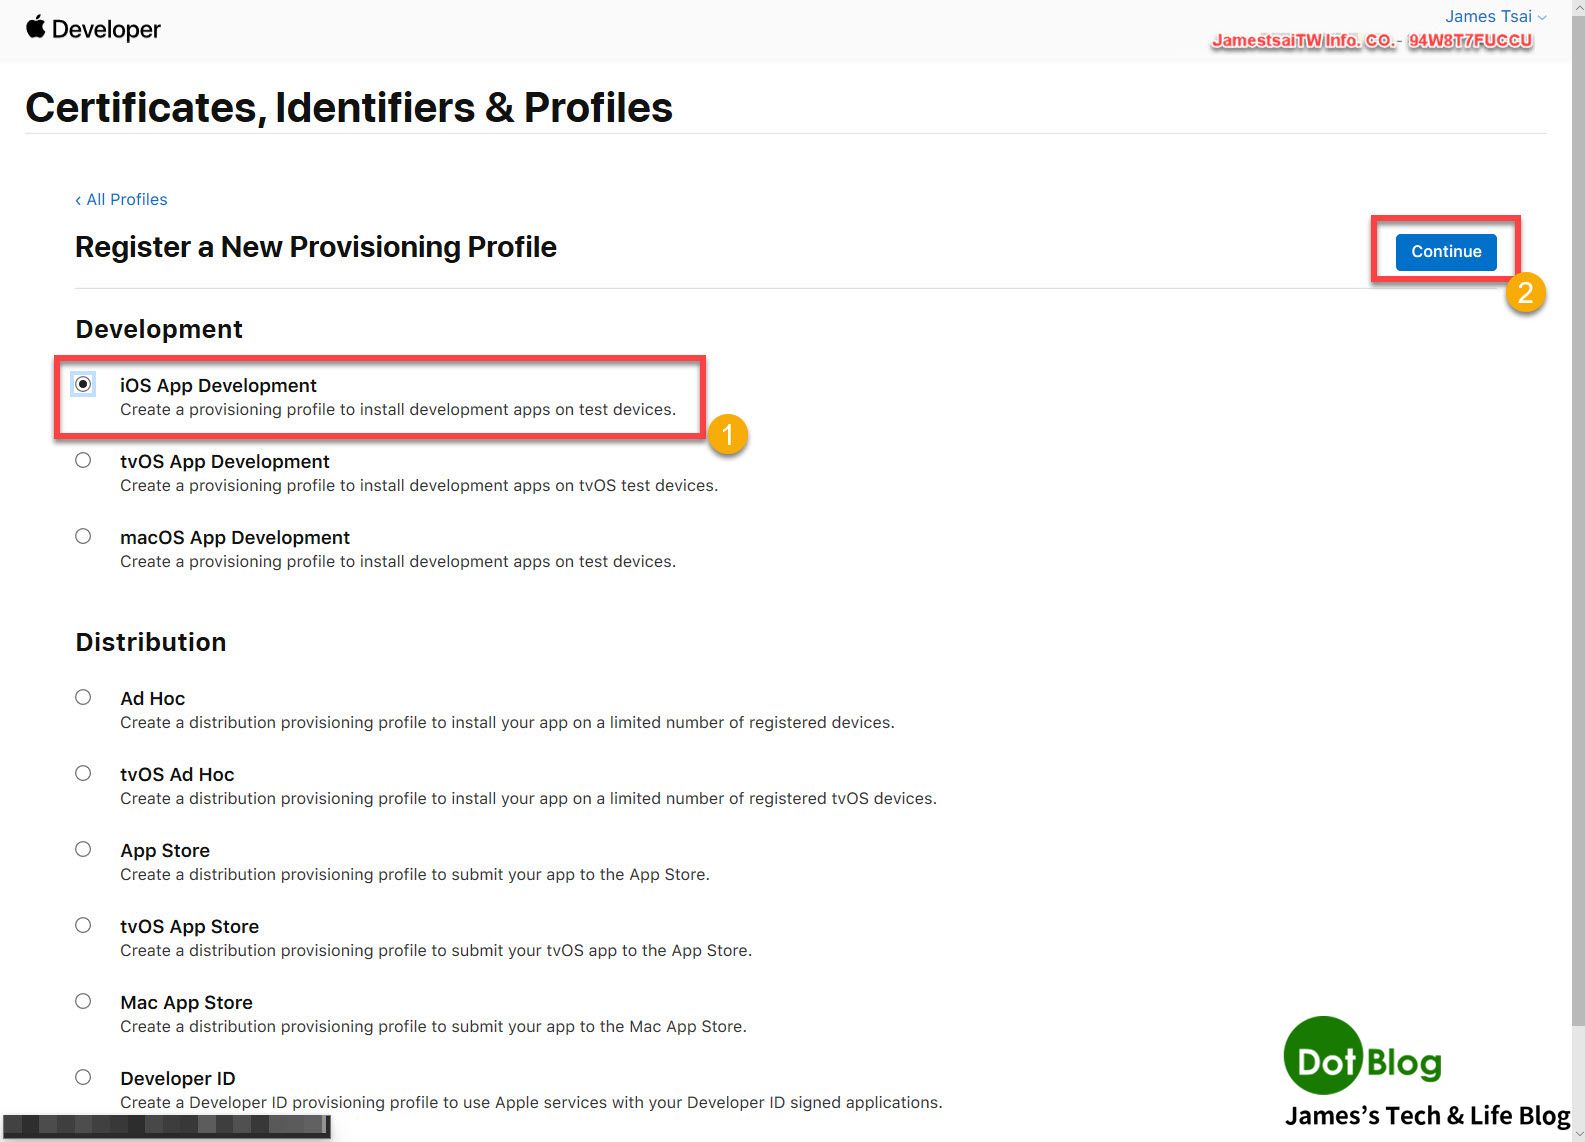
在 "Development" 中選取 "iOS App Development" 後,點選 "Continue"。
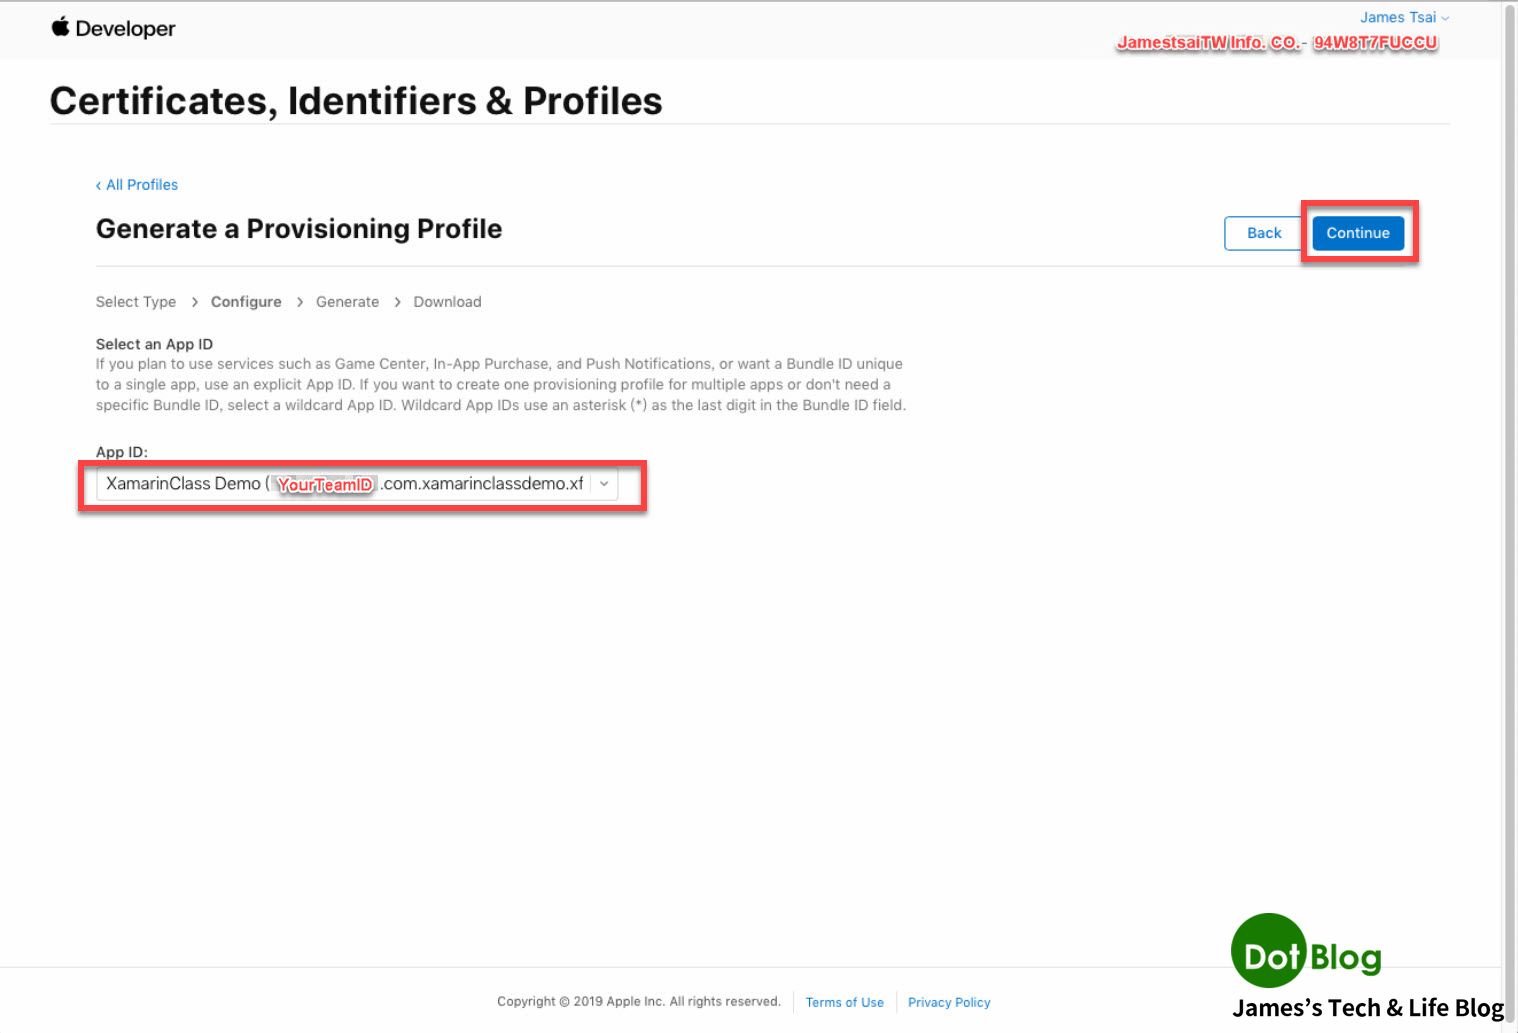
選取在第二關所建立的 "App ID" 並點選 "Continue"。
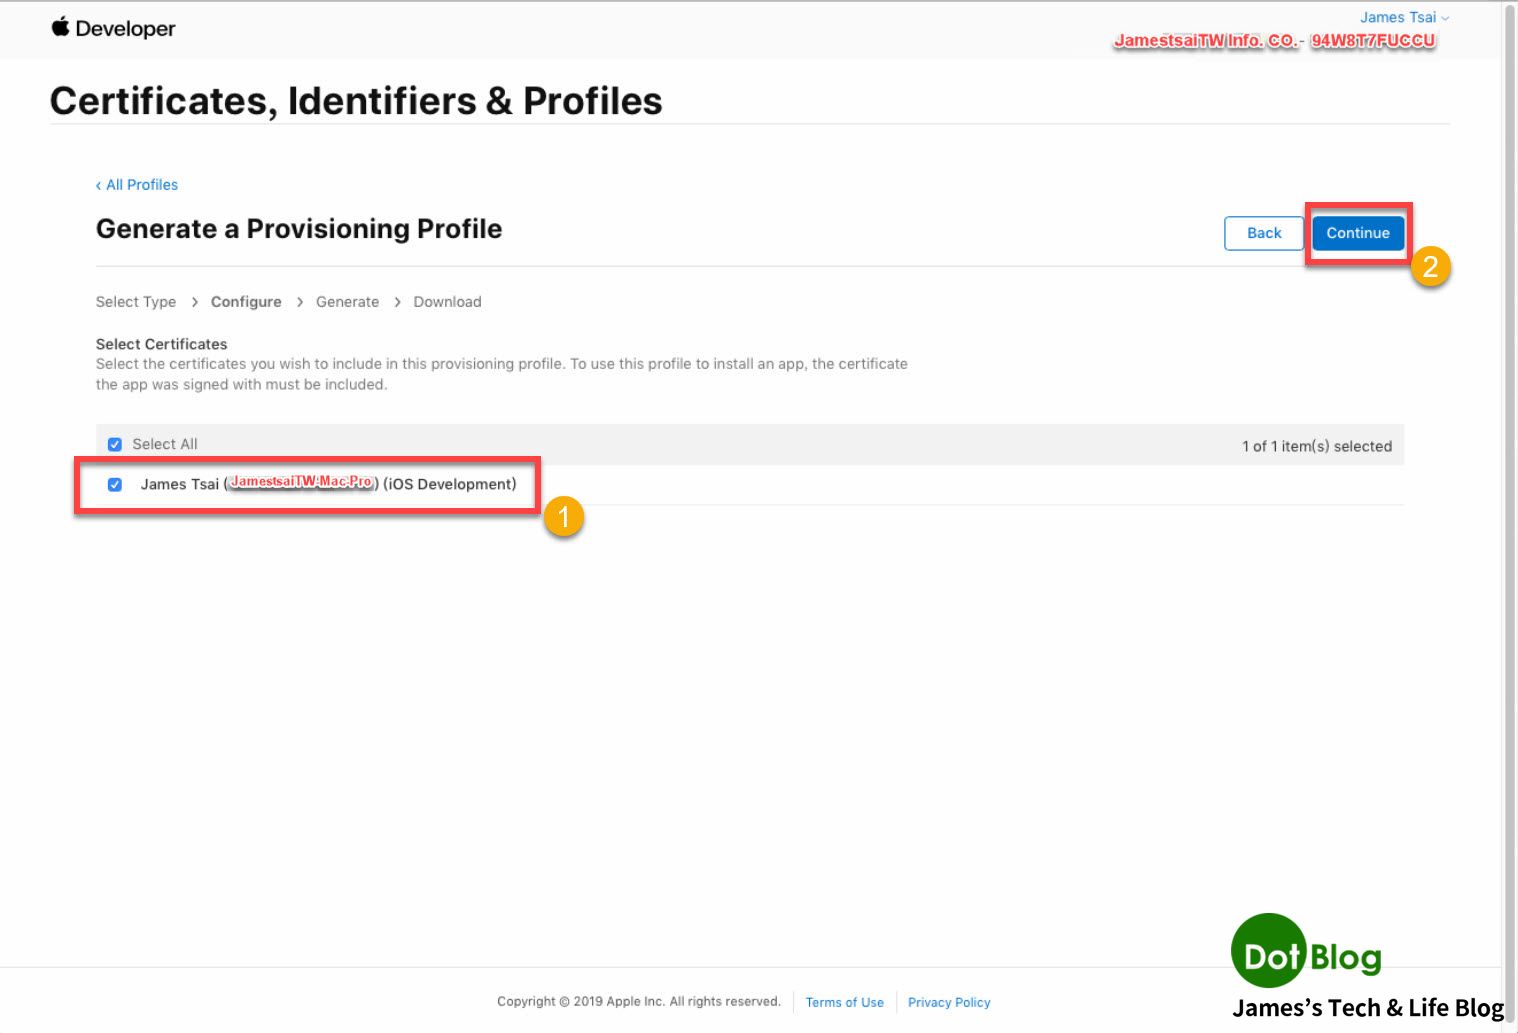
進到 "Select Certificates" 畫面。
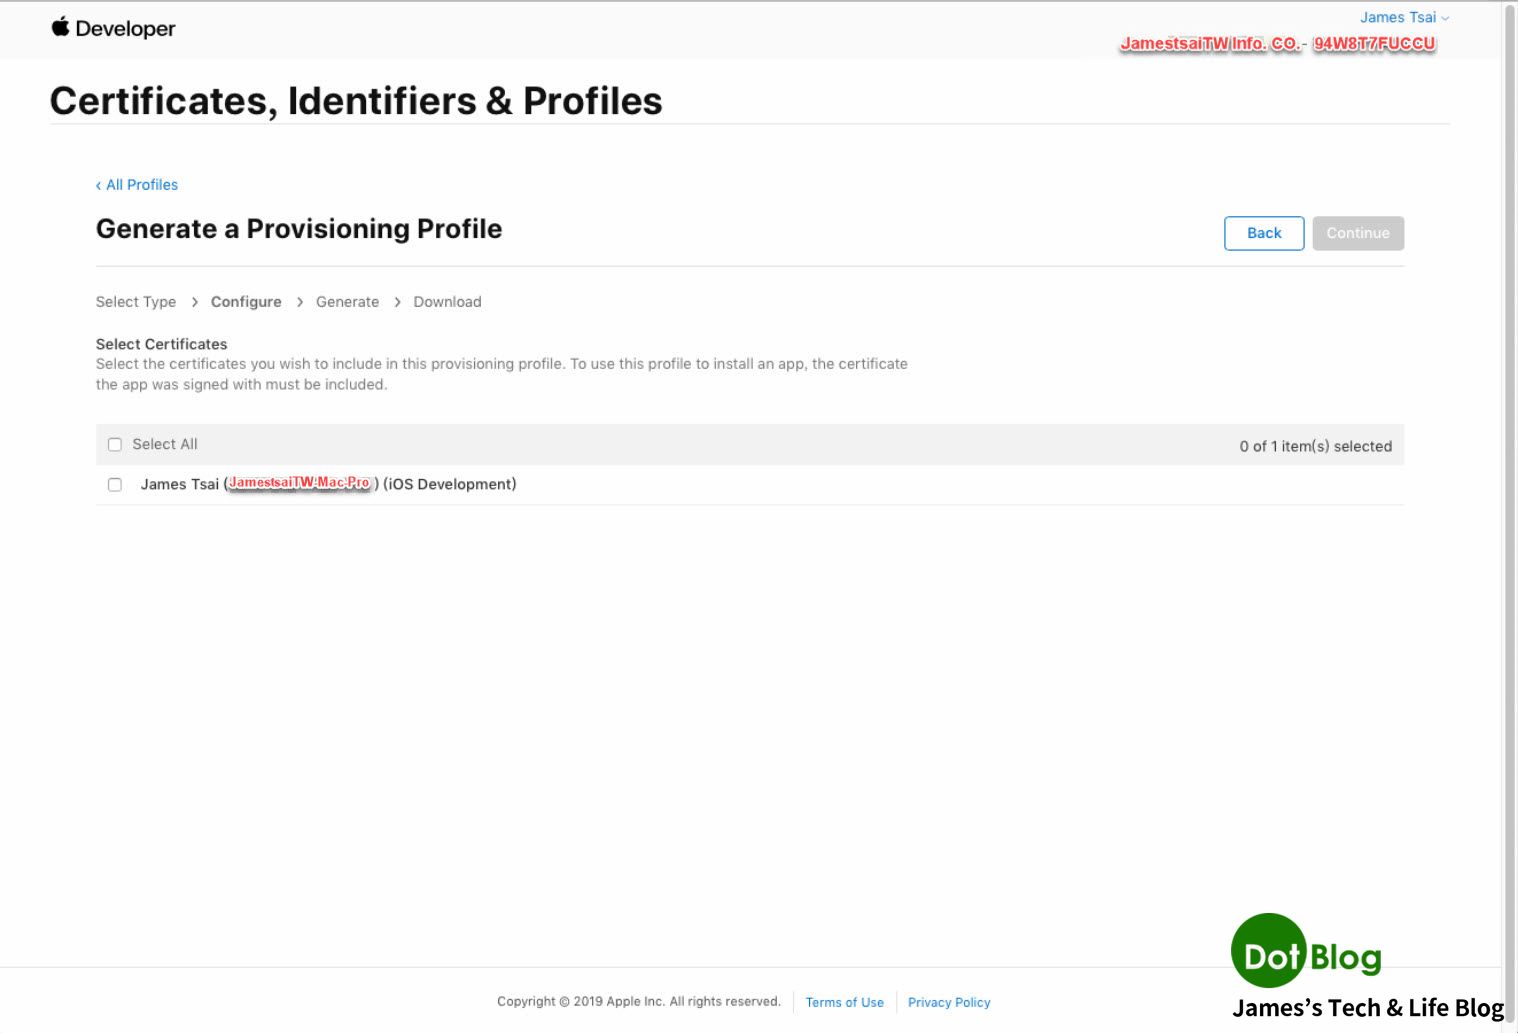
選取在第一關透過 Xcode 上傳到 "Apple Developer 網站" 的 "iOS Development 憑證" 後,點選 "Continue"。
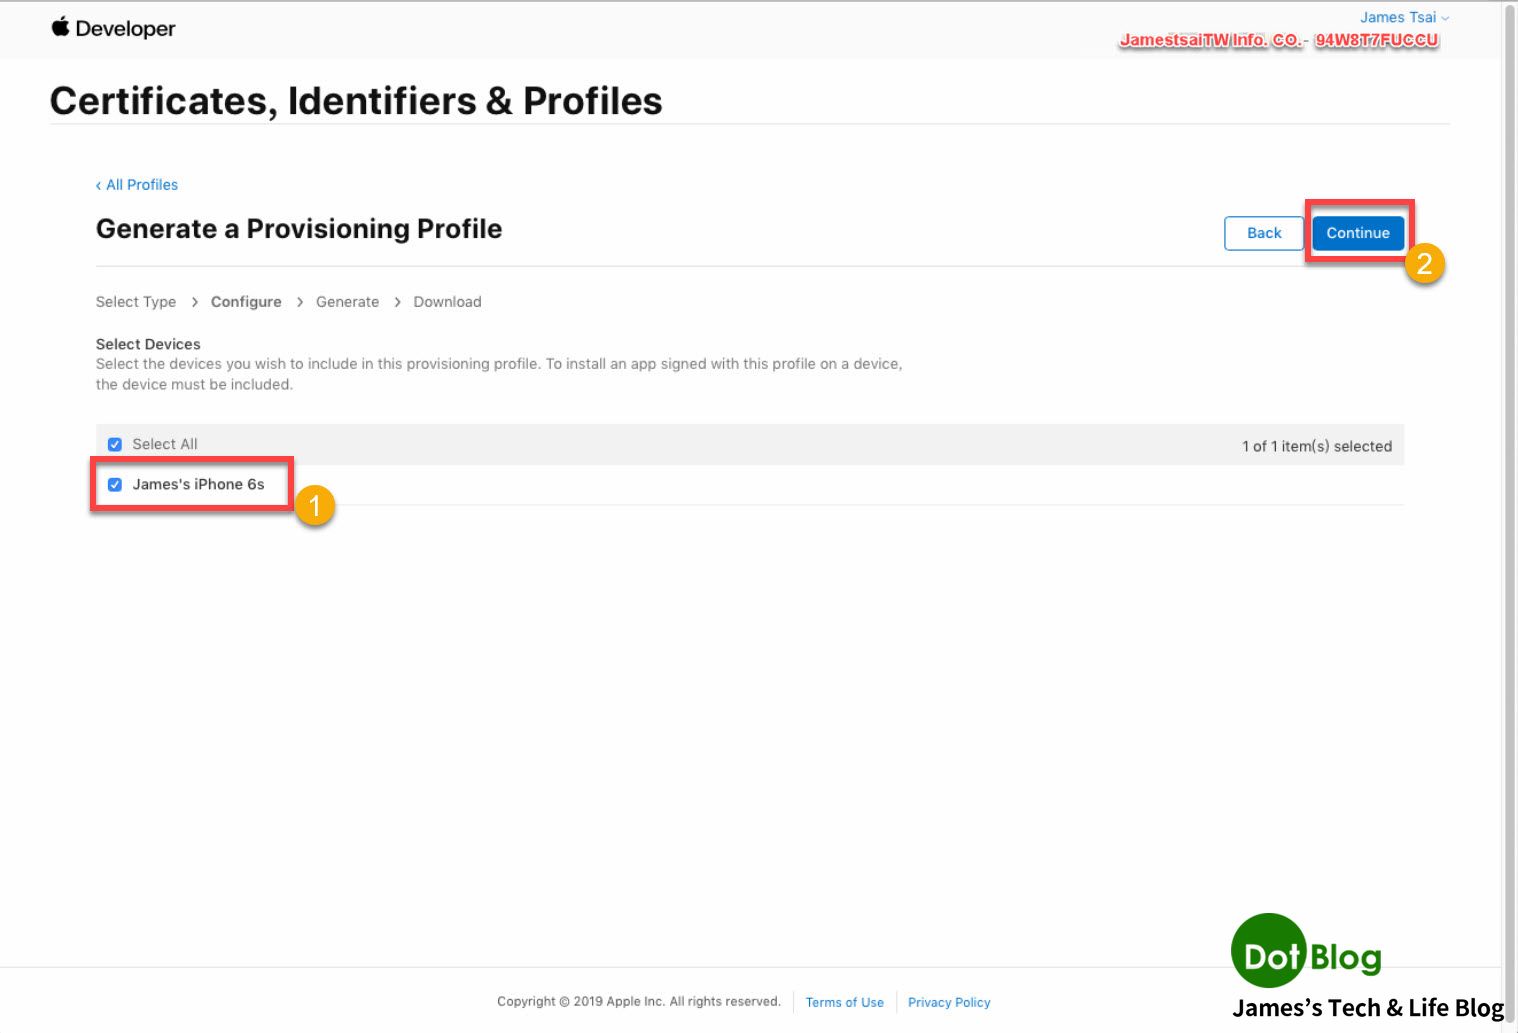
進入到 "Select Devices" 畫面。
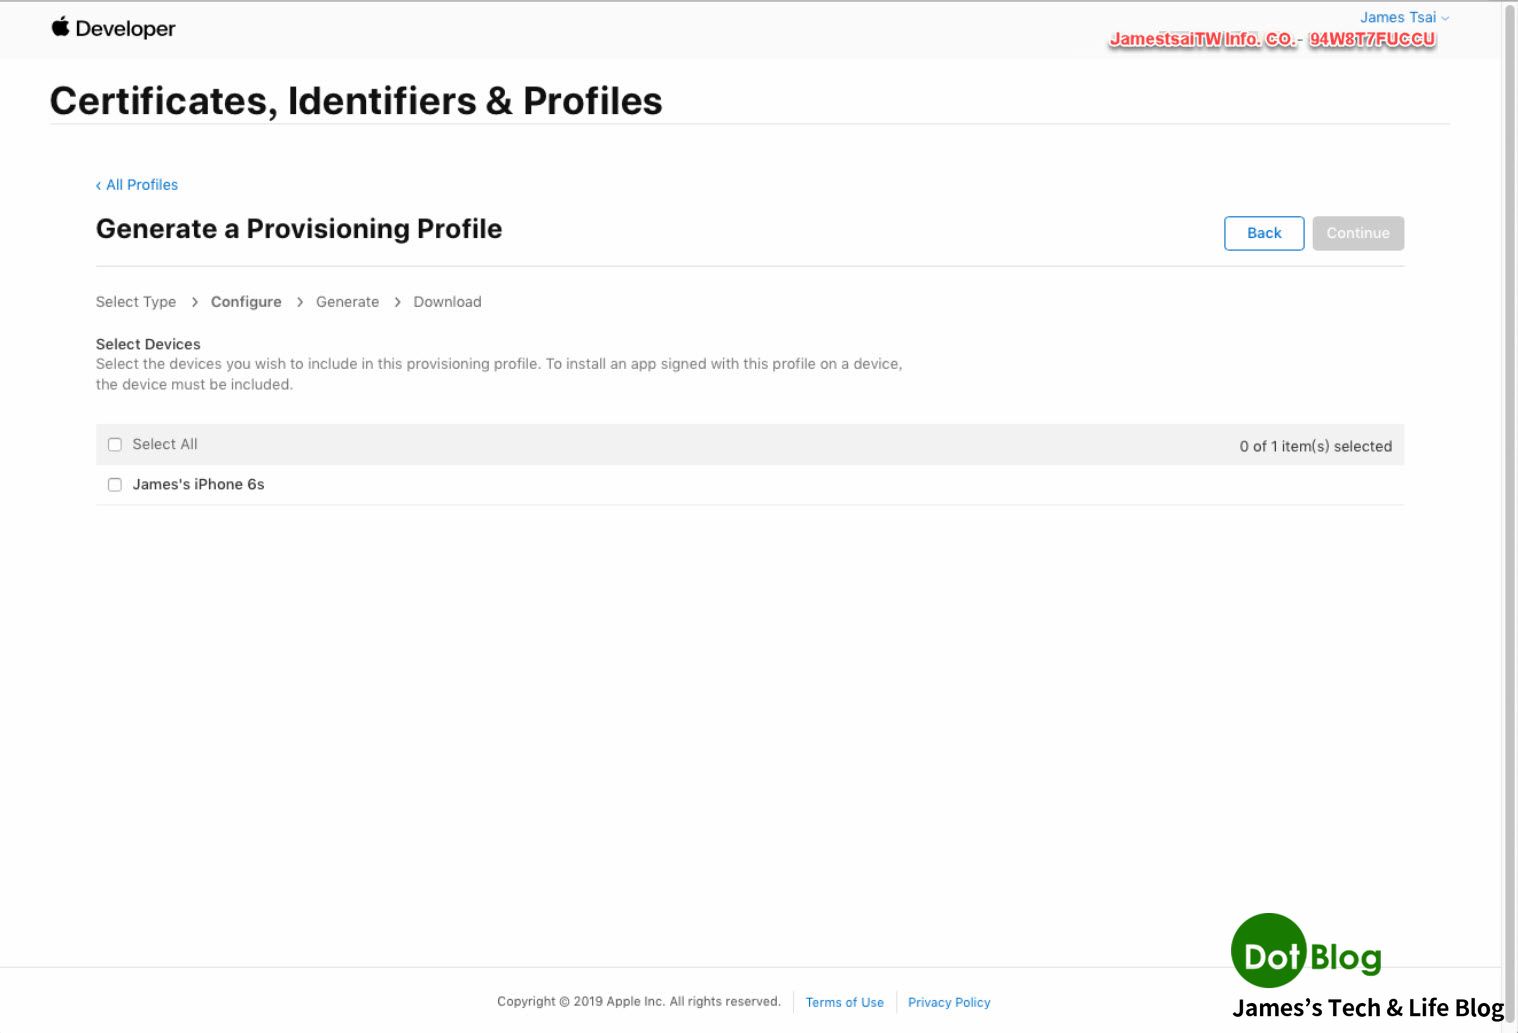
選取在第三關建立的 "Device" 後,點選 "Continue"。
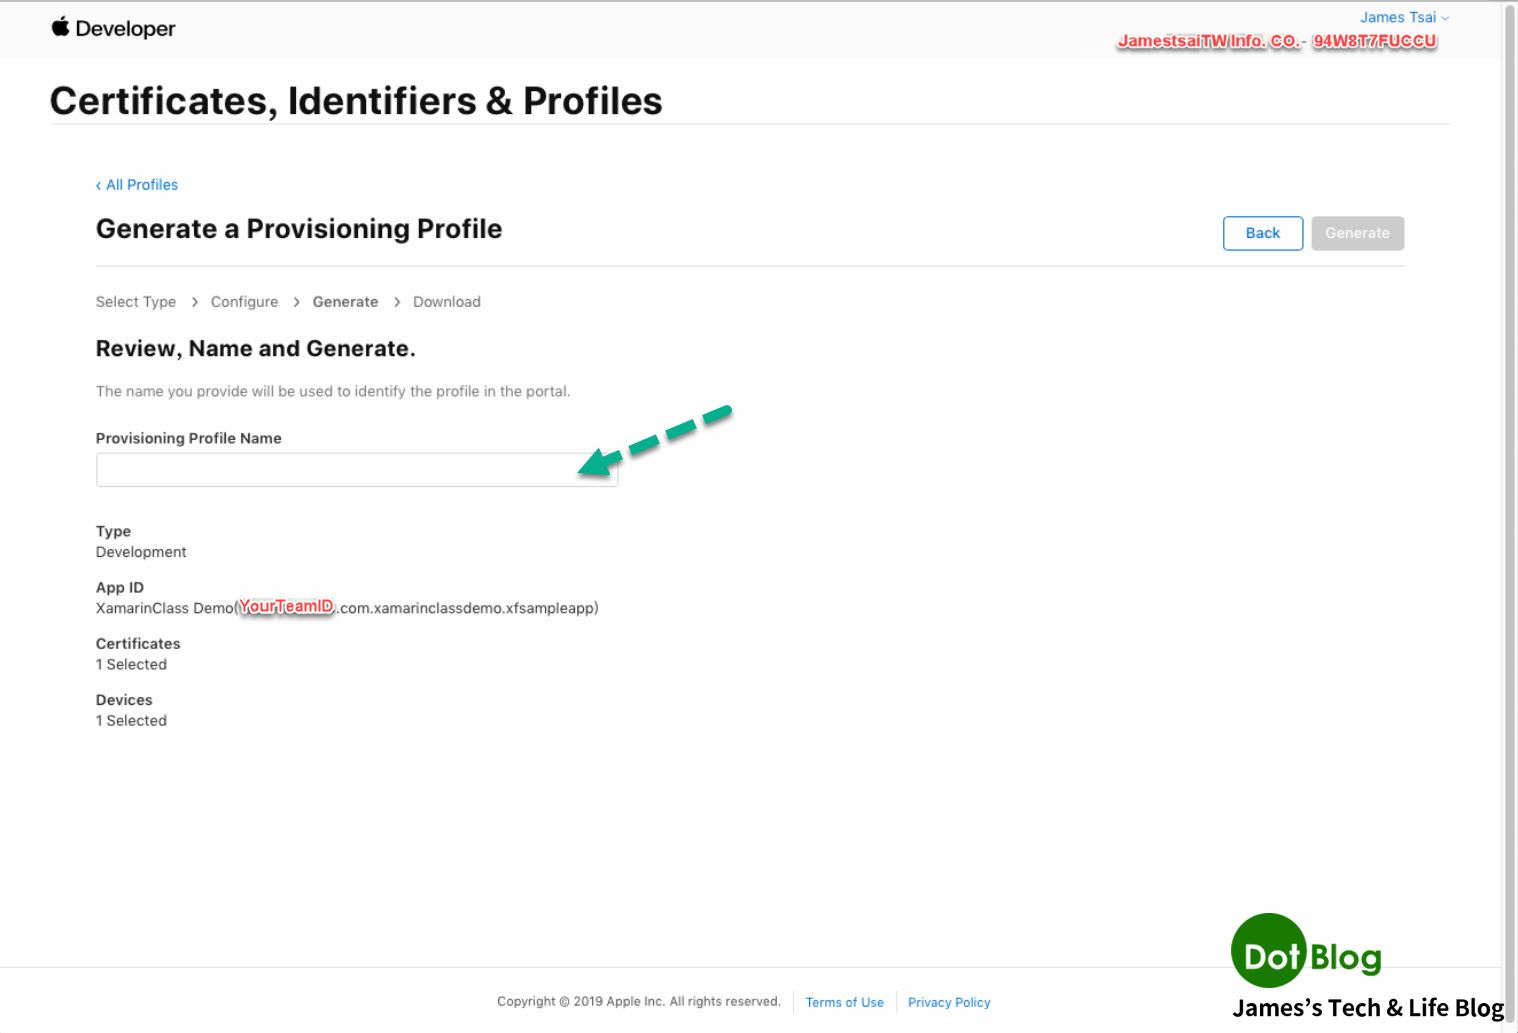
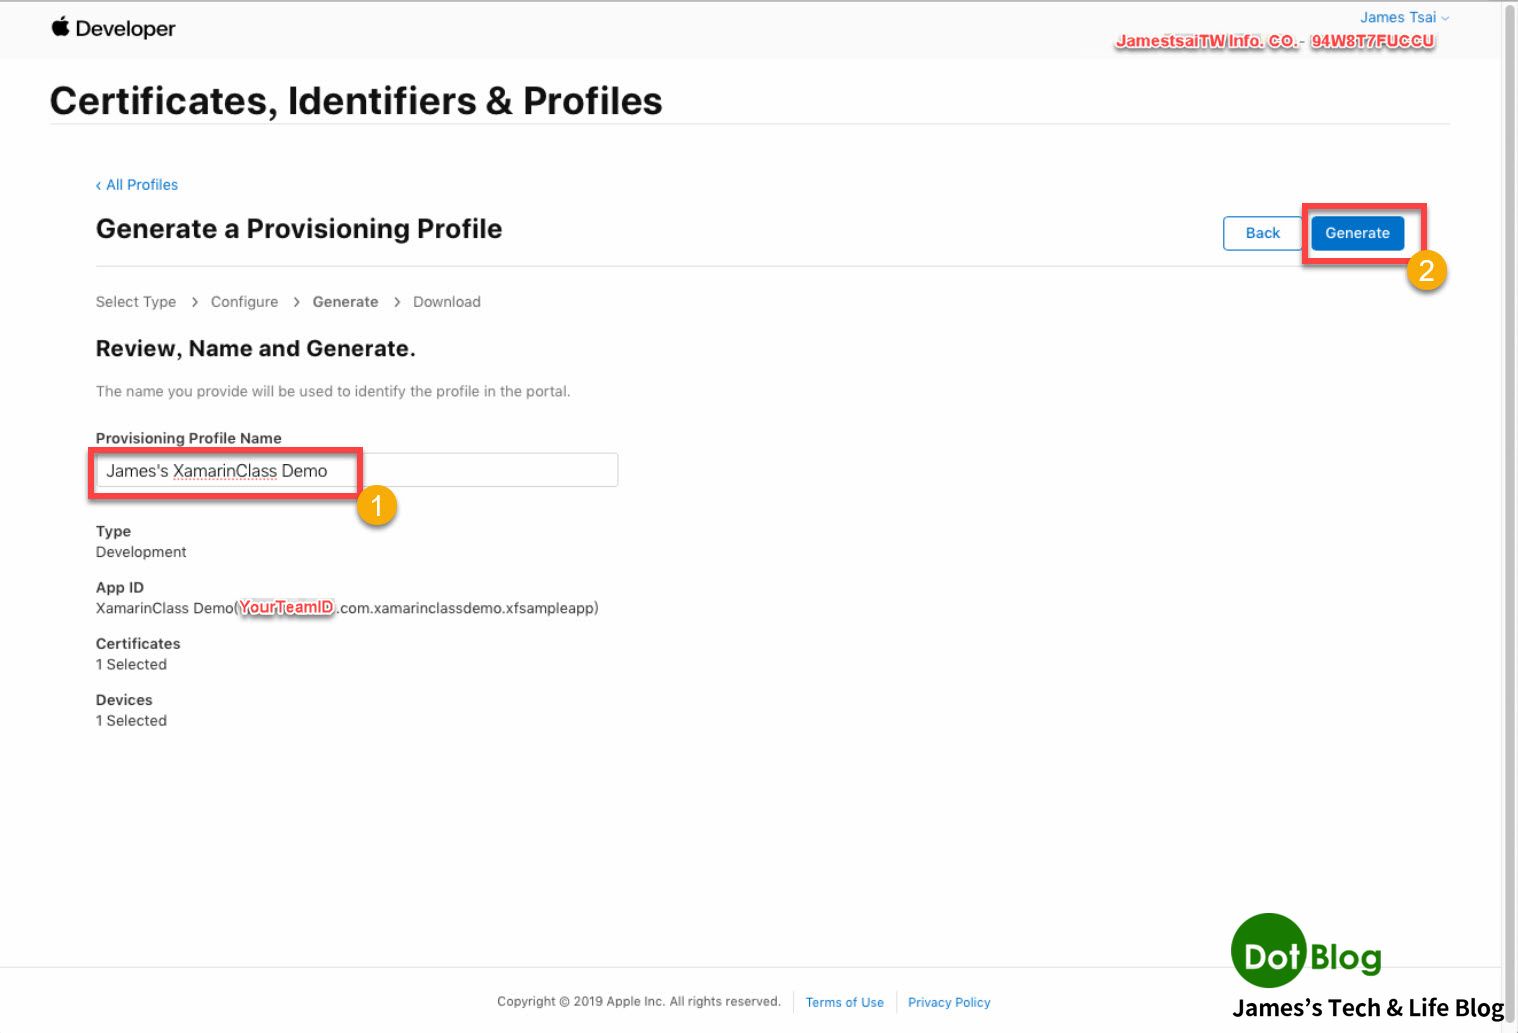
填入在公司或組織中可識別的 "Provisioning Profile Name"。
完成後,點選 "Generate"。
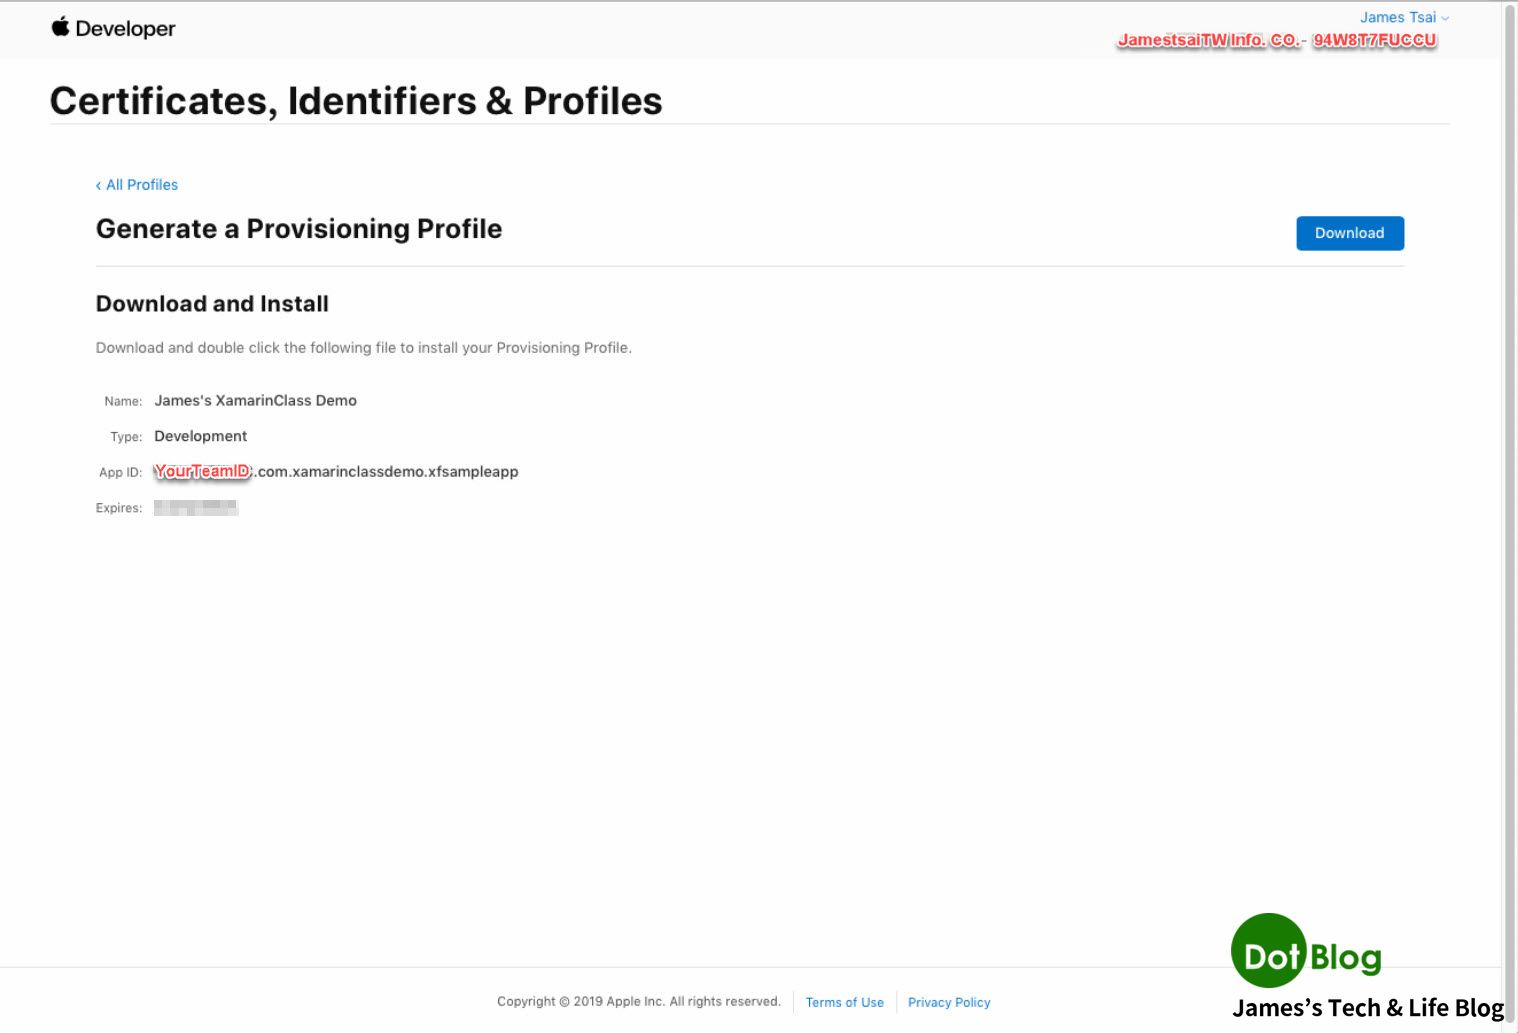
完成後可以點選 "Download" 下載 "Provisioning Profile" 檔案來手動匯入到 Mac 機器或是要串 CI/CD 時的平台或工具中,在這邊 不 下載。
直接透過 Mac 上使用 Xcode 來匯入 "Provisioning Profile" 即可。
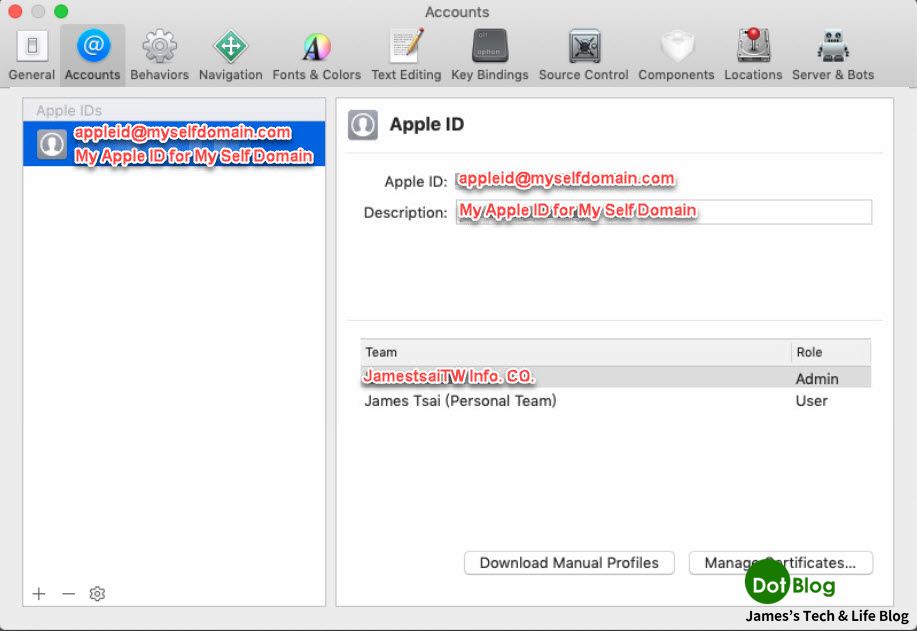
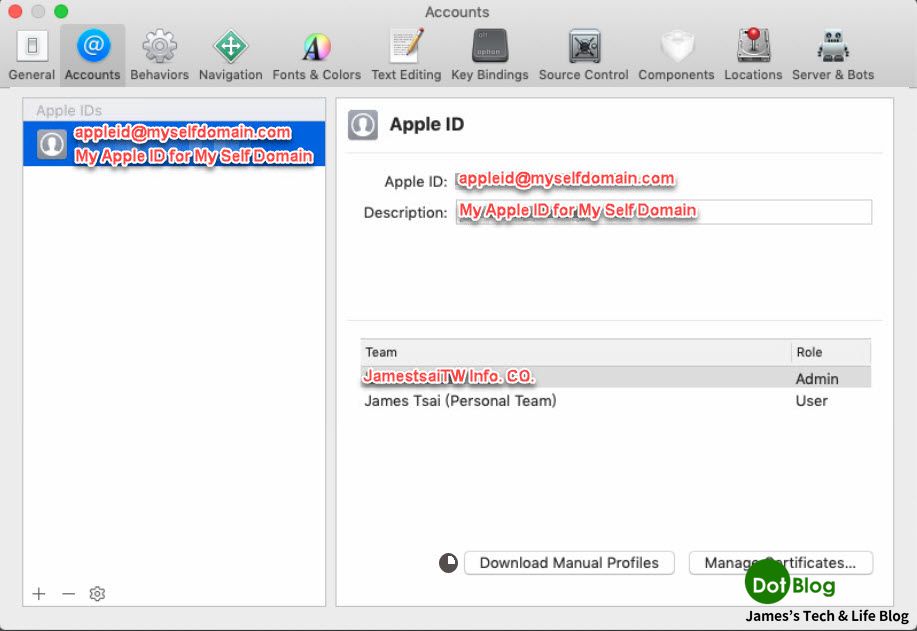
在 Xcode 的 "Preferences" -> "Accounts" 當中,點選 "Download Manual Profiles",就會自動把這個 "Apple ID" 帳號可用的 "Profiles" 下載並匯入此 Mac 機器中。
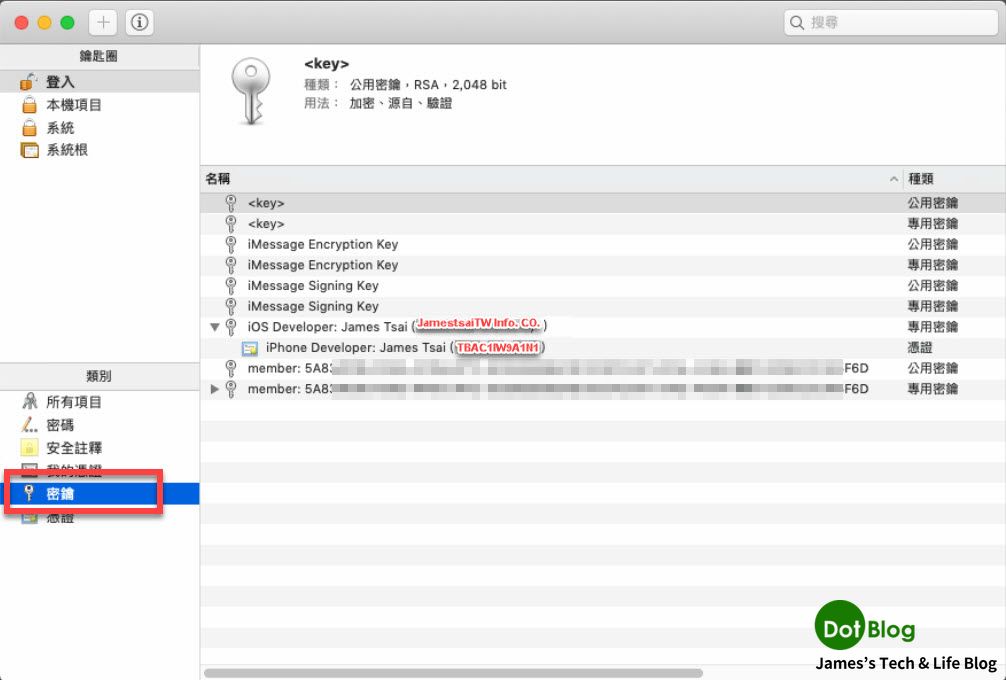
另外,若有興趣的捧友,可在 macOS 的 "鑰匙圈" 當中,可以在 "我的憑證" 看到這張由 Apple 發出的 "iPhone Developer 憑證"。

點選 "密鑰" 就會看到這張 iOS Developer 憑證的專用密鑰與其所簽發的 iPhone Developer 憑證。
好的,以上開發 iOS App 要部屬到 iOS 測試裝置的過四關終於結束!
恭喜各位,謝謝收看,咱們 "下回" 見~~~
PS: 截圖當中若有出現紅色白邊的字都會是隨意假設的文字,請捧友以自己的設定為準。
I'm a Microsoft MVP - Developer Technologies (From 2015 ~).
I focus on the following topics: Xamarin Technology, Azure, Mobile DevOps, and Microsoft EM+S.
If you want to know more about them, welcome to my website:
https://jamestsai.tw
本部落格文章之圖片相關後製處理皆透過 Techsmith 公司 所贊助其授權使用之 "Snagit" 與 "Snagit Editor" 軟體製作。